How to Set Up and Configure the ServiceNow Connector
All BA Insight connectors can be downloaded from Right Answers under Knowledge > BA Insight > Product Downloads > Connectors.
This connector is installed using the installation wizard, as outlined in Connectivity Hub documentation.
Satisfy the Prerequisites for your connector before installing.
Configuration specifics are detailed below.
Connection Configuration Specifics
- Connect to the web service.
- Go to the Connection page and select the General Settings tab:
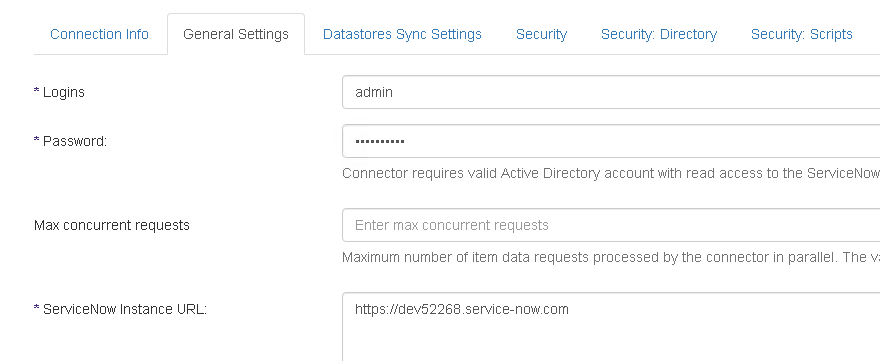
- Fill in the following:
- Login: Specify the name of the crawling account with the necessary rights (see ServiceNow Connector Prerequisites).
- Password (required): Enter the account password.
- ServiceNow Instance URL (connection parameters): Enter the link of the ServiceNow instance that is indicated in the placeholder found in this field.
- Save the connection.
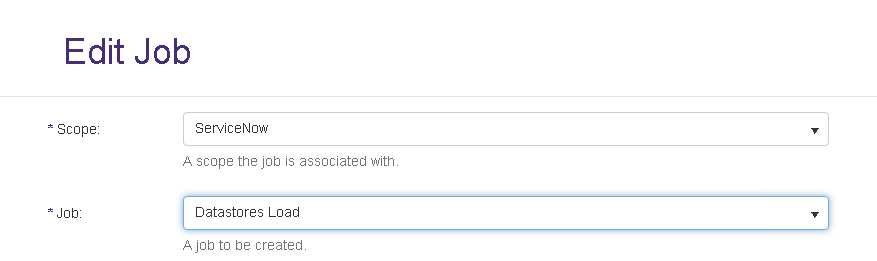
- Run the Datastore Load task to load the available datastores.
-
Select the Datastores.
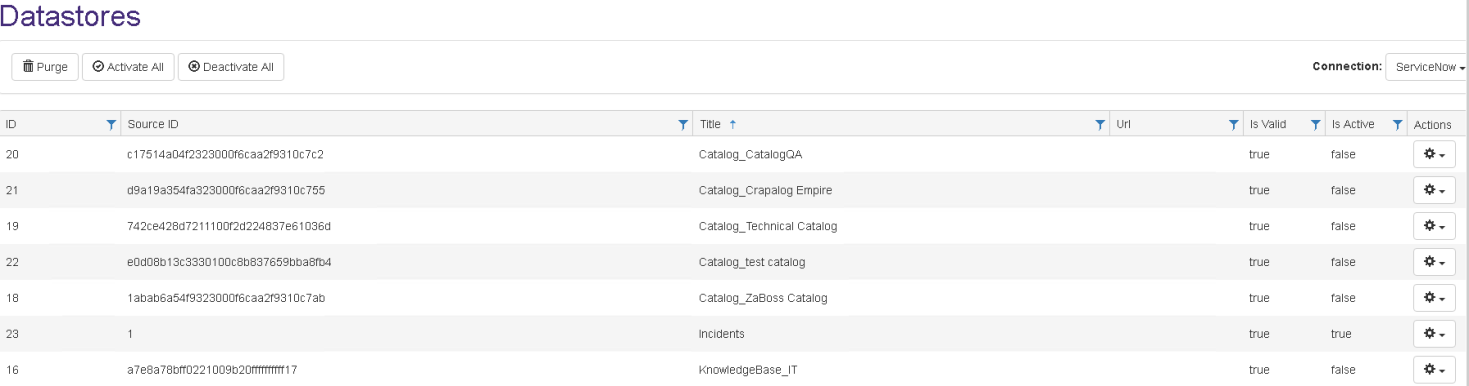
Only the selected datastores are crawled and indexed in SharePoint.
- (Optional) If indexing catalog items you can filter them by Catalog Category.
Usage and format are specified in the Content Filters tab.
Content Configuration Specifics
- Go to Tasks > Mailbox/Datastore.
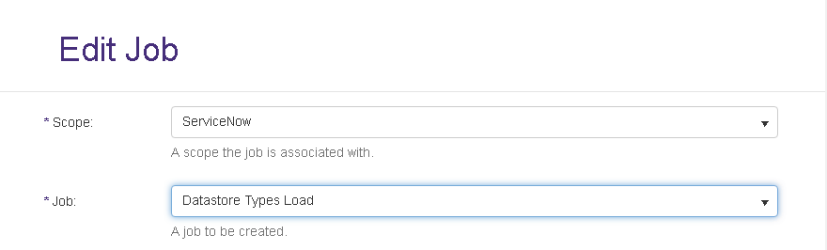
- Run a DataStore Types Load job.
After the job is successfully completed, you can create content for this connection. -
The ServiceNow connector uses native security.
-
Use the drop-down menu to change the Security Targetto escbasebadocacl (see similar Connectors that use native security).
Note: In the Content Info page, use the drop-down menu to change the Max Paging Sizeto 10000 or lower.
-
Extracting HTML Text and Metadata from Documents
You can extract HTML text and metadata from your source system.
See How to Extract HTML Text and Metadata from Documents.
Extracted information includes:
- Available text and metadata which can be mapped to metadata properties.
- HTML metadata tags from HTML pages.
- Available HTML tags and links for use as metadata from HTML documents
Configure Security
- Run a Security Sync job.
- Since native security is in place, run a full crawl after the first security sync operation.
- Run another security sync operation to make sure that all the levels are working.
Since there are more than one type of groups, a prefix is added to the group IDs.
This prefix identifies the group types:
- g_ for groups
- r_ for roles
- c_ for companies, and so on.
The security model:
- First level: (level 0 – escbase_badocacl property)
- Mapped to the security found on Knowledge Article in ServiceNow.
- This security consists of User Criteria groups (these groups have a uc_ prefix) that contain all the users with access to the specified knowledge article.
- Second level: (level 1)
- The security of the item.
- This level consists of groups that represent the roles that have access to this item.
- These groups have an r_ prefix.
- Third level: (level 2)
- Mapped to the security found on Knowledge Bases in ServiceNow.
- This security consists of User Criteria groups (these groups have a uc_ prefix) that contain all the users with access to the specified knowledge base.
This is a multilevel security model; if one or two levels are missing, the security will adjust to reflect snow security.
Note: Note: If you set the glide.knowman.block_access_with_no_user_criteria system property to false you need to map the "PublicAccess" group to an AD group that will be granted access to ServiceNow items.
This is necessary because setting that property to false gives everyone access to a Knowledge Base when either Can Read or Can Contribute user criteria list for the knowledge base isn't specified; so a group that contains "everyone" is required in order to handle this situation.
How to Set Paging Size
See How to Configure the ServiceNow Connector Using Web.config.