How to Modify Your SmartHub Page Banner or "Ribbon"
About the Ribbon Component
At the top of every SmartHub web page is a banner or heading bar that is referred to as the "Ribbon."
The Ribbon is shown below.

- The Ribbon is a SmartHub component that is located in the modules directory: <SmartHubInstallation>/modules/Ribbon
- The Ribbon component is active (at the top) on both your Landing (Index.html) and Results (Results.html) pages.
- The Ribbon component is used by other SmartHub components such as User Preferences.
- You can customize the Ribbon component as you would any SmartHub component, by copying its settings into your page's (Index or Results) custom settings file and modifying from there.
- The Ribbon component contains invisible elements which can be made visible and/or modified:
- Logo Image
- Back button
- The Ribbon component is formatted with CSS code.
- Changing the CSS code changes the appearance of the ribbon. This is described below.
Ribbon Settings
DefaultModuleSettings.js
The Ribbon settings file, shown below, can be found at <SmartHub_install_root>/modules/SmartHubResourceLoader/DefaultModuleSettings.js, around line 731.
- To modify Ribbon settings, copy the code you want to modify from this file and paste it into your custom settings file (typically, either ResultsCopyCustomSettings.js or ResultsCopyCustomSettings.js). Note: You may have renamed these files.
- For information about how to create and use a custom settings file, see How to Customize Your SmartHub User Interface.

Ribbon.js
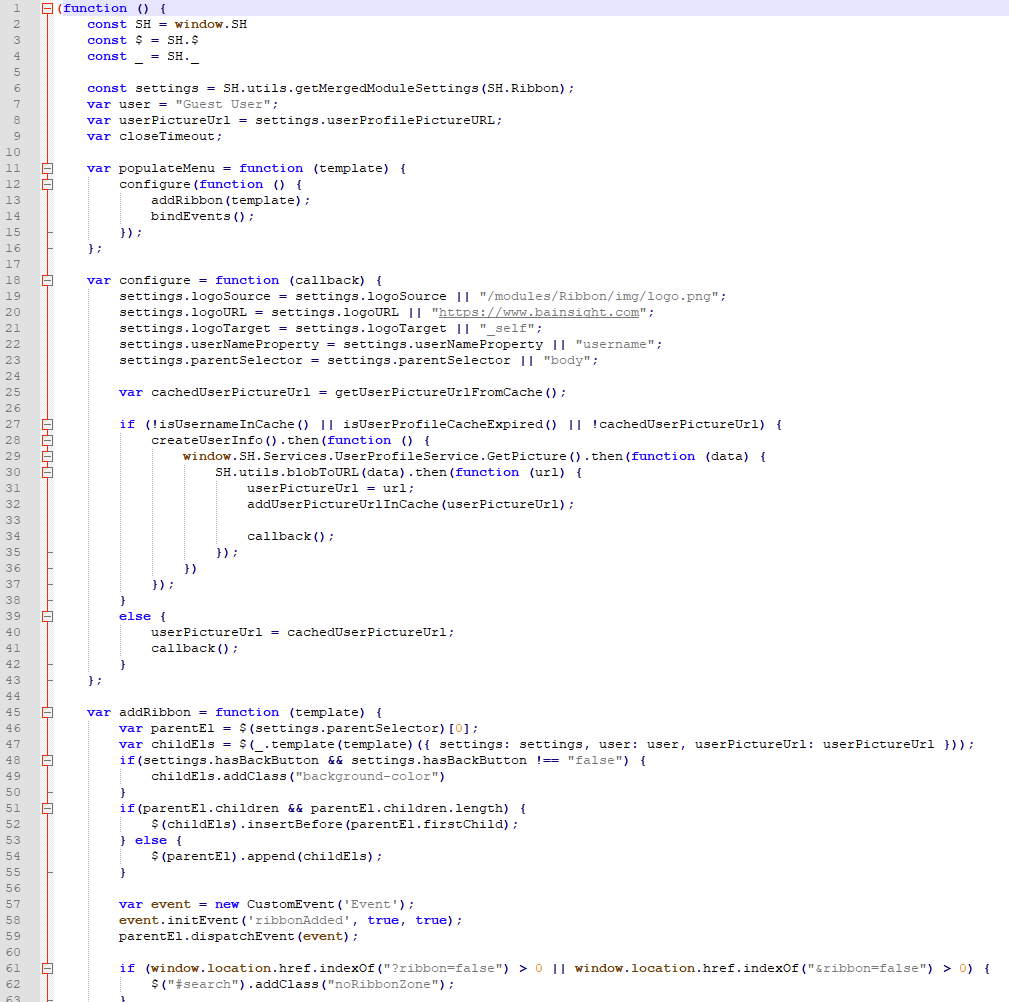
Settings such as your graphic logo source (settings.logoSource) and your graphic logo URL (settings.logoURL) are found in the the ribbon.js setting file found at /modules/Ribbon/ribbon.js.
See the graphic below.
CSS Files
- The appearance of the Ribbon component is controlled by its CSS file located at \modules\Ribbon\css, and shown in the graphic below.
- To modify the appearance of your Ribbon component within SmartHub, copy the appropriate settings from this CSS file into your custom CSS file.
- Note that the User Preferences module has settings within this CSS file (shown on right) that also affect its appearance.
- To modify the appearance of your User Preferences within SmartHub, copy the appropriate settings from this CSS file into your custom CSS file.
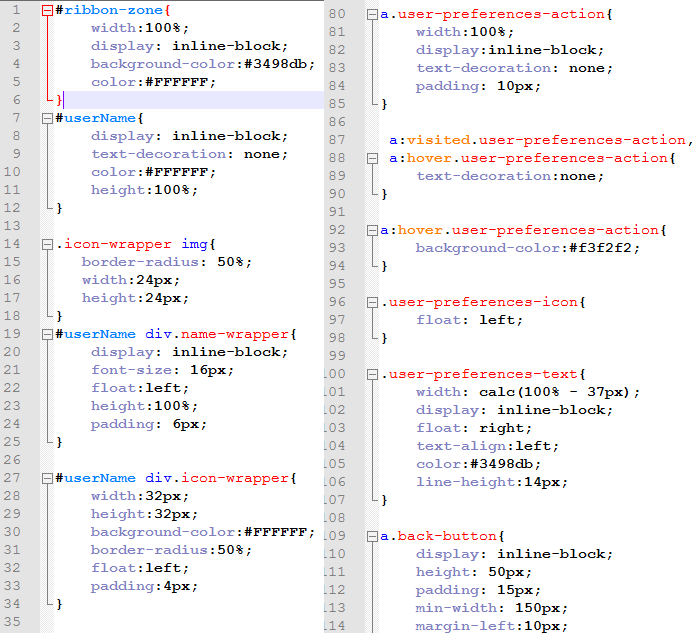
Image Files
Image files used by the Ribbon components are stored in the folder: \modules\Ribbon\img
Ribbon Component Parameters
| Parameter | Default Setting | Description |
|---|---|---|
|
|
RibbonTemplate.html | Ribbon template HTML file. Do not modify. |
'hasBackButton'
|
false |
|
'hasLogo'
|
false | Setting controls whether the logo at the far left of the ribbon is displayed. |
'logoSource':'/modules/Ribbon/img/logo.png',
|
logo.png | Default logo image. BA Insight. BA Insight recommends you change this to whatever image you desire. |
'logoURL'
|
<empty> | URL of logo. When clicked, opens the URL address in the current, active browser. |
'logoTarget'
|
<empty> | Specifies the window or a frame where the linked document is loaded. Attribute unsupported in HTML5. |
How to Customize Ribbon Appearance
Add Ribbon Settings to Your Custom Index Settings file
The Ribbon component is enabled by default.
To change the appearance of the ribbon, use the following instructions:
- Make a copy of the settings file \modules\Ribbon\Ribbon.js
- Rename the copy of the file.
- Modify the settings in the file as you see fit.
- Open your custom results or index HTML file.
- Locate the path to the Ribbon.js file.
- In IndexCopyCustomSettings.js the path is located around line 195. See the graphic below.

- In IndexCopyCustomSettings.js the path is located around line 195. See the graphic below.
- Change the path to that of your new custom file.
- For example: \modules\Ribbon\MyRibbon.js
- Save and close your custom settings file.
How to Customize Your Ribbon's Appearance Using CSS
Example: Change Ribbon Color
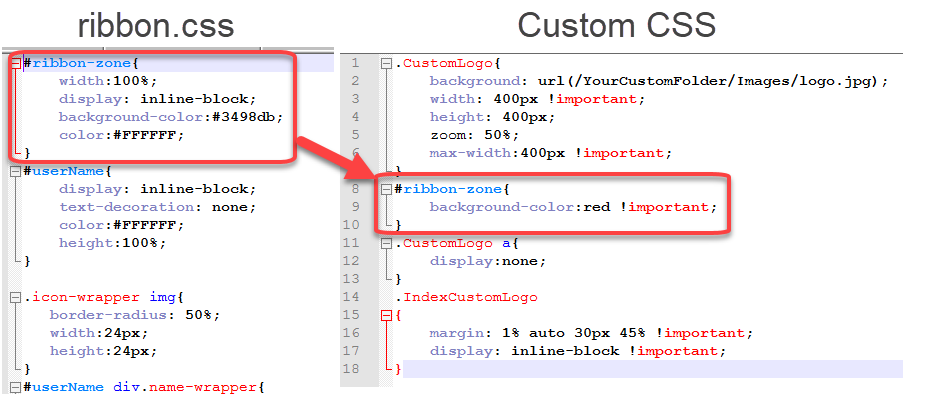
- In the following graphic, the Ribbon module CSS file is shown on the left.
- A custom CSS file has been created and placed in a directory that contains all custom files (.js settings files, CSS files, custom Results HTML file, etc.).
- The path to the custom CSS file is <SmartHub root>\<YourCustomFolder>\CSS\YourCustomCSS.css.
- The
#ribbon-zonesetting is copied from the Ribbon component CSS file to the custom CSS file, where you modify it to suit your needs. -
Be sure to save your custom CSS file before reloading your changed file (Index.html, Results.html or your custom Results HTML file).
In the example below, only the background-color element is copied into the custom CSS file and modified.
Example: Show Logo in Ribbon
- The Ribbon component settings are in both your Index.html and Results.html files by default. To activate the settings, you merely have to uncomment the code lines.
- The Ribbon contains a logo that is invisible by default. That is, the default setting is '
false'. - Changing the '
hasLogo' setting to 'true' reveals the default logo on the Ribbon, which is stored at SmartHub root/modules/Ribbon/img/logo.png.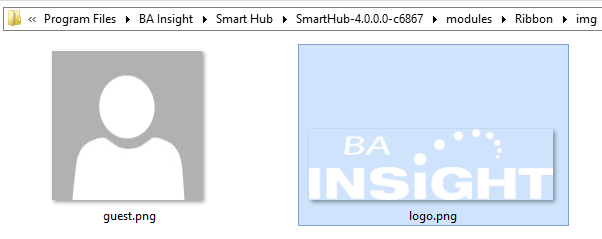
- To customize your ribbon, open your Custom Results, Index settings file, or both. (To change the Ribbon on both your Landing and Results page, you must modify both your Index and Results (or CustomResults) HTML files).
- Find the
SH.Ribbon.CustomSettingsline. - Uncomment the settings shown to make them active.
- Modify the
'hasLogo'setting to'true'.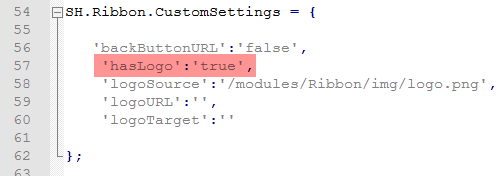
- The default logo appears. See Ribbon (with modified color) below:

Example: Change the Username Property
The ribbon component shows your user by defaulting to the username property - userNameProperty - (if you are using a user profile provider) or cached user from auth context.
To customize your ribbon use the following steps:
- Open your Custom Results, Index settings file, or both. (To change the Ribbon on both your Landing and Results page, you must modify both your Index and Results (or CustomResults) HTML files).
- Find the
SH.Ribbon.CustomSettingsline. - Uncomment the settings shown to make them active.
- Modify the
'userNameProperty'setting to whatever property you desire.
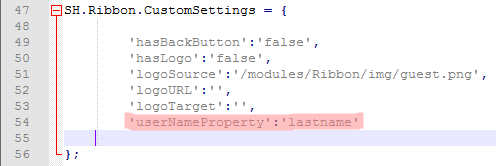
If you have a user profile provider configured, you can see in console all properties returned with the following command: localStorage["SH.UserProfileService.Cache"]
Edit the User Preferences Page
- Click the "SharePoint Service" link at the top right to access the User Preferences menu.

- See the layout.

The JavaScript file (.js) that loads the Ribbon module must have the valueid=“ribbon”.
<script id=”ribbon” data-back-button=”true” src =”../Ribbon/ribbon.js” data-disable-settings=”true”> </script>
- Use the following options to modify your user preferences:
-
- Disable the settings menu: If you desire, set the
dat-disable-settingstotrue. - Disable the settings menu: If you desire, set the
dat-disable-settingstotrue. - Edit the User Preferences Page: If you desire, edit the UserPreferences.html file located in the folder <SmartHubInstallation>\modules\UserPreferences.
- Change how the values are displayed in the Confirmation popup: If you desire, override the
showValuefunction.- The default implementation of the function can be found in <SmartHubInstallation>\modules\UserPreferences\js\office.js:
$(‘#profileWizard’).profileWizard({showValue: myRenderingFunction});
- The default implementation of the function can be found in <SmartHubInstallation>\modules\UserPreferences\js\office.js:
- Change the last step of the wizard: Set a new value for the
lastStep. - Specify the preference wizard initialization:
$(‘#profileWizard’).profileWizard(); -
The preferences are saved by default in the UserPreferences directory.
-
In order to change the directory where the preferences are saved, modify the value for
UserProfilePreferencesfrom the web.config file.
-
- Disable the settings menu: If you desire, set the