How Users Can Personalize Their Search Results
About
SmartHub Personalization is designed to enable your users to customize their search results.
-
Users can customize their search results on either the SmartHub "Landing" or "Results" HTML page by selecting filtering options.
-
The topics below detail how to set and employ these filtering options:
Limitations
-
Some SmartHub Features are unsupported by some backends.
-
For information about limitations to your backend The search engine your SmartHub instance uses to perform queries. SmartHub can be configured to use more than one search engine., see the "Limitations" topic for your backend
How to Set Personalization on the Landing Page (Index.html)
On the landing page (Index.html) users access Personalization from the top right corner.
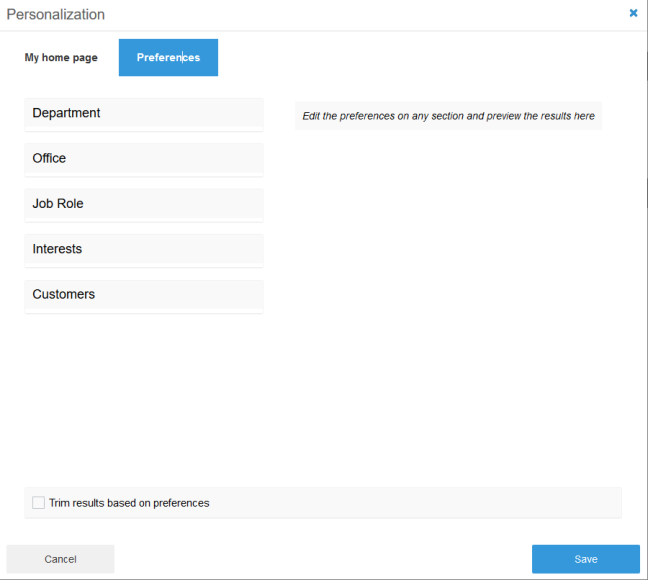
Personalization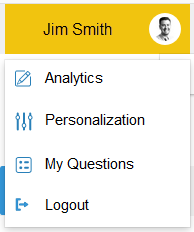
By selecting "Personalization" you see the following options:
- My home page
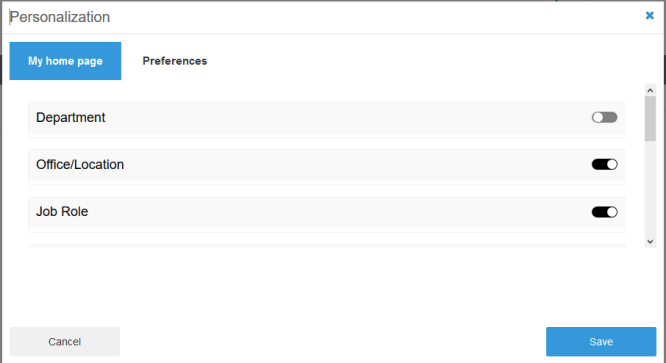
- Preferences
Personalization on the Results Page (Results.html)
If you access Personalization from the Results page you see the following options:
- Edit preferences
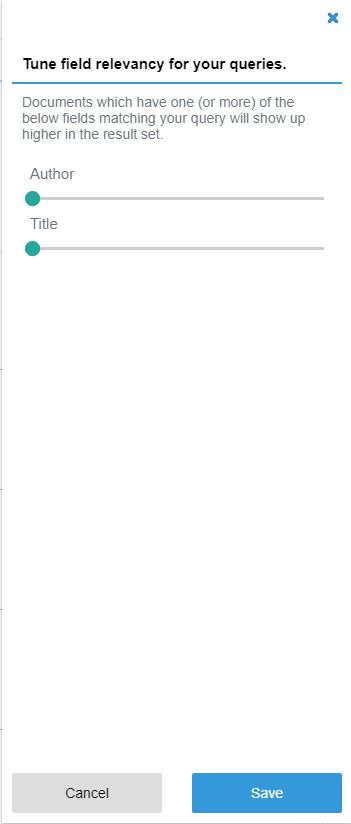
- Tune relevancy
How Users Access and Specify Personalization Filters
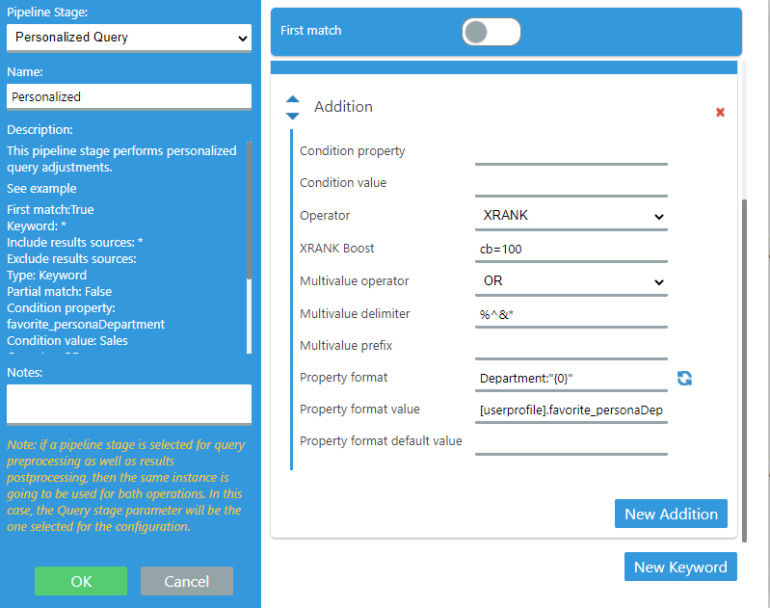
To activate Personalization, a personalized pipeline stage must be configured.
-
The pipeline stage Pipeline stages offer uniformity to the end user. Various functions include mapping names and values to match local refinements. is called "Personalized Query."
-
More information about Personalized stage can be found here: How to Personalize User Queries
Example:
Use the following procedure to access and specify Personalization filters.
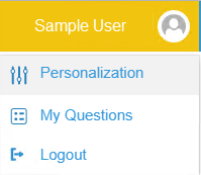
- In the top right, go to <user name>→ User Menu → Personalization.

- A pop-up appears displaying customization options.
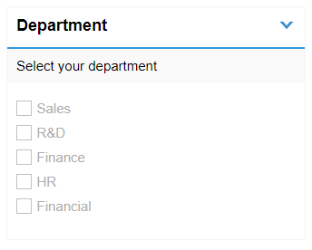
- Select the Departments, Regions, Job Roles, Interests, or Projects you want relevancy tuning applied to.
- Once your selections are made, the effect on search results is immediately shown on the right side.
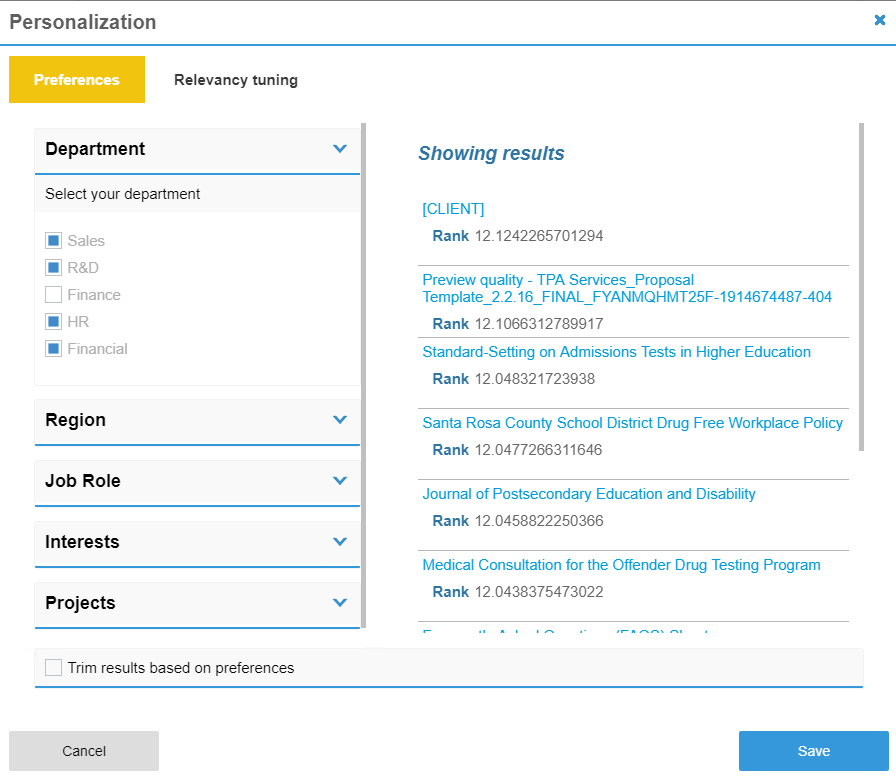
Options: Click to display a live preview of these search results on the Results page.
Cancel: Click to reset the values to the previously saved values.
- The Personalization pop-up appears if you click the Results not what you expected link under the search field at the top of the page.
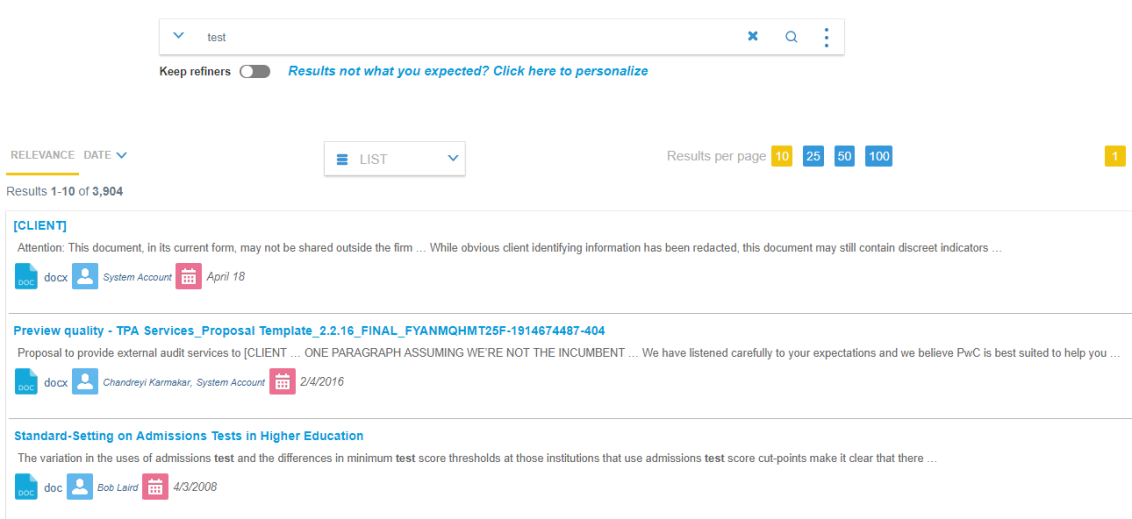
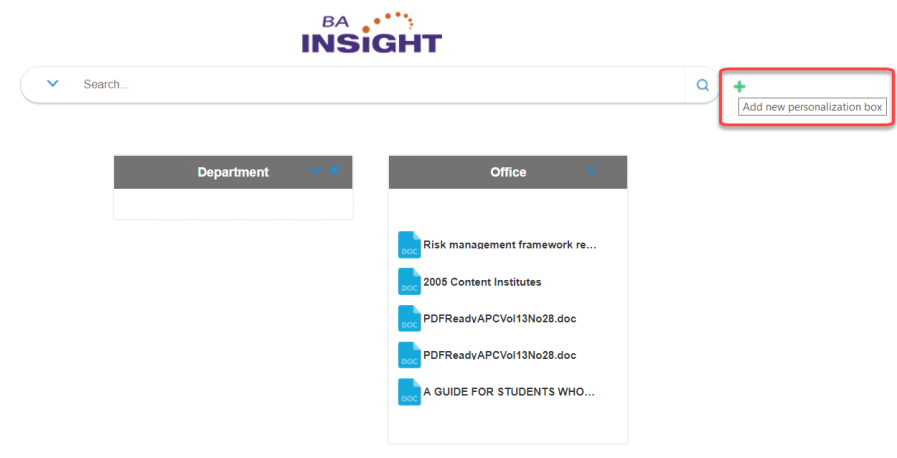
- On the landing page, the Personalization pop-up can be called by clicking the '+' (Add new personalization box) button, found next to the search field.
How to Configure Personalization for Your Organization
- SmartHub Personalization components are only visible if the Ribbon component is set up on the page.
-
The Personalization configuration is located in a file stored in the modules directory at: \modules\SmartHubResourceLoader\DefaultModuleSettings.js.
- The settings are stored under
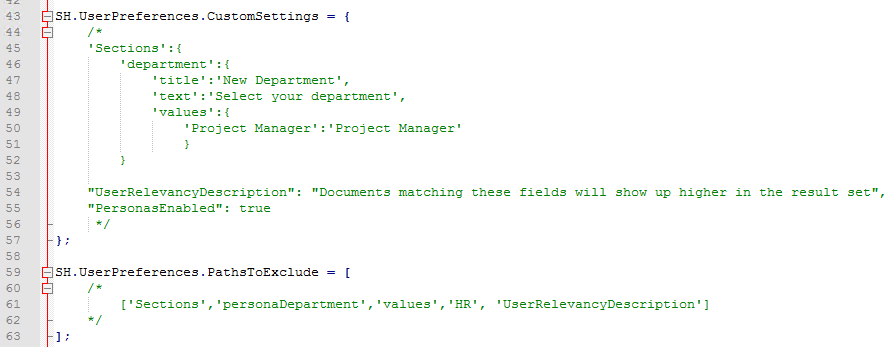
SH.UserPreferences.CustomSettingsaround line 43.
Use the original configuration file only as an example. Do NOT modify the file.
The file is overwritten when SmartHub is upgraded.
Use the following steps to configure the Personalization component.
- All changes must be done via a custom settings file created for the page.
For information about creating and using custom settings files, see How to Customize Your SmartHub User Interface. - Once your page's custom settings file is created, insert your customized Personalization code into the appropriate section in your settings file.
- For example, around line 43 in your ResultsCopyCustomSettings.js file is the User Preferences section where you put your Personalization code.
- Use the parameters in the table below to customize the code in this section.
Personalization Sections Settings
| Setting | Default Value | Description | User Interface |
|---|---|---|---|
| Separator | %^&* | Use this separator between values from the same category. |
|
| ServiceURL | /Services/UserProfileService.svc/ | The UserProfileService location. |
|
| UserPreferencesTemplate | /modules/Personalization/UserPreferencesTemplate.html | The location for the template used to render the User Preferences menu |
|
| Sections |
|
The data used to populate the user preferences template.
The Sections part of the configuration file contains the data that is rendered in the Preferences pop-up. It can contain as many "SectionID" as needed. Each SectionID has the following options (see the graphic right of this column):
|
|
|
PreviewResultsTemplate |
"/modules/Personalization/PreviewResultsTemplate.html" |
|
|
|
NoResultsPreviewMessage |
"Edit the preferences on any section and preview the results here" |
|
Personalization Pop-up
You can modify the Personalization pop-up from the underlying SmartHub code.
All Available Tabs
If you want to show the Personalization pop-up with all available tabs, use the following code block:
SH.Personalization.Show()
Preferences Tab Only
If you want to display only the Preferences tab, call the Preferences tab as specified here:
 var prefTabDetails = {}
 prefTabDetails.id = 'changePreferences';
 prefTabDetails.label = 'Preferences';
 prefTabDetails.jsCode = 'DisplayEditPreferences';

 SH.Personalization.Show([prefTabDetails]);
Personalization Pop-up Settings
| Setting | Default Value | Description |
|---|---|---|
|
PersonalizationTemplate |
"/modules/Personalization/PersonalizationTemplate.html" |
Personalization template |
|
PersonalizationTabsDefinitions |
Example
Copy
|
|
|
ResultsPagePersonalizationTabs |
['EditPreferences','ChangeRelevancy'] |
|
|
LandingPagePersonalizationTabs |
['EditPage','EditPreferences'] |
|
|
EnablePersonalizeLink |
true |
|
|
PersonalizeLinkContainerSelector |
".CoveoSearchbox" |
|
|
PersonalizeLinkText |
"Results not what you expected? Click here to personalize", |
|
Note: If you need to disable the "My home page" tab and hide it on your landing page, copy the PersonalizationTabsDefinitions setting (see the table above into your custom Results settings file and set 'enabled' to false for this tab.
{
 'EditPage':{'id': 'editDashboard',
          'label': 'My home page',
          'jsCode': 'DisplayEditHomePage',
          'enabled':false},
 'EditPreferences':{'id': 'changePreferences',
          'label': 'Preferences',
          'jsCode': 'DisplayEditPreferences',
          'enabled':true},
 'ChangeRelevancy':{'id': 'changeResultsOrder',
          'label': 'Relevancy tuning',
          'jsCode':'DisplayChangeRelevancy',
          'enabled':true}
}
About Personas
Personas are identities that are assigned to individual users or a group of users.
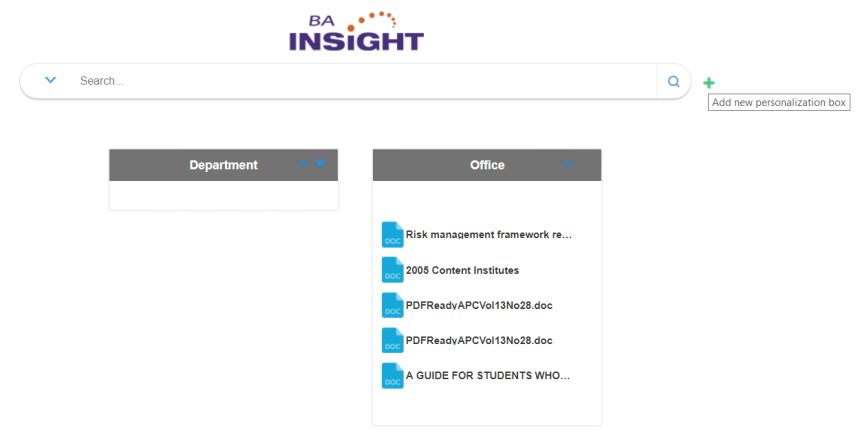
- An administrator can decide which Content-by-Search boxes (see the graphic below) each Persona may view.
- Individual users have the ability to choose which content is hidden and which is displayed.
- A condition attribute added on the Content-by-Search evaluates if the component should be displayed or not.
- The module displays all the Content-by-Searches on the page where the condition attribute returns
true.

If Content-by-Search (CBS) components are not updated with the condition attribute, all CBS components are displayed in the Edit page
- To get to "My home page," access Personalization from the ribbon.
- Navigate to user preferences view under <your user name>>User Menu>Personalization.
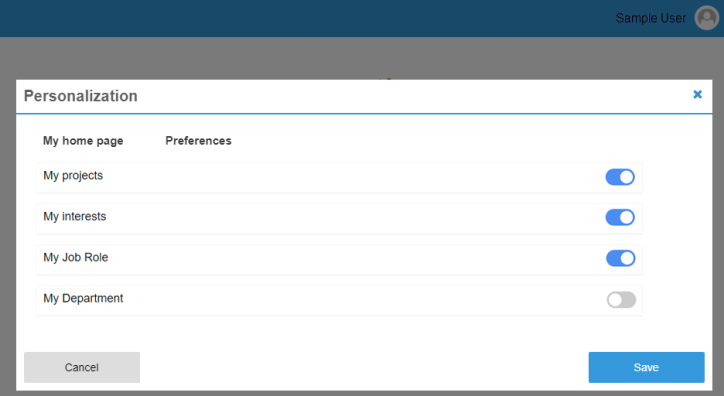
- A pop-up appears that displays customization options.
- Enable/Disable: Click to display a live preview of these boxes on the result page.
- Cancel: Click to reset the values to the previously saved values.
- Save: The option is saved in the preferences and applied when each page is loaded. The option is saved per page.
- On the landing page, the Personalization pop-up can be called by clicking on the "Add new personalization box" button, found next to the Search box.
How to Configure Personas for Your Organization
The parameters in DefaultModuleSettings.js file is used to configure the Personalization component.
- The file can be found in the directory \modules\SmartHubResourceLoader\DefaultModuleSettings.js.
- The settings file must be used only for source and it should not be modified because it is overwritten at upgrade time.
- All the changes to the settings should be done via the custom settings file created for the page (such as CustomResultsSettings.js).
- For more information, see How to Customize Your SmartHub User Interface.
To modify Personalization, open the Personalization settings file, and do the following:
- Copy the code from the DefaultModuleSettings.js file, by default around line 502.
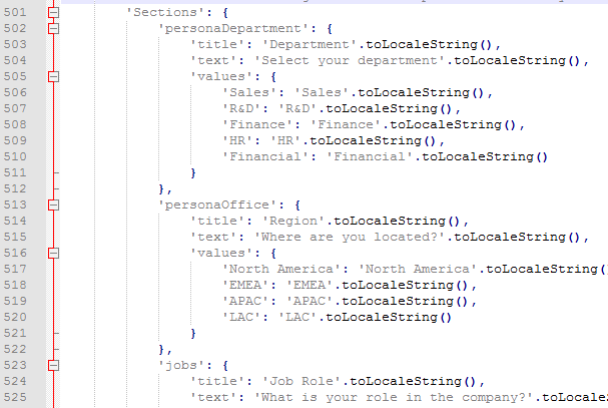
- Paste the code into your page's custom settings file (such as "CustomResultsSettings.js") in the appropriate "User Preferences" section, such as
SH.UserPreferences.CustomSettingsin the graphic below.
Note!! If you migrated custom settings files from a prior version of SmartHub, you must add the Personalization settings code if it is not yet in your custom settings file(s).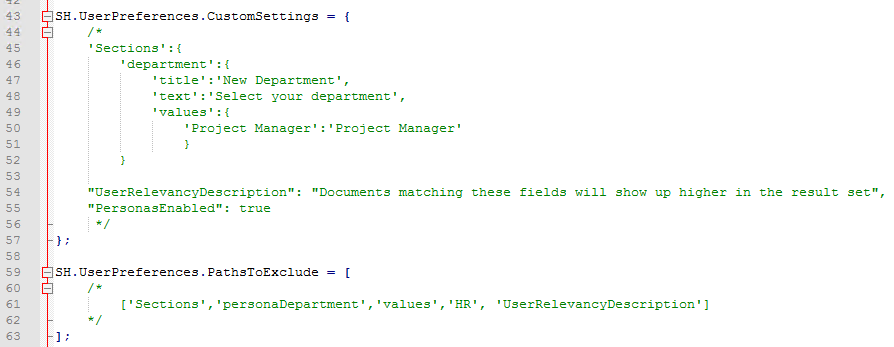
- Modify the code as you see fit.
- Refer to the settings parameters below.
- Refer to the settings parameters below.
- For more information, see How to Customize Your SmartHub User Interface.
Settings Example
The PersonasEnabled parameter stored in the provided custom Results and Index settings templates by default. See line 55 in the graphic, above.
Other parameters are found in the file \modules\SmartHubResourceLoader\DefaultModuleSettings.js, around line 574.
Settings Parameters
|
Setting Name |
Default Value |
Description |
|---|---|---|
| EnablePersonas | false |
|
| PersonasTitle | "Edit Page" | Title displayed in Edit page |
| PersonasDescription | Select the Content Boxes that you want to see | Description of Granting Specific Users Search Content: Personas feature |
| PersonasTemplate | "/modules/Personalization/PersonasTemplate.html" |
|
|
DeleteBoxWarnMessage |
Do you want to remove this panel from your home page? |
Alert message which appears when you want to delete a personalization box |
|
AddPersonalizationPanelContainerSelector |
".coveo-search-section" |
|
|
EnableAddPersonalizationPanelButton |
true |
|
|
AddPersonalizationPanelButtonTooltip |
"Add new personalization box" |
|
How to Add Your Content-by-Search Components
- The Content-by-Search components must have their own unique ID so that they can be configured independent of each other.
-
The condition attribute is configured using the format:
user.property == 'property value'For example:
user.department == 'Sales'
Note: The property and property value are case sensitive.
How to Enable Users to Collapse or Expand Boxes
If you want to enable your users to collapse or expand the CBS boxes, you must add multiples classes to your Content-By-Search component.
Box Expand/Collapse Example
The following See the graphic below.
- data-collapse-target: This value must be the same as the ID from the class sh-collapse.
- data-collapse-parent: This value must be the same as the ID from the class CoveoContentBySearch.


How to Exclude Out-of-the-Box Section Values from User Preferences
If you want to display your own sections under Preferences, and exclude the ones provided out-of-the box via the DefaultModuleSettings.js file, use the SH.UserPreferences.PathsToExclude object in your custom settings file to exclude them.
-
The
SH.UserPreferences.PathsToExcludeobject is included in the default custom settings files in the root directory \CustomerCustomization\settings.
-
In the next example, a section called New Department is added.
-
It uses
PathsToExcludeto exclude the out-of-the-box sections.
SH.UserPreferences.CustomSettings = {
    'Sections': {
        'my_department': {
            'title': 'New Department',
            'text': 'Select your department',
            'values': {
                'Project Manager': 'Project Manager'
            }
        }
    }

};

SH.UserPreferences.PathsToExclude = [

    ['Sections', 'department'],
    ['Sections', 'location'],
    ['Sections', 'jobs'],
    ['Sections', 'interests'],
    ['Sections', 'projects']

];
Relevancy Stage Order
Note: Be aware that relevancy stages order can impact the way documents are boosted.
The Default priority order is:
- User Relevancy
- Personalization
- Admin Relevancy
Relevancy Tuning
If you want to boost the relevance of properties (just until you refresh the page) in SmartHub, use the following procedure.
Customize the CustomSettingsTemplate.js file
Use the CustomSettingsTemplate.js file to make customizations which can be saved.
-
You will OVERRIDE the “title” booster that was built in.
Procedure:
- Navigate to the CustomSettingsTemplate.js file.
- The default location of this file is: <Installation directory>\modules\SmartHubResourceLoader\CustomSettingsTemplate.js
-
Add the following code as shown in the graphic:
SH.UserPreferences.CustomSettings = {
Properties: {
RelevancyTitle: "Title",
}
};
SH.UserPreferences.PathsToExclude = [
    ['Properties','title']
];
Map the New RelevancyTitle into the Property Mapper of SmartHub
- Navigate to SmartHub/_admin.
- Click on the Backend.
- Click on property mapper stages (update both query and results side property mapper stages).
- Add the line:
RelevancyTitle,ElasticDocumentTitle.keyword;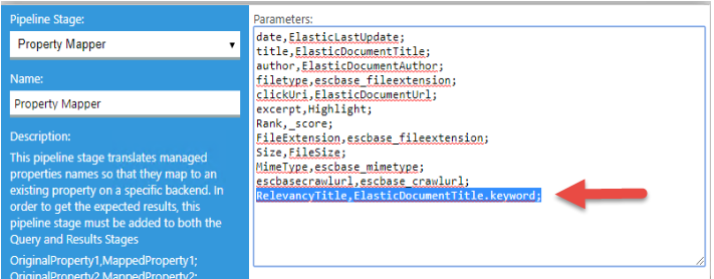
Navigate to the property mapper stages:
- Go to SmartHub/_admin
- Click on the Backend.
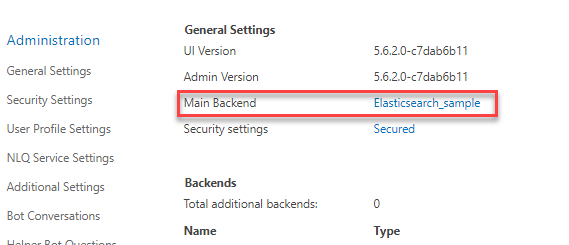
- The property mapper stages.

-
You can add more properties using this method.
-
You can add more by just adding to the customsettings.js file and the propertymapper.
User Relevancy Component Example
Note: Be aware that relevancy stages order can impact the way documents are boosted.
Default priority order:
1. User Relevancy
2. Personalization
3. Admin Relevancy
