Configure your Elasticsearch authentication type
Your Elasticsearch search engine can be configured with the following types of authentication:
-
None
-
Basic
-
Token Based
-
API Key
Refer to the following sections for in-depth information to configure your desired authentication type:
Configure Elasticsearch with basic authentication
Prerequisites
- You must have an account that has access to your Elastic service
Configure the search engine
When Connecting SmartHub to your Elasticsearch search engine, after selecting Basic from the Authentication Mode drop-down, do the following:
-
In the Account field, enter the account name for your Elastic service.
-
In the Password field, enter the password for your Elastic service account.
Configure Elasticsearch with token-based authentication
About token-based authentication
We exchange the user token that is currently valid for SmartHub with a token that is valid for the Azure app assigned to Elasticsearch.
Note! Token Based Authentication works only with Azure Active Directory authentication configured in SmartHub.
For more details about how to configure Azure Active Directory in SmartHub, go here.
Prerequisites
- SmartHub must be configured with Azure Active Directory
- An app must be registered in Azure for Elastic Authentication
Grant the app permissions
You must grant the SmartHub app registration permissions in order to consume the Elastic app.
For more details about this procedure, go here.
- Log in to your Azure portal as an administrator:http://portal.azure.com.
- Click Azure Active Directory → App registrations → App applications.
- Search for application used for SmartHub Authentication.
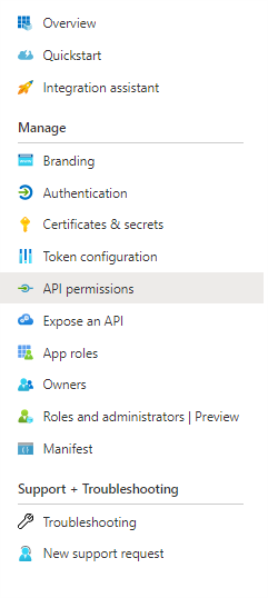
- Click the "API permissions" entry from the left side navigation menu.
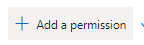
- Click Add a permission:
- Click "APIs my organization uses" and search for "Elastic App."
- Click "Add permissions."
- Now your app should be under "Configured permissions" from SmartHub Authentication app.

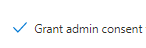
- Click Grant admin consent (the button near to the App a permission)
Elastic Backend Configuration
- Choose TokenBased from Authentication Mode drop-down menu.
- In the Azure Scope field, add the Azure Scope for your Elastic Authentication app
- To obtain Azure Scope from an Azure app, perform the following steps:
- Log in to your Azure portal as an administrator:http://portal.azure.com
- Select Azure Active Directory → App registrations → App applications
- Search for the application used for the Elastic Authentication app
- Select Expose an API → Add a scope
- Add a scope name → Choose who can consent → Add a consent display name → Set state on Enabled
- Click "Add scope."
- To obtain Azure Scope from an Azure app, perform the following steps:
Configure your Elasticsearch search engine to use API key for authentication
You can configure your Elasticsearch search engine to use an API key for authentication. To do so, you must complete the following:
Enable security in Elasticsearch
-
Open your elasticsearch.yml file in a text editor.
-
Set the xpack.security.enabled and xpack.security.authc.api_key.enabled parameters to true.
xpack.security.enabled: true
xpack.security.authc.api_key.enabled: true -
For single-node developer set-ups, add the following line to the file.
discovery.type: single-node -
Restart your Elastic server.
Set passwords for built-in users
After enabling security, you will be locked out from Elastic until you set passwords. For more information, see elasticsearch-setup-passwords in the Elastic documentation.
-
In the Elastic CLI, run the following one-time setup command:
./bin/elasticsearch-setup-passwords interactive -
When prompted, set the password for the elastic superuser and other users. Ensure that you note the password for later use in authentication.
If you have not explicitly also set the elastic username, the default username is elastic.
Generate an API Key
After setting your passwords, you can use the Elastic user credentials that you set previously to create an API key.
-
Using an API platform, such as Postman, make a post request to the following:
http://<elastic webserver address>/_security/api_key -
If you are using Postman, you can click the Authorization tab > Basic Auth > and add the username and password that you configured in Set passwords for built-in users. For more information, see API authentication and authorization in Postman in the Postman documentation.
-
Provide the request body for your request. The following example provides a super admin API key. You can adjust this request body to fit your needs. For more information, see Create an API key in the Elastic documentation.
{
                        "name": "admin-api-key",
                        "expiration": "365d",
                        "role_descriptors": {
                        "admin_role": {
                        "cluster": ["all"],
                        "index": [
                        {
                        "names": ["*"],  // Wildcard for all indices
                        "privileges": ["all"]
                        }
                        ]
                        }
                        }
} -
Verify that you are receiving your API key in the response. For example, the sample code above produces the following response:
{
                        "id": "-YgrFZYB6OjK-FcX6Tan",
                        "name": "admin-api-key",
                        "expiration": 1775647921575,
                        "api_key": "rqtDE3W6RwqPFYybuSUb-w",
                        "encoded": "LVlnckZaWUI2T2pLLUZjWDZUYW46cnF0REUzVzZSd3FQRll5YnVTVWItdw=="
                    }
Configure the API Key in SmartHub
After creating your API key, you can configure SmartHub to use it for your Elasticsearch Search Engine and storage settings configurations:
-
In your Elasticsearch Search Engine configuration, select ApiKey from the Authentication Mode drop-down list.
-
In the API Key field, enter your API key in the following format: id:api_key. For example, using the sample response above, the value of this field is -YgrFZYB6OjK-FcX6Tan:rqtDE3W6RwqPFYybuSUb-w.
-
In your storage settings configuration, select ApiKey from the Elastic Authentication drop-down list.
-
In the API Key field, enter your API key in the following format: id:api_key. For example, using the sample response above, the value of this field is -YgrFZYB6OjK-FcX6Tan:rqtDE3W6RwqPFYybuSUb-w.