Add and Manage Calendars
Calendars are used for identifying Working and Non-Working Days which can be applied to a schedule within a project. This section of the Organization view is where the “hours per day” and all non-working days are configured – this is referred to as the Organizational Calendar. The Organizational Calendar is utilized on Projects and Project Templates, and it is referenced on the Schedule within a project.
Note: This page explains how to add and manage Calendars from the Administration page. For information on adding and managing Calendars for specific Work Plans, click here.
This page covers the following topics:
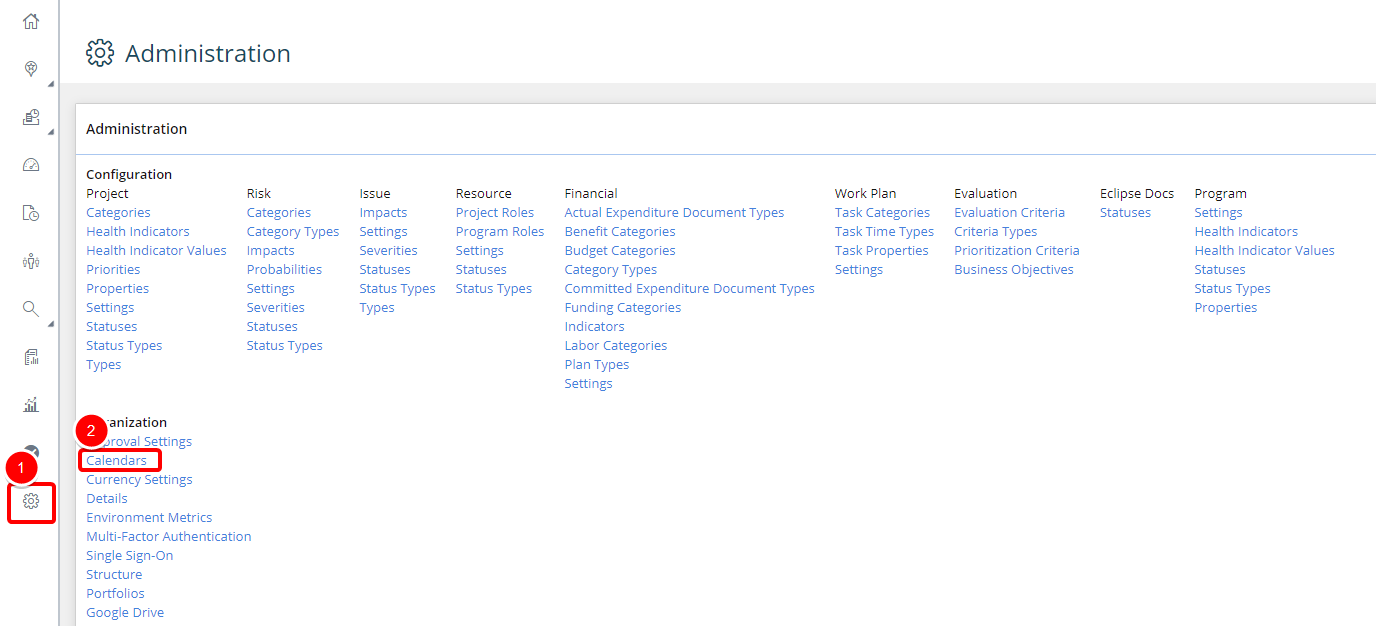
- Select the Administration icon
 from the Icon bar.
 -
Select Calendars from the "Organization" list:
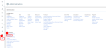
Click image to enlarge.
-
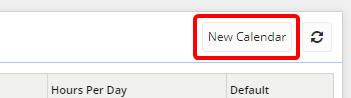
Click the New Calendar button:
-
Enter the "General" information for your new Calendar:
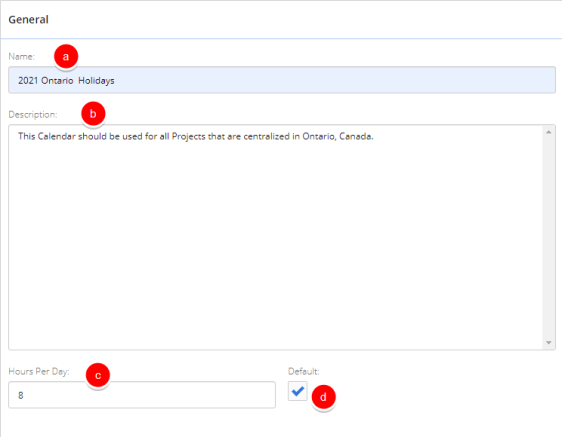
a. Name: Enter a name for your Calendar.
b. Description: Enter a brief description for your Calendar.
c. Hours Per Day: Enter how many hours a working day consists of.
d. Default: Select this checkbox if you would like this Calendar to be the default Calendar.
Note: Selecting this checkbox means that your new Calendar will replace the current default Calendar.
-
Enter the "Exceptions" for your new Calendar:
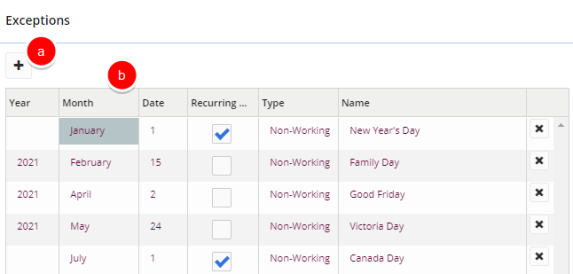
a. Add Exception: Clicking the "Plus" button
 will add a new Exception to the table.
b. Exception Table: Once Exceptions are added, they can be edited by clicking directly on their values within the table.
Note: If the "Recurring" checkbox is selected, the "Year" will not be editable. "Recurring" means that the Exception takes place on the same date every year.
-
Click the Save button.
After clicking Save, your new Calendar will be listed amongst other Organizational Calendars.
- Select the Administration icon from the Icon bar.
-
Select Calendars from the "Organization" list:
Click to enlarge.
Note: This will open up the "Calendars" page.
-
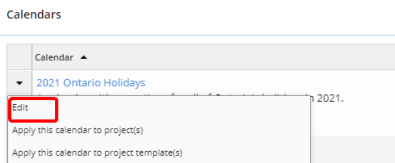
Click the drop-down arrow
 of the Calendar you would like to edit.
 -
Select Edit from the drop-down menu:
-
Edit any of the "General" information:

a. Name: Enter a name for your Calendar.
b. Description: Enter a brief description for your Calendar.
c. Hours Per Day: Enter how many hours a working day consists of.
d. Default: Select this checkbox if you would like this Calendar to be the default Calendar.
Note: Selecting this checkbox means that your new Calendar will replace the current default Calendar.
-
Edit the "Exceptions":

a. Add Exception: Clicking the "Plus" button
will add a new Exception to the table.b. Exception Table: Once Exceptions are added, they can be edited by clicking directly on their values within the table.
Note: If the "Recurring" checkbox is selected, the "Year" will not be editable. "Recurring" means that the Exception takes place on the same date every year.
-
Click the Save button.
After clicking Save, your changes to the Calendar will be final.
Applying Calendars to Projects
Eclipse PPM administrators can apply Calendar characteristics to multiple Project Work Plans at a time from the Calendars page. This prevents Project Managers from having to manually adjust the "Non-working" days of multiple Projects at a time, especially at the beginning of the year when the dates of "Non-working" days change.
Note: Eclipse PPM users will require "Modify" Project Schedule permissions to apply a calendar to Projects.
Note: A calendar can only be applied to Project Work Plans that can be checked out. Also, the Work Plan cannot be set to "Auto-Sync."
To apply Calendars to Projects:
- Select the Administration icon from the Icon bar.
-
Select Calendars from the "Organization" list:
Click to enlarge.
Note: This will open up the "Calendars" page.
-
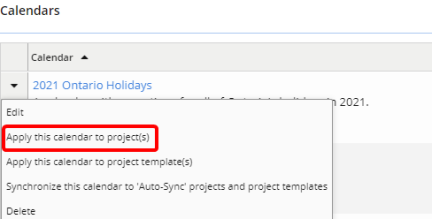
Click the drop-down arrow
of the Calendar you would like to apply. -
Select Apply this calendar to project(s):
-
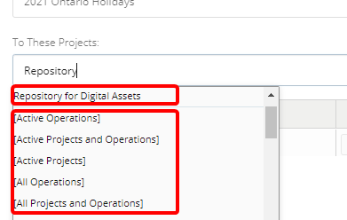
Type a Project into the "To these Projects" field and select it once it appears from the drop-down menu
OR
Click on the "To these Projects" field and use one of the Project searches from the drop-down menu:
-
(Optional) Delete any unwanted Projects by clicking the "X" button
 next to the Project in the table.
 -
Set the "Apply Options":
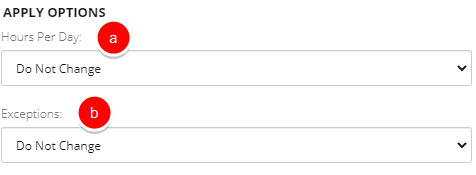
a. Hours Per Day: This drop-down menu allows you to apply the "Hours Per Day" of your chosen calendar to the Projects.
-
Do Not Change: The hours per day on each Project's current schedule will not be updated.
-
Update to calendar value: The hours per day on each Project's current schedule will be updated to match the "Hours Per Day" of the chosen Calendar.
b. Exceptions: This drop-down menu allows you to apply Exceptions of your chosen calendar to the Projects.
- Do Not Change: The Exceptions on each Project's current schedule will not be updated.
-
Add missing exceptions to project: The Exceptions from the chosen calendar that are not already on the current Project schedules will be added to them.
-
Add missing 'working days' to project: Only the "Working" day Exceptions from the chosen calendar that are not already on the current Project schedules will be added to them.
-
Add missing 'non-working days' to project: Only the "Non-Working" day Exceptions that are not already on the current Project schedules will be added to them.
-
Synchronize exceptions with calendar: The Exceptions from the chosen calendar will completely replace the Exceptions on the current Project schedules.
-
-
Click the Save button.
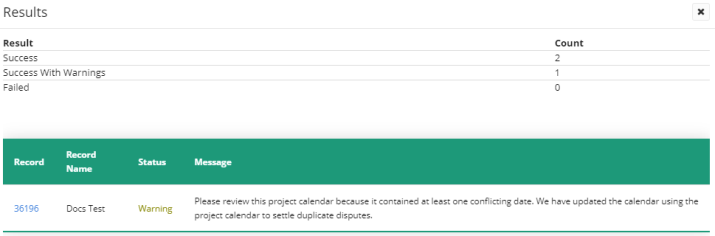
After clicking Save, the Calendar will be applied to the selected Projects. A "Results" window will appear to notify you of all the successful applications, failures, and conflicts:
Applying Calendars to Project Templates
Eclipse PPM administrators can apply Calendar characteristics to multiple Project Template Work Plans at a time from the Calendars page. This prevents Project Managers from having to manually adjust the "Non-working" days of multiple Project Templates at a time, especially at the beginning of the year when the dates of "Non-working" days change.
Note: To apply a calendar to Project Templates, Eclipse PPM users will have to have either created the Project Template themselves or have "Allow" Manage Project Templates permissions.
Note: A calendar can only be applied to Project Work Plans that can be checked out. Also, the Work Plan cannot be set to "Auto-Sync."
To apply Calendars to Project Templates:
- Select the Administration icon from the Icon bar.
-
Select Calendars from the "Organization" list:
Click to enlarge.
Note: This will open up the "Calendars" page.
-
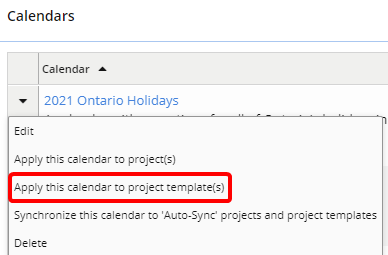
Click the drop-down arrow
of the Calendar you would like to apply. -
Select Apply this calendar to project template(s):
-
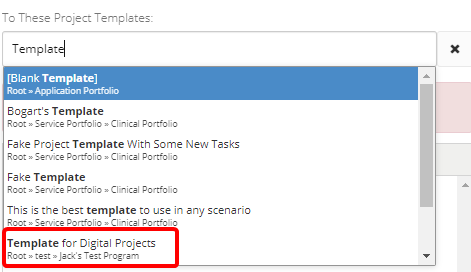
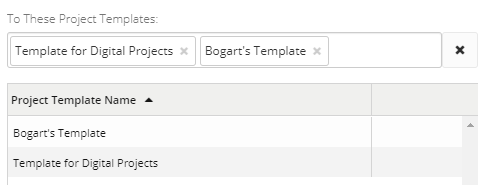
Type in the name of a Project Template into the "To These Project Templates:" field and select it from the drop-down list once it appears:
-
Repeat Step 5 until all the Project Templates you would like to include in the application are listed in the table:
-
(Optional) Delete any unwanted Project Templates by clicking the "X" button
 next to the template name in the "To These Project Templates" field.
 -
Set the "Apply Options":
a. Hours Per Day: This drop-down menu allows you to apply the "Hours Per Day" of your chosen calendar to the Project Templates.
-
Do Not Change: The hours per day on each Project Template's current schedule will not be updated.
-
Update to calendar value: The hours per day on each Project's current schedule will be updated to match the "Hours Per Day" of the chosen Calendar.
b. Exceptions: This drop-down menu allows you to apply Exceptions of your chosen calendar to the Project Templates.
- Do Not Change: The Exceptions on each Project Templates's current schedule will not be updated.
-
Add missing exceptions to project: The Exceptions from the chosen calendar that are not already on the current Project Template schedules will be added to them.
-
Add missing 'working days' to project: Only the "Working" day Exceptions from the chosen calendar that are not already on the current Project Template schedules will be added to them.
-
Add missing 'non-working days' to project: Only the "Non-Working" day Exceptions that are not already on the current Project Template schedules will be added to them.
-
Synchronize exceptions with calendar: The Exceptions from the chosen calendar will completely replace the Exceptions on the current Project Template schedules.
-
-
Click the Save button.
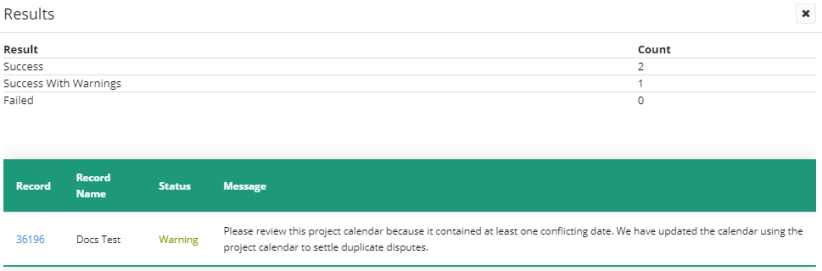
After clicking Save, the Calendar will be applied to the selected Project Templates. A "Results" window will appear to notify you of all the successful applications, failures, and conflicts:
Auto-Syncing Calendars to Projects and Project Templates
Eclipse PPM users can synchronize a custom Calendar with a Project or Project Template from the Configuration page. When this occurs, the Work Plan(s) will automatically update to match a custom calendar's Hours Per Day and Exceptions when opened. If any changes have been made to the Calendar since the last time it synced to the Project or Project Template, the new changes will be applied during the next sync. This can be done to ensure that Calendar changes will still be applied to any Work Plans if no users accept the changes upon opening the Work Plan:

When a user opens a Work Planner, this pop-up appears if any changes have been applied to the Calendar that it has been configured to synchronize to. If the user selects "No," the changes will not be applied. Administrators can go ahead and push a synchronization from the Calendar page to ensure that the changes will be accepted into the Work Plans.
After a Project or Project Template has been set to "Auto-sync" with a Calendar, administrators can go ahead and push any changes made to a Calendar onto the Projects and Project Templates.
Note: In order for the "Auto-sync" to be pushed onto any Projects or Project Templates, the Projects and Project Templates must already be configured to "Auto-sync" with the Calendar.
To synchronize a Calendar to "Auto-sync" to Projects and Project Templates:
- Select the Administration icon from the Icon bar.
-
Select Calendars from the "Organization" list:
Click to enlarge.
Note: This will open up the "Calendars" page.
-
Click the drop-down arrow
of the Calendar you would like to apply. -
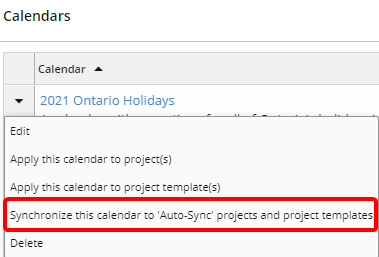
Select Synchronize this calendar to 'Auto-Sync' with projects and project templates:
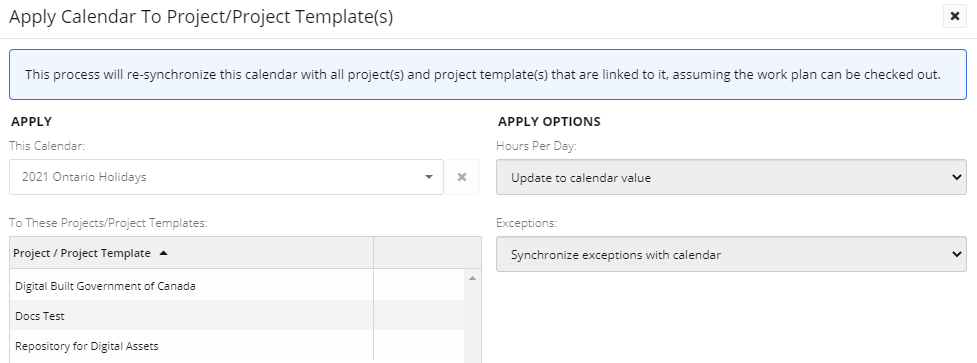
Note: This will open up the "Apply Calendar To Project/Project Template(s)" window. Notice that none of the fields are editable; in particular, the "To These Project/Project Templates" table will only contain Projects and Project Templates that have already been configured to "Auto-sync" with the Calendar:
-
Click the Save button.
After clicking Save, any changes made to the Calendar will be pushed onto the Projects and Project Templates that it is configured to "Auto-sync" to. A "Results" window will appear to display of all the successful synchronizations, failures, and conflicts:

- Select the Administration icon from the Icon bar.
-
Select Calendars from the "Organization" list:
Click to enlarge.
Note: This will open up the "Calendars" page.
-
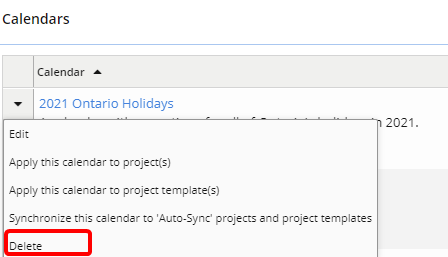
Click the drop-down arrow
of the Calendar you would like to apply. -
Select Delete from the drop-down menu:
-
Select Yes on the "Delete Calendar" pop-up.
After clicking Yes, the Calendar will be deleted from Eclipse PPM.