Add and Manage Work Plan Calendars
Setting the hours per day, holidays, and any other exceptions related to working days and time is very important in ensuring the effectiveness of a Work Plan. From the Work Planner page, Eclipse PPM users can create calendars and set any of them as the current calendar of the plan. Users can also edit and delete calendars from the Work Planner page.
Note: Eclipse PPM administrators can also create custom calendars from the Administration page that can be applied to Work Plans.
To create a new calendar:
- Navigate to a Project.
-
Select Work Plan from the Project Menu:
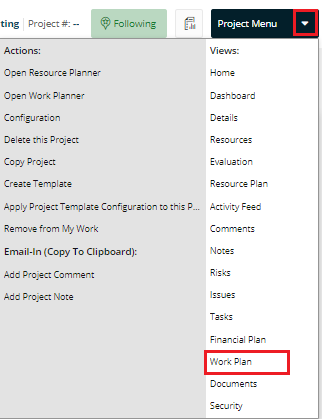
Note: This will open the Work Plan page.
-
Select the Work Plan you would like to add a calendar to using the drop-down menu in the top-right corner:

-
Click the Edit button:

Note: This will open up the Work Planner.
-
Select New... from the "Calendars" drop-down menu:

Note: If New... is not available from the "Calendars" drop-down menu, it means the Work Plan is already set to Auto-sync to a Calendar. You can change this by adjusting the Calendar Exceptions to "Independent" under "Work Plan Settings" from the Configuration menu.
-
Enter details into the "Calendar" tab:
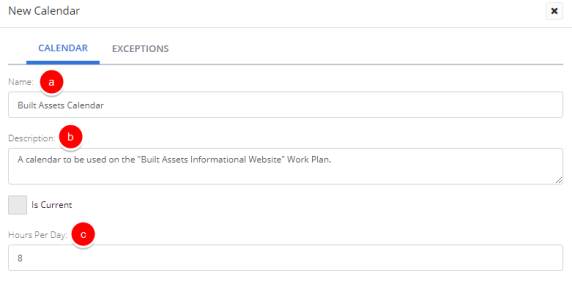
a. Name: Enter a name for your new Calendar.
b. Description: Enter a quick description of your new Calendar.
c. Hours Per Day: Enter in how many hours each working day consists of.
-
Enter information into the "Exceptions" tab:
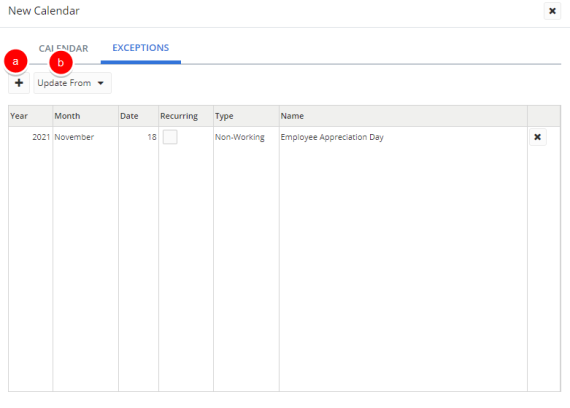
Tip: Exceptions are commonly used to record local holidays, days-off, or other non-working days.
a. Add Exception: Clicking the "Plus" icon
 will add a new Exception to the table (like "Employee Appreciation Day" pictured above). The Exception information can be edited by clicking directly on any of the fields in the table.
Note: If the "Recurring" checkbox is selected, the "Year" will not be editable. "Recurring" means that the Exception takes place on the same date every year.
b. Update From: This drop-down menu can be used to apply the Exceptions from another Calendar. After selecting a Calendar, all the Exceptions from that Calendar will populate the table. Each Exceptionscan still be edited after being applied.
Tip: Applying Exceptions through the "Update From" drop-down menu will erase any Exceptions added from the Add Exception button. If you wish to add Exceptions to the Exceptions from another calendar, use the "Update From" drop-down menu first, and then add your new Exceptions second.
-
Click the OK button.
After clicking OK, your new Calendar will be saved. You can edit the Calendar at any time by selecting it from the Work Plan's "Calendar" drop-down menu. Also, it can be set as the current calendar by selecting the "Checkmark" button  or deleted by selecting the "Trash" button
  :
:
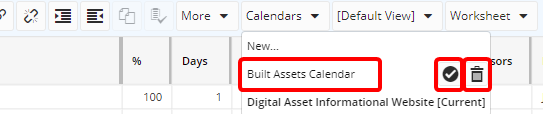
Note: Editing a Calendar will bring up the same details from the "New Calendar" window (Steps 6 and 7).