Project Status Report
The Project Status report provides a summary of the recent updates and accomplishments of specific Projects as well as an overview of upcoming Tasks. This report can be exported as a PDF file, a Microsoft Excel spreadsheet, or a Microsoft Word document.
Each Project included in the report will have one page (or tab, if downloaded as an Excel spreadsheet) dedicated to general information on its current state. This includes its Description, Status Update, Health Indicators, basic stats, completed Tasks (referred to as "Accomplishments"), and upcoming / in progress Tasks.

While configuring the report, users can determine the date ranges for including accomplished and upcoming / in progress Tasks. See the procedure below for more information.
The report can also include additional pages (or extra tabs, if downloaded as an Excel spreadsheet) that contain information on each Project's Risks, Issues, Status Update, Notes, and Comments.
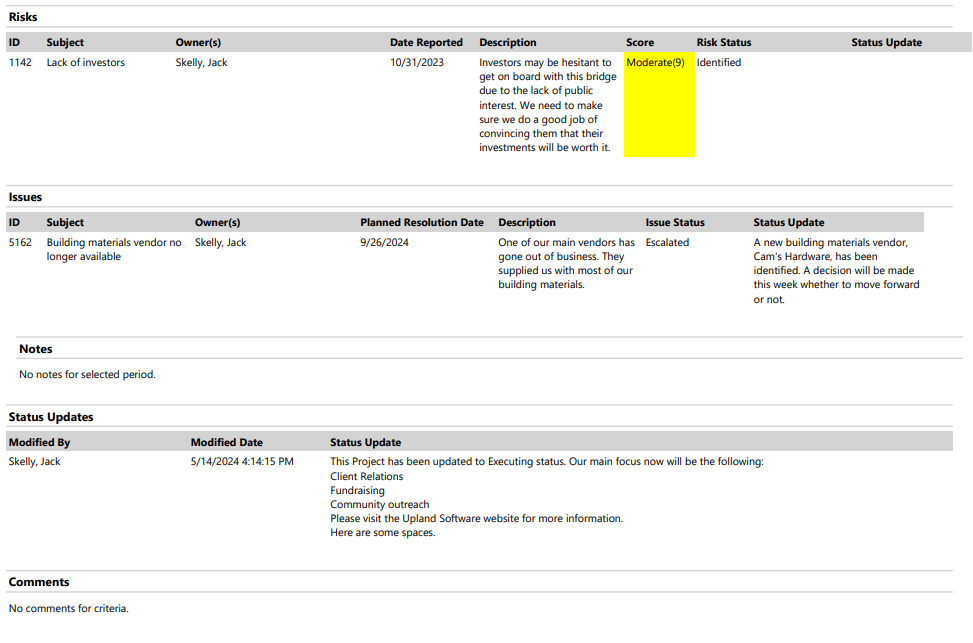
Users can determine which of these components should be included while configuring the report. They can also determine the criteria for including each of them (i.e. which Status Updates should be included, how severe Risks should be in order to be included, etc.). See the procedure below for more information.
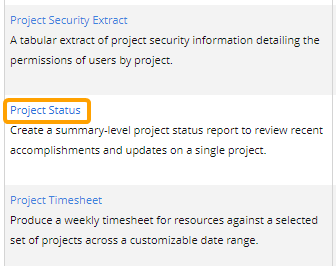
Users can run and download the Project Status report from the Reports page.
Tip: This report can also be run for individual Projects. See Managing Project Reports for more information.
To run the Project Status report:
Before You Start: Projects will only be included in the report if the user running the report has the "Profile Details - View" permission on at least one of the Project's Policies. Additionally, the user will need the "Portfolio / Approval View" permission on at least one of the Project's Policies in order for Project data to actually appear on the report. Consider this before tasking an Eclipse PPM user with running this report.
-
Select the Reports icon
 from the Navigation Menu.
-
Select Project Status from the list of Eclipse Reports.
-
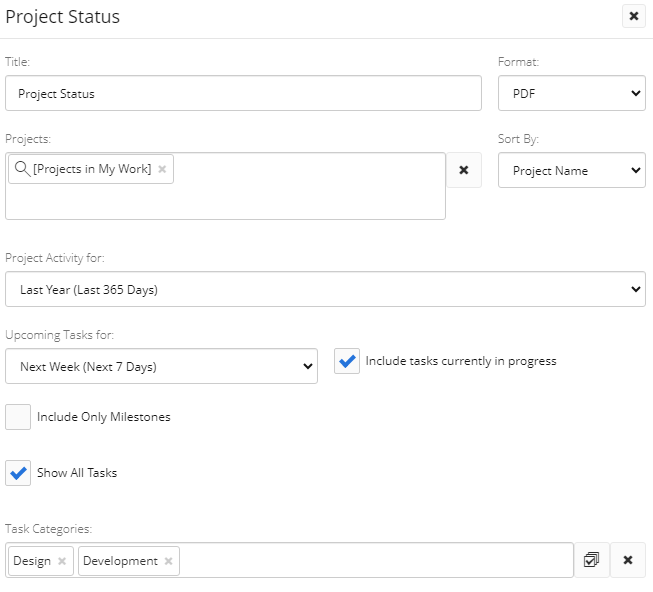
Configure the general report details at the top of the "Project Status" window.
-
Title: Enter a custom name for your Project Status report. This title will appear at the top of the report.
-
Format: Determine whether to export your Project Status report as a PDF file, a Microsoft Excel file, or a Microsoft Word file.
Tip: Excel and Word files are much easier to edit. Users can make adjustments and leave notes on these files before saving them and sending them to others.
-
Projects: Select which Projects will be included in the report by typing in the name of a Project or Project filter and selecting it from the drop-down menu. Repeat this until all of your desired Projects and filters have been added.
Note: These are the same Project filters that can be found on the Project Search page. From here, users can create their own custom Project filters that can be used in the report.
Note: A message will appear if the selected filter(s) will result in no Projects being included in the report.
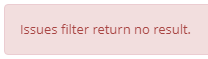
This could be the result of selecting a filter (or multiple) that does not include any Projects. It could also occur if the user running the report does not have permission to view any of them. -
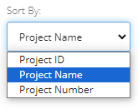
Sort By: Use the drop-down menu to determine the order of Projects on the report. The Projects can appear in alphabetical order by Project Name or in numerical order by Project ID or Project Number.
-
Project Activity For: Use the drop-down menu to determine a date range for Tasks to be included as "Accomplishments".
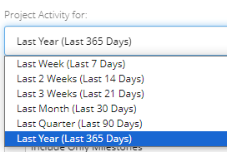
Tasks that were completed within the selected timeframe will be included in the "Accomplishments" table on the report.

Note: This will also determine which Issues and Notes will be included in the report.
-
Upcoming Tasks for: Use the drop-down menu to determine a date range for Tasks to be included as "Upcoming Tasks".
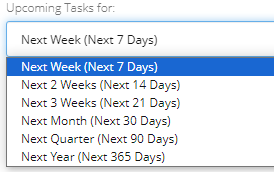
Future Tasks with a "Start Date" within the selected Timeframe will be included in the "Upcoming Tasks" table.

-
Include tasks currently in progress: If this checkbox is selected, the "Upcoming Tasks" table will become a "Upcoming Tasks + In Progress Tasks" table. Every Task on the Project that is currently incomplete (regardless of "Start Date") will also be included.

-
Include Only Milestones: If this checkbox is selected, Tasks will only be included in both the "Accomplishments" table and the "Upcoming Tasks" table if they are Milestone Tasks.
-
Show All Tasks:
-
Task Categories: If you would only like Tasks from specific Task Categories to be displayed on the report, click on this field and use the drop-down menu to select the names of the Task Categories that will be used to filter them. Leave this field empty if you do not want Tasks filtered out by their Task Categories.
-
-
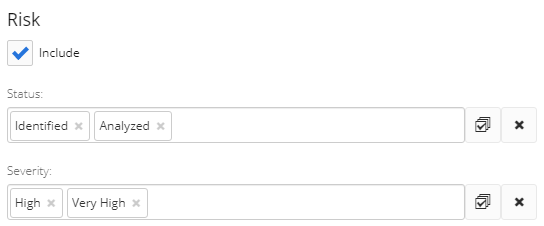
Configure the "Risk" settings for the report.
-
Include: Select this checkbox to include Project Risks on the report.
-
Status: If you would only like Risks with specific Risk Statuses to be displayed on the report, click on this field and use the drop-down menu to select the names of the statuses that will be used to filter them. Leave this field empty if you do not want Risks filtered out by their statuses.
-
Severity: If you would only like Risks with specific Risk Severities to be displayed on the report, click on this field and use the drop-down menu to select the names of the Severities that will be used to filter them. Leave this field empty if you do not want Risks filtered out by their Severities.
-
-
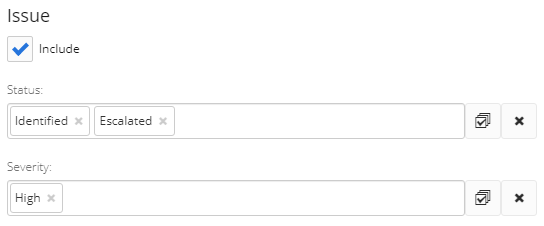
Configure the "Issue" settings for the report.
-
Include: Select this checkbox to include Project Issues on the report.
Note: Only Issues that were created or modified within the "Project Activity for" timeframe above will be included in the report.
-
Status: If you would only like Issues with specific Issue Statuses to be displayed on the report, click on this field and use the drop-down menu to select the names of the statuses that will be used to filter them. Leave this field empty if you do not want Issues filtered out by their statuses.
-
Severity: If you would only like Issues with specific Issue Severities to be displayed on the report, click on this field and use the drop-down menu to select the names of the Severities that will be used to filter them. Leave this field empty if you do not want Issues filtered out by their Severities.
-
-
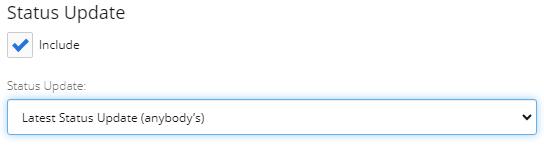
Configure the "Status Update" settings for the report.
-
Include: Select this checkbox to include Status Updates on the report.
Note: This is separate from the Status Update information that can be found on the first page / tab of the report.
-
Status Update: Use the drop-down menu to determine which Status Update(s) will be displayed.
-
-
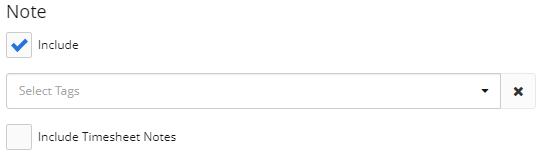
Configure the "Note" settings for the report.
-
Include: Select this checkbox to include Project Notes on the report.
Note: Only Notes that were created or modified within the "Project Activity for" timeframe above will be included in the report.
-
Select Tags: If you would only like Notes with specific Tags to be displayed on the report, click on this field and use the drop-down menu to select the names of the Tags that will be used to filter them. Leave this field empty if you do not want Notes filtered out by their Tags.
-
Include Timesheet Notes: Select this checkbox to include a table for all Timesheet Notes that have been submitted against the Projects.
Note: All of a Project's Timesheet Notes will appear, not just those that were submitted within the "Project Activity for" timeframe.
-
-
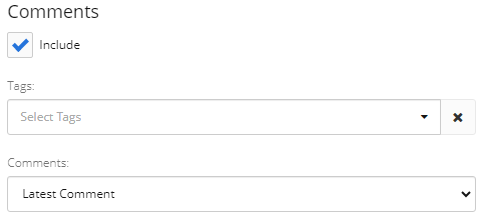
Configure the "Comments" settings for the report.
-
Include: Select this checkbox to include Project Comments on the report.
-
Tags: If you would only like Comments with specific Tags to be displayed on the report, click on this field and use the drop-down menu to select the names of the Tags that will be used to filter them. Leave this field empty if you do not want Comments filtered out by their Tags.
-
Comments: Use the drop-down menu to determine which Project Comments will appear on the report.
-
-
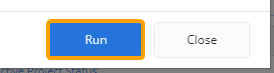
Select the Run button.
After selecting Run, the report will automatically download onto your device in your selected format.