Resource Timesheet Report
The Resource Timesheet report displays Timesheet entries for a specific set of Resources. Report viewers will be able to see the time Resources have entered against Projects and Tasks, as well as any Timesheet Notes that have been included.
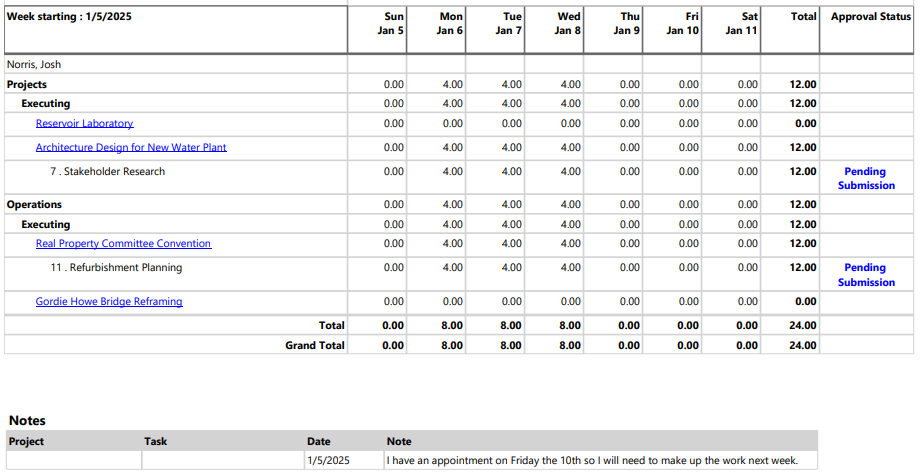
The report contains a page (or a sheet if downloaded as an Excel file) for each Resource Timesheet included in the date range. For example, if the date range spans three weeks, the report will contain three weekly Timesheets for each included Resource.
Every Timesheet will display all of the Projects that each Resource belongs to, even if the Resource does not have any allocations or time entries on the Project during the week. The Projects are primarily sorted by whether they are "Projects" or "Operations", and secondarily sorted by their statuses. Each Timesheet displays the Resource's entered time on each day against each Task. On the right-hand side of the Timesheet, the "Approval Status" column displays the current approval status of each specific entry. In the example above, both of Josh's specific time entries display "Pending Submission" because he has saved them to his Timesheet, but he has not yet submitted them for approval.
Additionally, the user running the report can choose to include Timesheet Notes below each weekly Timesheet. The "Notes" table will indicate which Project and/or Task the Note has been written on (if any).
To run the Resource Timesheet report:
Before You Start: Users will require the "Resource Reports - Allow" permission from an Application Policy to run this report. Additionally, users will require the "Profile Details - View" permission on at least one of aProject's Policies in order to include the Project's data in the report.
-
Select the Reports icon
 from the Navigation Menu.
-
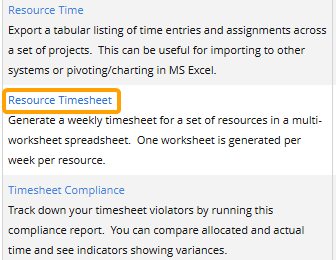
Select Resource Timesheet from the list of Eclipse Reports.
-
Use the "Resource Timesheet" window to customize your Resource Timesheet report.
-
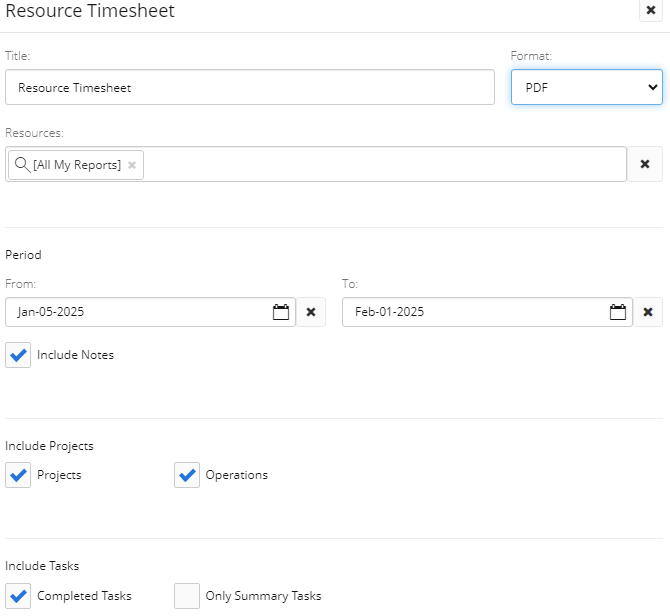
Title: Enter a custom name for your Resource Timesheet report. The title will appear at the top of the report.
-
Format: Determine whether the report will be downloaded as a PDF file, a Microsoft Excel file, or a Microsoft Word document.
-
Resources: Select which Resources will be included in the report by typing in the name of a Resource or Resource filter and selecting it from the drop-down menu. Repeat this until all of your desired Resources and filters have been added.
Note: These are the same Resource filters that can be found on the Resource Search page. From here, users can create their own custom Resource filters that can be used in the report.
-
Period: Use the "From:" and "To:" fields to determine the time period that the report will cover. The report will include Timesheets for every week included in the date range.
Note: Even if the date range reaches a week by one day (for example, the "To:" date is the Sunday of a new week), the Timesheets for that week will be included.
-
Include Notes: Select this checkbox to include a "Notes" section for each weekly Timesheet. This section will include any Notes that have been saved against the Timesheet.
-
Projects: Select this checkbox to include non-"Operations" Projects in the report.
-
Operations: Select this checkbox to include Projects set as "Operations" in the report.
-
Completed Tasks: Select this checkbox to include completed Tasks in the report. If this box is not selected, completed Tasks will be filtered out of each Timesheet.
-
Only Summary Tasks: Select this checkbox to only include Summary Tasks in the report. Any Tasks that are not Summary Tasks will be filtered out.
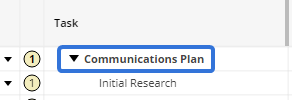
Note: A Summary Task is any Task that acts as the parent to child Tasks. On Work Plans, they have child Tasks indented below them:
They are represented by a black bracket in the Gantt window of the Work Plan:
-
-
Select the Run button.
After selecting Run, the report will automatically download onto your device in the selected format.