Advanced Search (Apply a Filter)
Eclipse PPM users can run an Advanced Search from the Search page of any object type (Programs, Projects, Tasks, Resources, Risks, Issues, Notes). An Advanced Search simply consists of applying a filter to a list of object types (Programs, Projects, Issues, Risks, Tasks, Resources, Notes, and Assignments) on a Search page:

Note: An "Assignment" occurs when a Resource is assigned to a Task.
Note: The "Advanced Search" page is also referred to as the "List" page ("Project List", "Program List", etc.).
Additionally, users can select any of the columns to sort the results alphabetically / numerically by the column values:
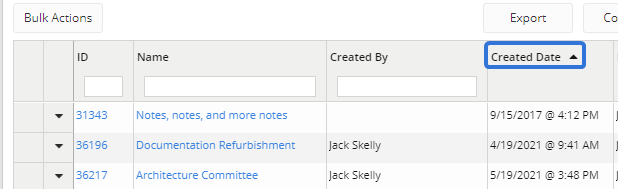
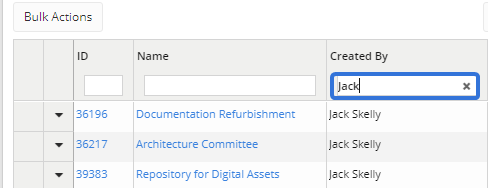
Users can also type text into any of the column text boxes in order to filter the results:
This page covers the following topics:
Creating a Filter for an Advanced Search
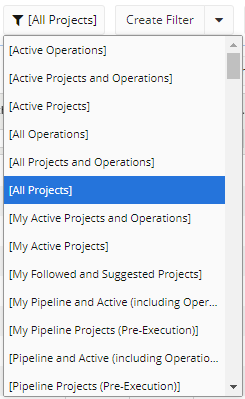
Users can apply filters to the Advanced Search page in order to only view the entities that are interested in. Eclipse PPM comes with a number of preloaded filters that can be applied to each Advanced Search page. These system filters are placed in brackets in the "Filters" drop-down menu:
However, users can also create their own custom filters to fit their unique business needs. Each custom filter must be created from the Advanced Search page.
Tip: This procedure outlines how to create a filter by setting criteria that the listed items must meet in order to be included. If instead you would like to directly pick and choose the items that will belong to your filter, see Creating a filter using Bulk Actions below.
To create a filter for Advanced Search:
Before You Start: Any user can create a filter in Eclipse PPM. However, users will require the "Share Items (Searches, Views)" Application Behavior permission from an Application Policy in order to share their created filters with others.
-
Select the Search button from the Icon bar:

-
Select one of the object types from the "Search In" menu:
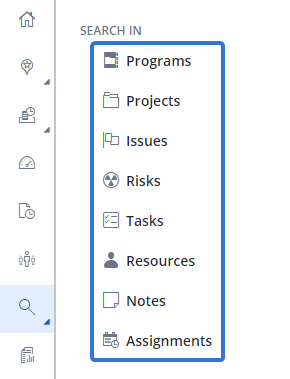
Note: This opens up the Advanced Search page for the object type.
-
Select the Create Filter button:

OR
Select Copy Filter from the drop-down menu to create a new filter starting with the rules and groups of the filter currently selected:
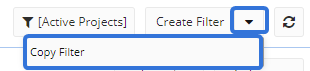
In the above example, a new filter is being created using the "[Active Projects]" filter as a template.
-
Type a name for your new filter into the "Name" field.
-
(Optional) Use the "Share this Filter with:" drop-down menu to determine which Eclipse PPM users will be able to use your new filter:

-
Only Me: You are the only Eclipse PPM user who will be able to apply the new filter.
-
All Users: Every Eclipse PPM user will be able to apply the new filter.
-
Specific users or groups: Use the table that appears to select which users or User Groups will be able to apply the new filter.
Note: You must have the "Share Items (Searches, Views)" Application Behavior permission from an Application Policy to see this option.
-
-
Add Rules and Groups for your filter:
Tip: See Applying Rules and Groups below for more information.
-
(Optional) Click the Preview button to see which results your search will yield.
-
Click the Save button.
After clicking Save, your new filter will be finished. You will be able to access it by running an Advanced Search.
Adding Rules and Groups to your Filter
Eclipse PPM searches use rules and groups to yield specific results. You must establish these rules and groups while creating a new search filter (Step 5).
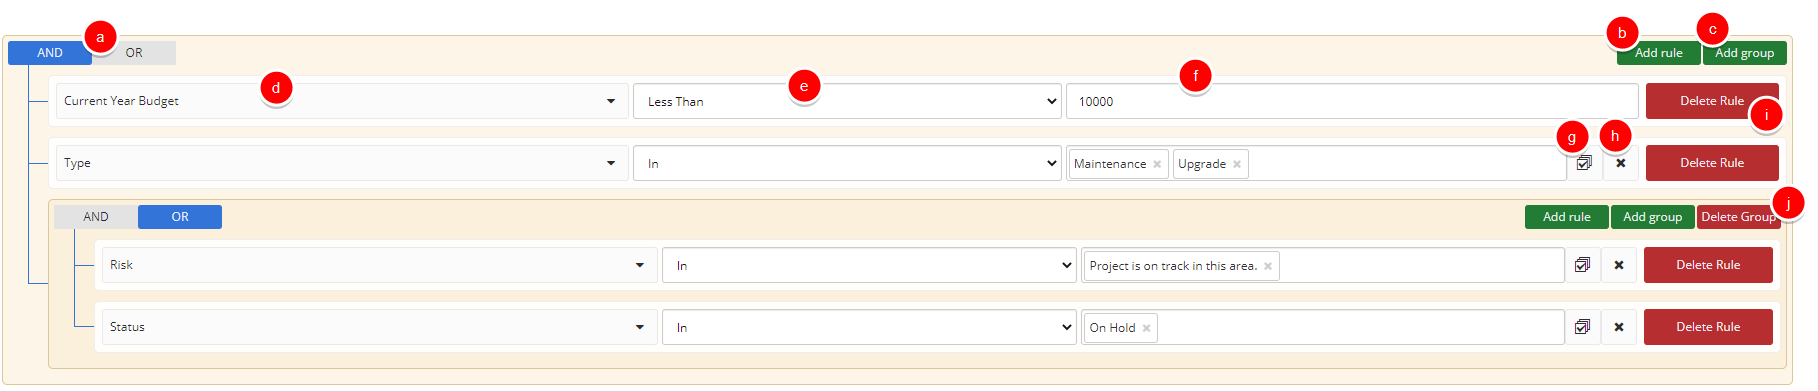
a. AND / OR Switch: Click this to switch between "AND" and "OR". When set to "AND," all of the connected rules and groups must be satisfied by the object to be included in the search. When set to "OR," only one of the rules or groups must be satisfied by the object to be included in the search. In the above example, the first switch is set to "AND"; this means that every rule connected by the lines that stem from the switch must be satisfied by the object to be included in the search. However, the switch in the group is set to "OR"; this means that only one of the rules in the group must be satisfied by the object to satisfy the group as a whole.
b. Add rule: Click this button to add a new rule to your filter. The rule will appear at the same level of the AND / OR switch that the button appears; if the Add rule button is within a group, the new rule will appear within that group.
c. Add group: Click this button to add a new group to your filter. The group will act a rule that must be satisfied by the object to be included in the search. In the above example, there is only one group that consists of two rules. The AND / OR switch is set to "OR" for this group, which means that only one of the rules within this group must be satisfied for the entire group to be satisfied. In this case, the group (which acts as a rule) and the other two rules above it must all be satisfied by the object because the main AND / OR switch is set to "AND".
d. Rule Component: The first drop-down menu of each rule is used to indicate what component is being measured. In the above example, the first rule is set to measure the "Current Year Budget" of Projects.
e. Rule Qualifier: The second drop-down menu of each rule is used to qualify which aspects of the component (d) will be included in the search filter or how the component will be measured. In the above example, the first rule has a qualifier of "Less Than". This means that a Project's "Current Year Budget" must be below the standard (f) in order to satisfy the rule.
f. Rule Standard: The third field of each rule is used to set a standard that dictates whether or not an object will satisfy the rule. In the above example, the first rule has a standard of "10000". This means that a Project's "Current Year Budget" must be below 10,000 in order to satisfy the rule.
g. Select All: For components (d) with multiple choices, clicking this button will add all of the choices to the field.
h. Clear: For components (d) with multiple choices, clicking this button will empty the field.
i. Delete Rule: Clicking this button will delete the rule.
j. Delete Group: Clicking this button will delete the group in its entirety.
Example: Let's take another look at our example of a new Project filter:
The first AND / OR switch is set to "AND," which means everything it connects to must be satisfied for the Project to be included in the search. Three things must be satisfied: two rules and one group. If you look at the group, you can see that its AND / OR switch is set to "OR," which means that only one of the rules within the group need to be satisfied in order to satisfy the group in its entirety. Therefore, a Project must satisfy both rules outside of the group and only one rule inside the group on order to be included in the search.
Running an Advanced Search
An Advanced Search simply involves applying a filter to the entity of your choice (Programs, Projects, Issues, Risks, Tasks, Resources, Notes, and Assignments). Any Eclipse PPM user can perform an Advance Search.
To run an Advanced Search:
-
Select the Search button from the Icon bar.
-
Select one of the object types from the "Search In" menu:
-
Select the Filter button:

-
Choose a filter from the drop-down menu.
Note: By default, all of the filters created by Eclipse PPM are surrounded by brackets. Scroll past these filters to find custom filters that have been created by you or shared with you.
After selecting a filter, you have completed an Advanced Search.
Advanced Search page Bulk Actions
An advantage of the Advanced Search page is the ability to apply actions to multiple entities at once. The Bulk Actions button allows users to either create a new filter for the selected items or take action on multiple entities at once.
This section covers the following topics:
Creating a filter using Bulk Actions
The Bulk Actions button on the Advanced Search page allows users to create a filter by directly selecting the items that will belong to it.
Tip: If you would like to create a filter by setting criteria that items must meet in order to be included, see Creating a Filter for an Advanced Search above.
To create a filter using Bulk Actions:
-
Select the Search button from the Icon bar:
-
Select the object type that you would like to create a for:
Note: This opens up the Advanced Search page for the object type.
-
Select the Bulk Actions button:

-
Select the checkboxes of the items you would like to include in your new filter:
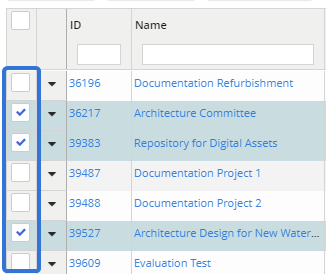
Tip: Selecting the checkbox in the column header will automatically select every checkbox.
-
Select the Create Filter button:

-
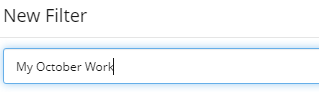
Enter a name for your new filter:
-
(Optional) Select the "Share this Filter" checkbox if you would like other Eclipse PPM users to be able to apply the new filter:

Note: You must have the "Share Items (Searches, Views)" Application Behavior permission from an Application Policy to see this option.
-
(Optional) Select the "Select this Filter immediately" checkbox if you would like this filter to be applied by default whenever you visit the object type's Advanced Search page:

-
Select the Ok button:
After selecting Ok, your new filter will be saved. You will be able to apply it to the Advanced Search page whenever you like.
Applying changes to multiple items at once
An advantage of the Advanced Search page is the ability to take action on multiple items at once. This saves users from having to repeatedly navigate to each individual item in order to make similar changes.
The available Bulk Actions depend on the object type. Select one of the following object types for more information about the actions you can take:
Note: Aside from creating filters using Bulk Actions, there are no additional Bulk Actions for Notes or Assignments.