
Manual Declaration Settings: Determines how records for the project can be declared.
- Allow manual declaration of Records: Records for the project can be declared automatically by the Records Declaration automation process, or manually.
- Never allow manual declaration of Records: Records for the project can only be declared automatically by the Records Declaration automation process.
A Records Declaration automation process must be configured by a System Administrator before records are automatically declared. See Record Declaration process for more information.
Record Series

In this section, you can specify rules that will be used to identify the documents to be declared as records and the disposition criteria to destroy the records.
-
In the Record Series section, click Add.
- In the Record Series dialog box, configure the record series using the options on the following tabs, then click Save.
Record Series Information tab
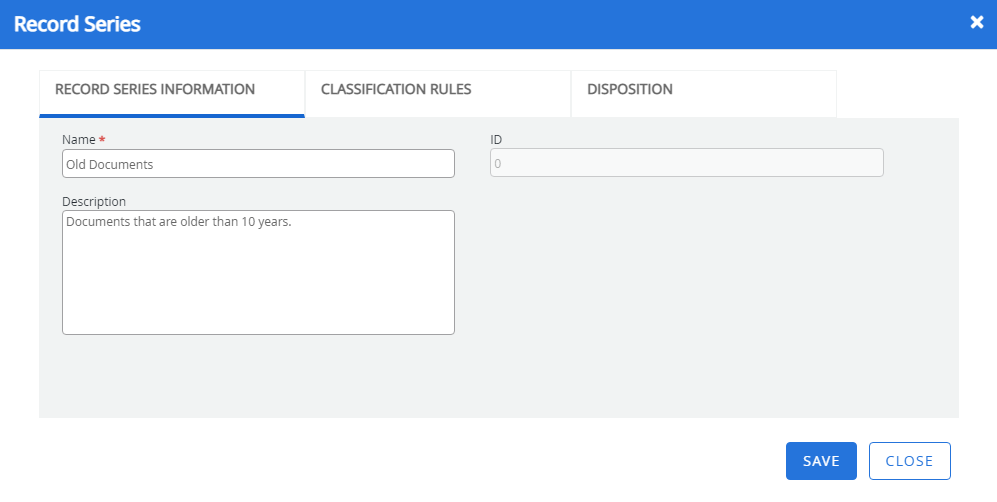
Name: The record series name.
ID: The record series ID. The ID is automatically assigned when a record series is created. The value of this field cannot be edited.
Description: A description of the record series.
Classification Rules tab
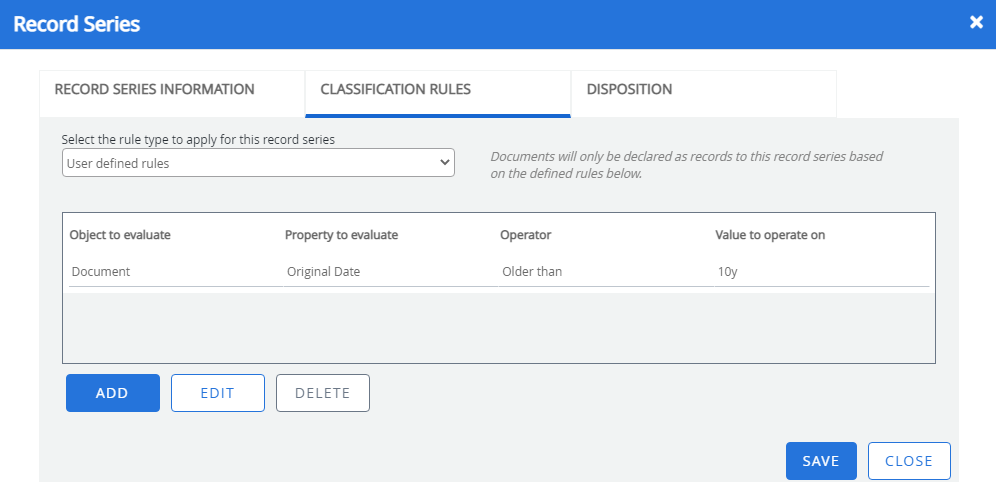
Select the rule type to apply for this record series: Specifies the rule type to be applied to the record series. Select one of the following options:
- All documents in project: Declares all documents in the project as records.
- User defined rules: Allows you to specify rules that will identify documents to be declared as records.
If you selected User defined rules from the rule type list, you need to add rules that will identify documents to be declared as records.
Note: If more than one user defined rule is set up in the classification rules tab, these are treated as an and function, so all rules must apply for a record to be declared to this record series.
-
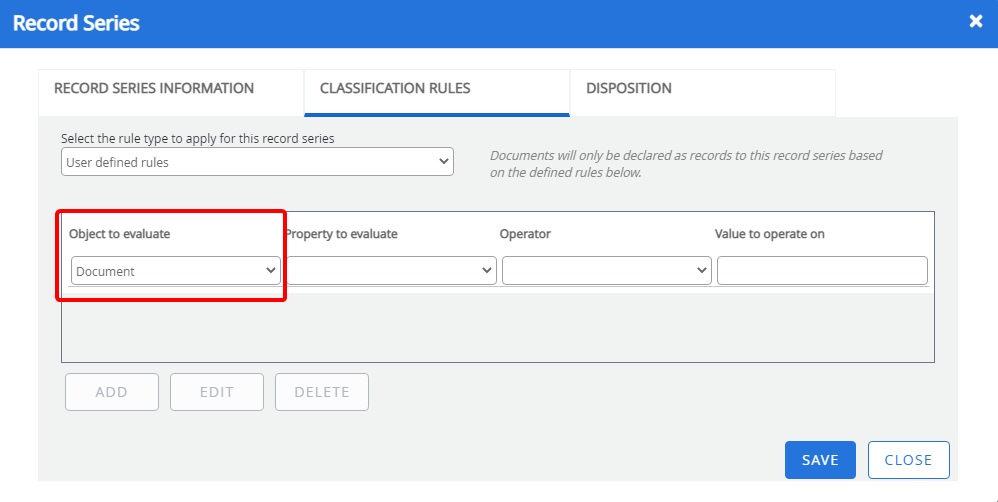
Select an option from the Object to evaluate list. The following options are available:
- File: Performs evaluation based on the properties of a file.
- Document: Performs evaluation based on the properties of a document.
-
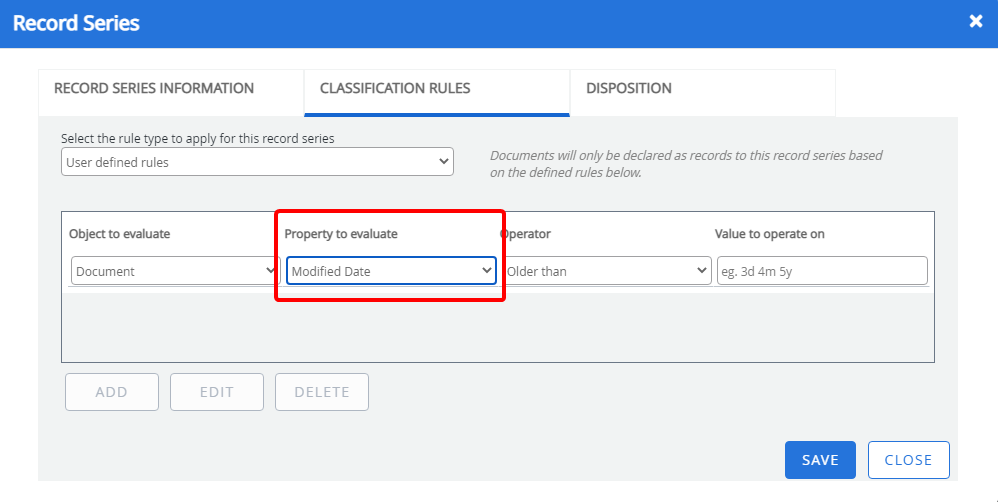
Select an option from the Property to evaluate list.
The options available in the Property to evaluation list depend on the option that was selected from the Object to evaluate list. If File was selected, the index fields of the project will be available in this list. If Document was selected, Separator (if enabled for the project), Divider, Document Name, and Modified Date, Original Date, and Upload Date options are available in the this list.
-
Select an option from the Operator list, to specify the operation to be used for the evaluation.
The options available in the Operator list depend on the option that was selected from the Property to evaluate list.
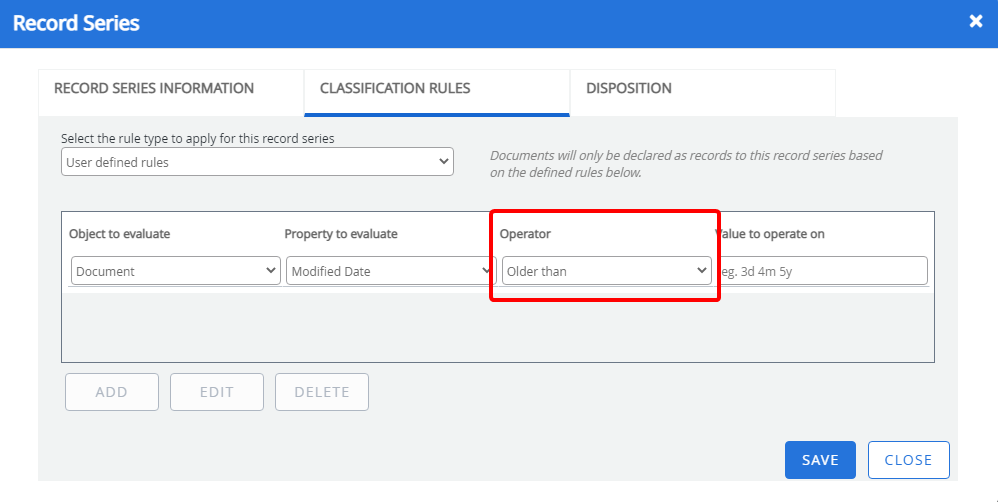
-
Specify a value that will be used for evaluation in the Value to operate on box.
If you selected Divider or Separator from the Property to evaluate list, the list of available dividers or separators is available in the Value to operate on list.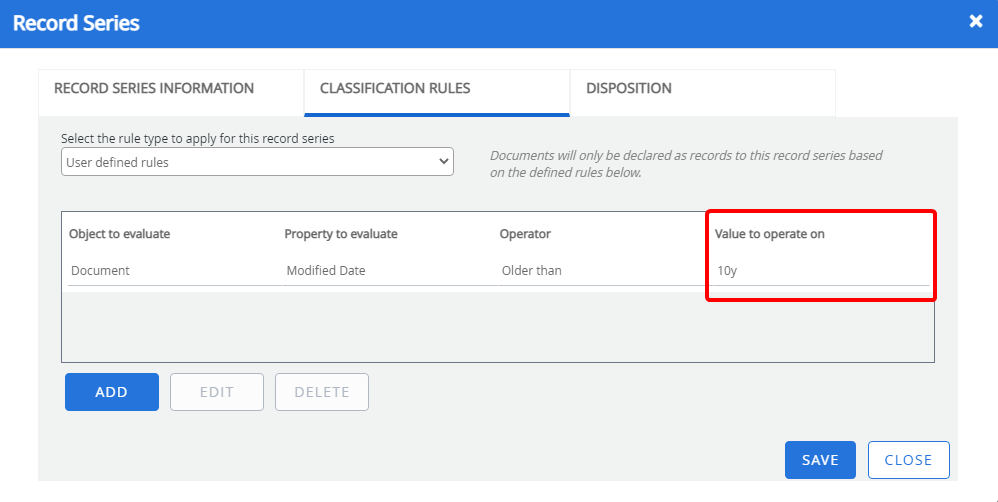
-
Click Add to define additional user defined rules as needed.
-
Click Save.
Scenario 1
Company A needs to dispose of invoices three years after they were created. Invoices cannot be declared as records until the invoice approval workflow process has completed in case users need to edit the invoices.
Solution
The invoices project will have an index field called “Status”. The default value for the field will be set to “Active” when invoices are uploaded to the system. At the end of the Invoice approval workflow process, the status of the Status field will be set to “Complete”. The Status field will trigger company A’s classification rules, in order to declare the invoices as records. The following image shows the classification rules set up for the record series for this scenario.
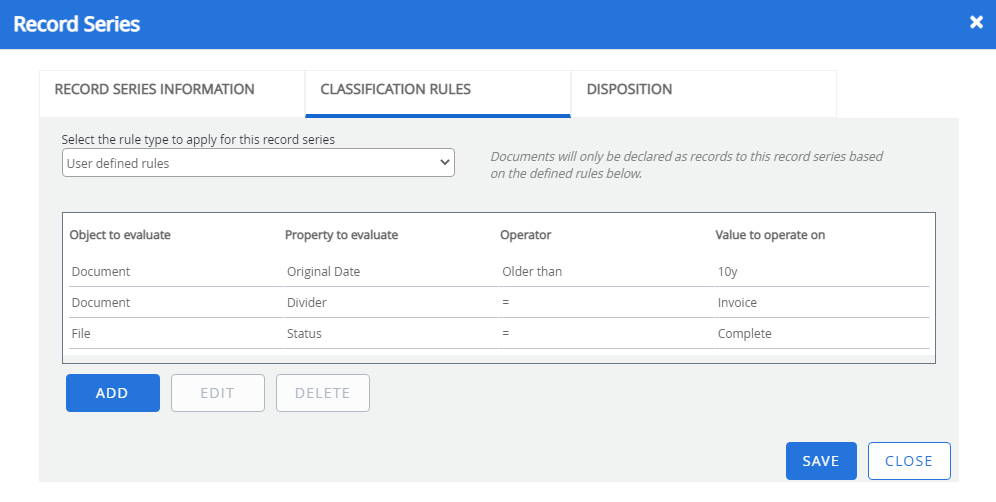
Scenario 2
Company B is required to dispose of all employee records two years after an employee was terminated and maintain no history of the records. A Records Administrator needs to approve the records before they are destroyed.
Solution
The HR employees project needs to have index fields called “Employee Status” and “Terminated Date”. By default, the value for the Employee Status field is set to “Active” for the current employees. When an employee is terminated the value of the Employee Status field gets updated to “Non-Active” and the date of termination of the employee is specified for the Terminated Date field. The following image shows the classification rules that would be applied to look for all files where the employee status is “Non-Active”.
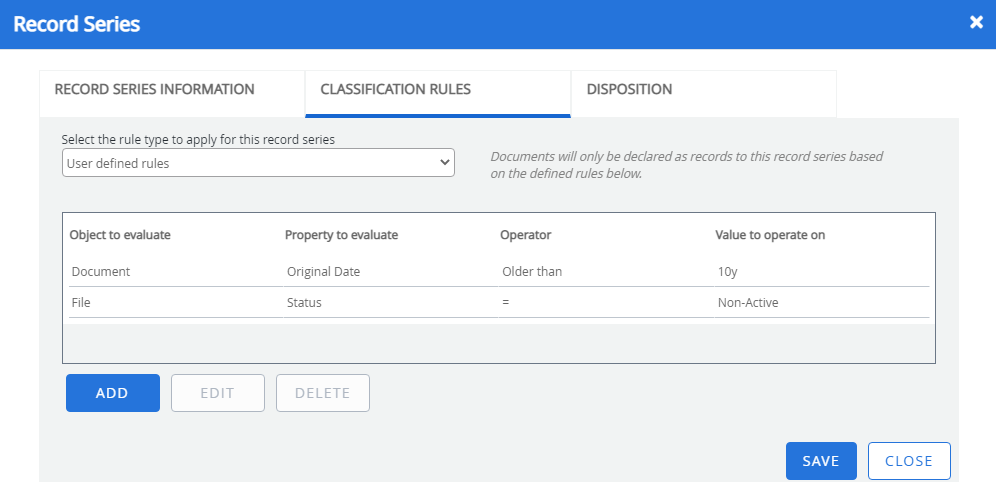
The following image shows the Disposition setup for this use case. The disposition is triggered based on the Terminated Date for an employee and adds two years to the date. Additionally, the company is required to maintain no history of the records; therefore, the “Retain record file information after destruction” option is not selected. The “Destroy With Approval” option is selected to allow a Record Administrator to approve records before they are destroyed.
Disposition tab
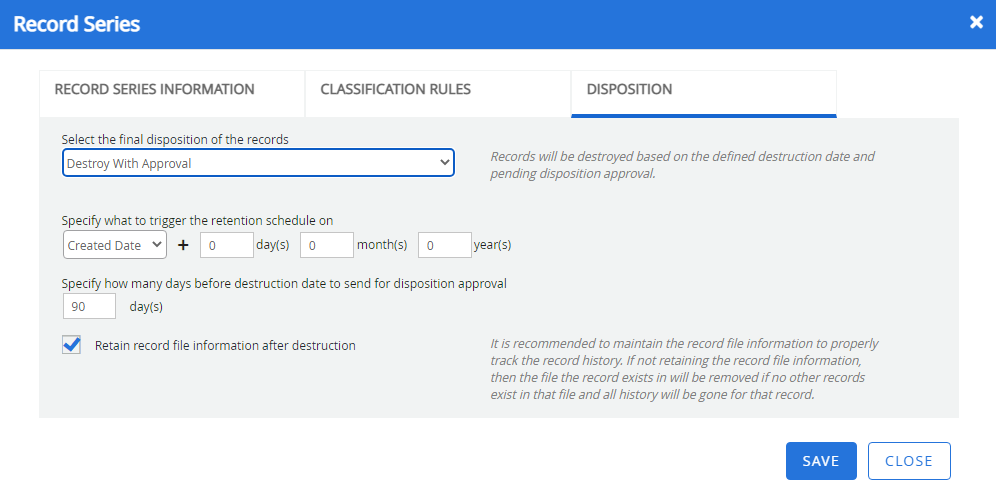
Select the final disposition of the records: Determines the disposition of the record series. Select one of the following:
- None: Records will not be deleted, and will be kept indefinitely.
- Auto-Destroy: Destroys records automatically at the specified time.
- Destroy With Approval: Destroys records at the specified time after approval. A record cannot be destroyed, even if the destruction date has passed if the record is pending approval from the Records Administrator. The record must be approved for destruction before getting destroyed. Records can be approved for destruction or dismissed on the Disposition Notification page.
Specify destruction time
If the Auto-Destroy or Destroy With Approval is selected from the Select the final disposition of records list, you need to specify the time the records will be destroyed.
You can specify the time to destroy by adding the duration to the date of creation, last modified date, or any date type index field of the project.
When a record is destroyed the physical document, OCR data, renditions of the document, and any revisions to the document will get destroyed.
Example: For example, if you want to specify the time to destroy as one year, four months, and 10 days after the document was created. You need to select Created date from the list, and specify ten, four, and one in the days, months, and year boxes, respectively.
-
Select an option to specify the date to be considered as the start date.
-
Specify the days, months, and year to be added to the start date.
-
Specify the number of days before the destruction date to send for disposition approval.
This option is available only if the Destroy With Approval option is selected from the Select the final disposition of records list.
Retain record file information after destruction: Retains the file information after the records are deleted. If this option is not selected, after all records in that file are destroyed, the file will be deleted and all index information on that file will be destroyed. There will be no traceability back to the record.
-
In the Record Series section, select the file relationship that you want to edit, then click Edit.

- In the Record Series dialog box, edit the record series configuration as needed.
- Click Save.
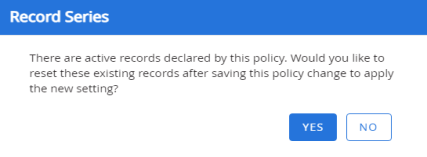
If records have already been declared by the policy you are editing, you will be prompted when saving changes. Click Yes to implement the new settings made in the record series to the documents that are declared as records based on this record series or click No to implement the settings made the next time the record series is used to declare document as record without affecting the existing records.
-
Select the record series that you want to delete, then click Delete.

- Click Yes to confirm the deletion.
If there are documents that are declared as records based on this record series, it will remain, but the status will change to "Obsolete".
If there are no documents declared as records based on this record series, it will be deleted permanently.
