File actions are the functions that can be carried out at the file level.
To access File Actions, right click a file in the File Tree.
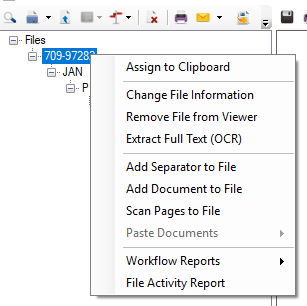
This option allows users to assign the file to their clipboard or to the Clipboard of other users that belong to the same group.
- On the File Actions menu, click Assign to Clipboard.
- In the Select User dialog box, click the user that you want to assign the file to.
- View the confirmation message.
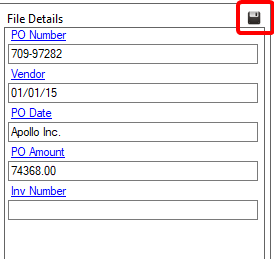
This option allows users to modify the index field information for the file.
- On the File Actions menu, click Change File Information.
-
Modify index field values as needed in the File Details section, then click Save.
This option removes the selected file from the Windows Viewer.
- On the File Actions menu, click Remove File from Viewer.
This option performs Optical Character Recognition (OCR) on all documents within the selected file. This feature works for TIFF files, Word documents, PDF files, and XLS files when an OCR license is installed on the computer and the OCR engine is registered with FileBound.
- On the File Actions menu, click Extract Full Text (OCR).
-
Click OK to acknowledge the confirmation message.
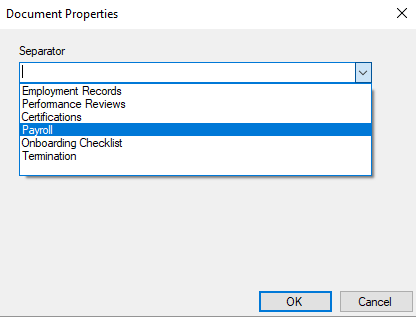
This option adds the selected separator to the file. This option will only be available when separators are enabled for the project.
- On the File Actions menu, click Add Separator to File.
- Select a separator from the Separator list.
-
Click OK.
This option allows users to import documents into a file.
- On the File Actions menu, click Add Document to File.
-
In the Select Document(s) to Import dialog box, locate the document(s) you want to add to the file.
Tip: You can select multiple documents by pressing Ctrl and selecting each file. You can select all the documents by pressing Shift and selecting the last document in the range you want to select.
- Click Open.
-
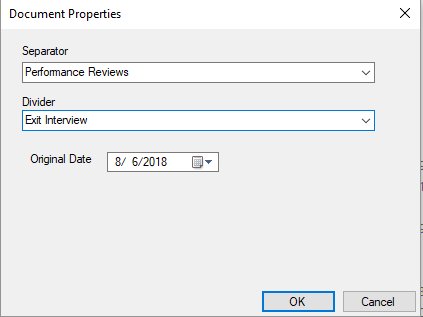
Select a Separator (if applicable) and Divider for the document to be placed under. If you do not select a separator or divider, the document is added under a separator named <<NO SEPARATOR>> or a divider named <<NO DIVIDER>>.
- Select an Original Date for the document
-
Click OK.
This option allows users to scan documents into a file.
- On the File Actions menu, click Scan Pages to File.
-
Select a Separator (if applicable) and Divider for the document to be placed under. If you do not select a separator or divider, the document is added under a separator named <<NO SEPARATOR>> or a divider named <<NO DIVIDER>>.
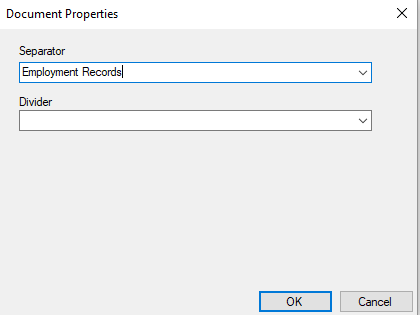
- Click OK.
-
Make required changes to the scanner settings in the scanner settings dialog.
-
Click OK to scan pages.
This option pastes copied documents into the selected file. This option will only be available if a document has already been copied.
- In the File Actions menu, click Paste Documents.
-
Select one of the following options:
- Paste as Copy: Creates another copy of the document in the selected separator.
- Paste as Link: Creates a link to the original document.
This option allows users to view workflow and file activity reports for a file from within the Windows Viewer.
You will only be able to view reports if you are assigned to a group with the Print and View All Reports right.
The following reports are available:
Workflow Reports - Overdue: Displays the Workflow Status report for items with a status of Overdue. See Workflow Status Report for more information.
Workflow Reports - All: Displays the Workflow Status report. See Workflow Status Report for more information.
Workflow Reports - Current: Displays the Workflow Status report for items with a status of Current. See Workflow Status Report for more information.
Workflow Reports - Incomplete: Displays the Workflow Status report for items with a status of Incomplete. See Workflow Status Report for more information.
Workflow Reports - System Steps: Displays the Workflow Status report for items with a status of System Steps. See Workflow Status Report for more information.
File Activity Report: Displays the File Activity report. See File Activity Report for more information.