Inbox
Your Inbox is where you can view and manage all of your inbound faxes.
Depending on whether permissions are allowed for your account, you can do the following from your Inbox:
Modify the Inbound Faxes page view
View or edit document properties
Send documents from an inbound fax as a fax
Filter faxes
Inbound faxes can be filtered by user, property, or date received.
-
Select filter criteria from the drop-down lists at the top of the page. For properties, select a property from the drop-down list and enter the value you want to filter on in the box to the right, then click Search.

The page will automatically refresh to display only faxes meeting the selected criteria.
Click Clear Filters to remove all filters.
Modify the Inbound Faxes page view
The Inbound Faxes page can be modified to display information in a format that is most useful for you. See Modify a page view for more information.
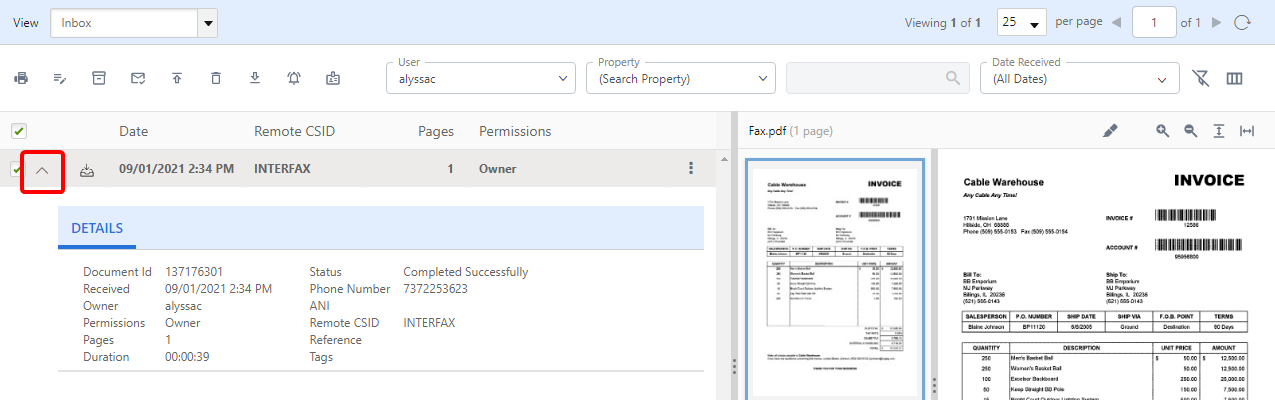
View fax details
-
Click the down arrow next to a fax to expand it.
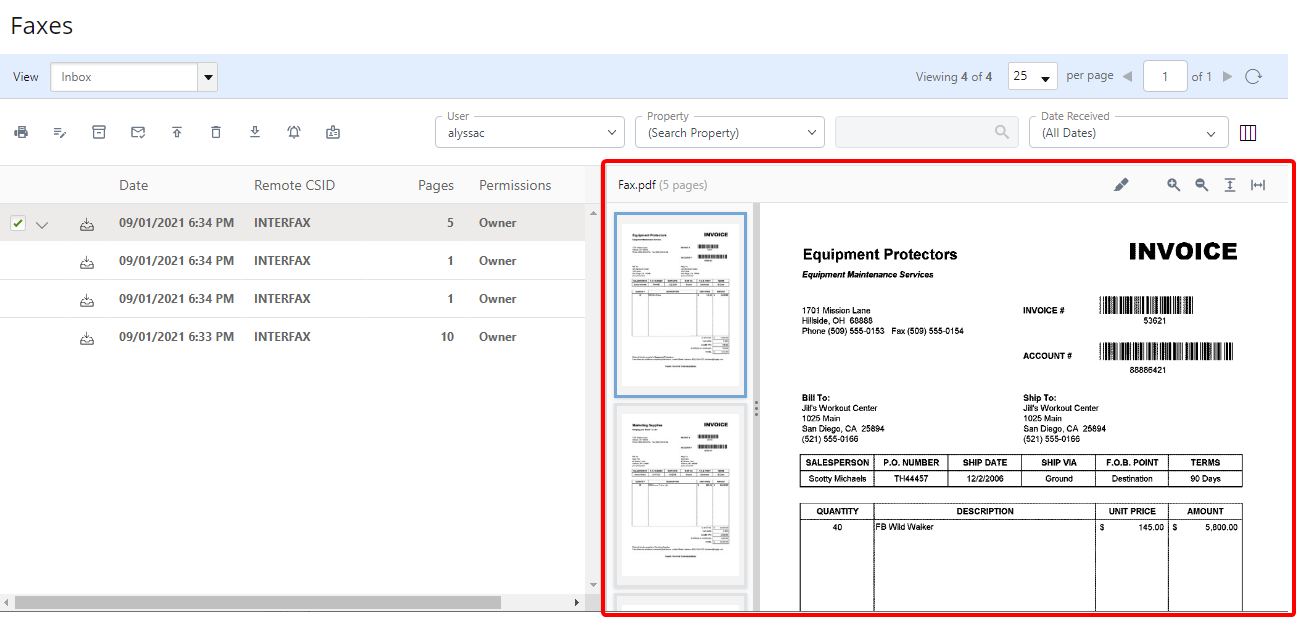
View a fax
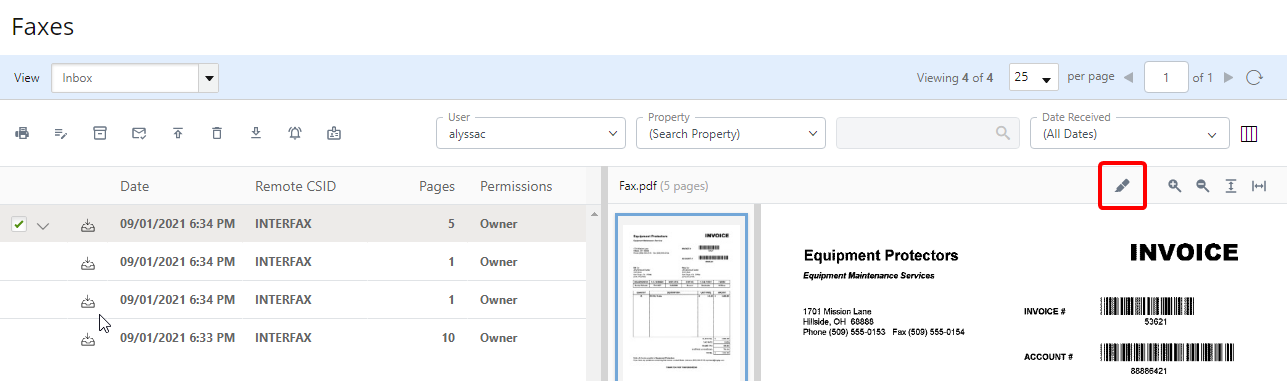
The Fax Preview Window displays your faxes. On the left is the thumbnail view, which displays thumbnails of each page within the fax. The right side displays a preview of the selected page.
The two sections of the window can be resized horizontally to fit your needs. Simply move the pointer to the line between the thumbnail view and the full size view. When the pointer becomes a  , drag the pointer to make the pane the desired size.
The options on the toolbar in the Fax Preview Window allow you to further customize your view. You can:
Redact document content: This tool allows a user with edit permissions to hide sensitive or private information that may be visible in a received fax. See Redact document content for more information.
Zoom in: Make the page larger (Ctrl++ keyboard shortcut).
Zoom out : Make the page smaller (Ctrl+- keyboard shortcut).
Fit to height: Fit the page to the height of the Document Preview Window (Ctrl+Shift+Up Arrow keyboard shortcut).
Fit to width: Fit the page to the width of the Document Preview Window (Ctrl+Shift+Down Arrow keyboard shortcut).
Faxes in your Inbox can also be viewed in the document viewer.
-
Right-click anywhere in the fax row or click the three dots next to the fax you want to view, then select View from the drop-down menu
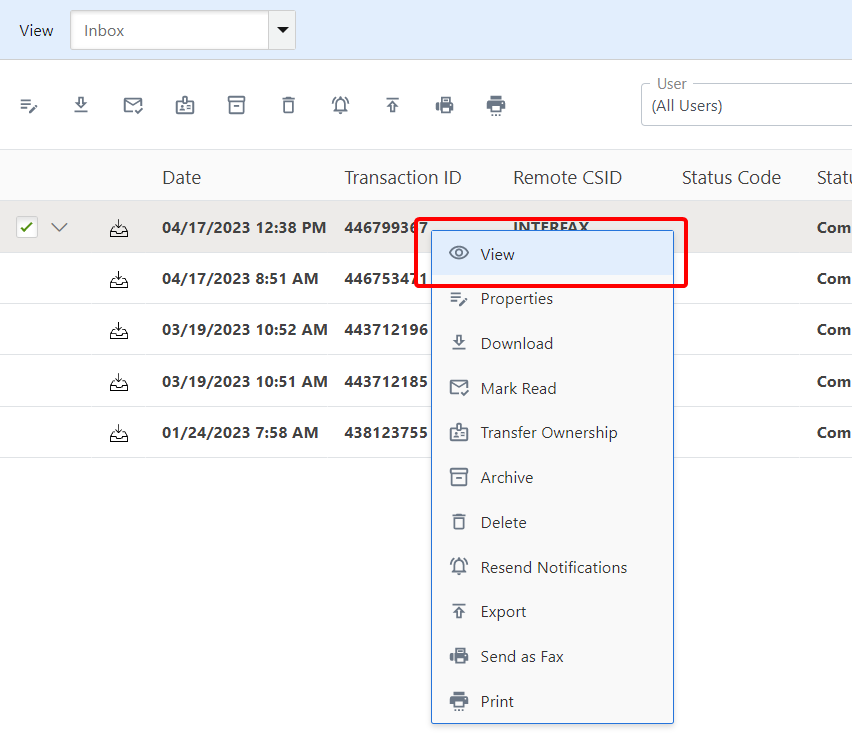
The Document Viewer will open in a separate tab in your browser.
Redact document content
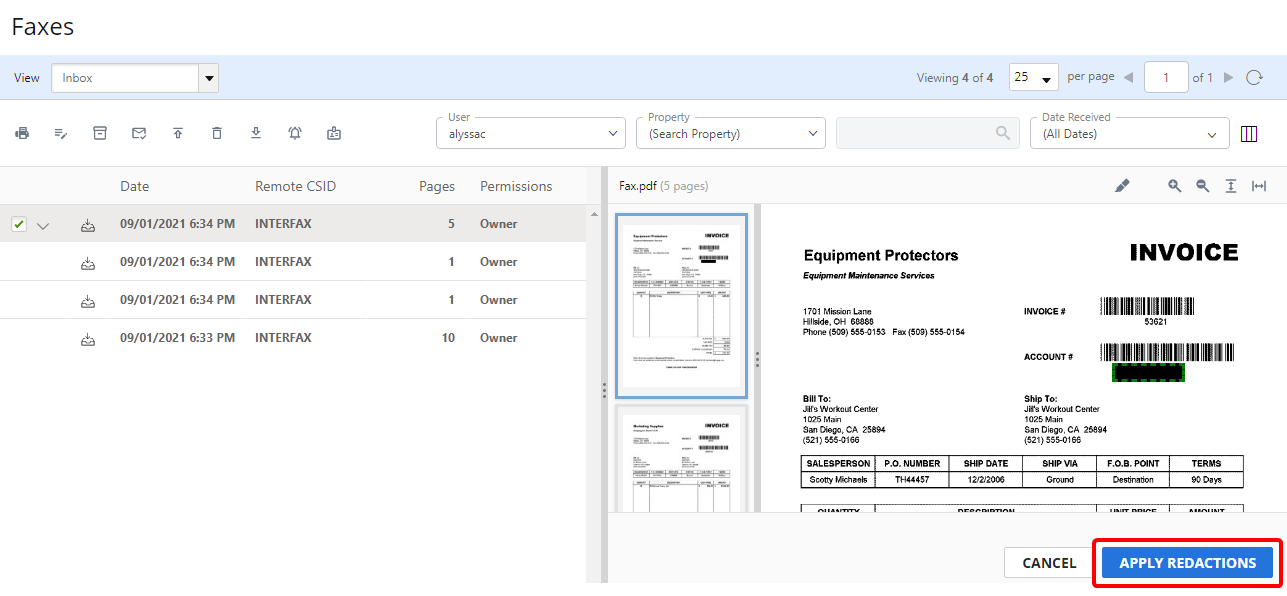
Both a fax’s owner, as well as any users with edit permissions with whom the fax has been shared, can redact document content. This tool allows a user to hide sensitive or private information that may be visible in a received fax. The tool permanently removes visible text and graphics from a fax by imprinting a black box over the selected area.
You will only have this option if the 'Allow redaction of content in documents' permission is enabled for your account.
-
Click Redact document content in the toolbar.
-
Click and hold down the left mouse button to draw a rectangle around the area you want to hide, then click Apply Redactions.
View or edit document properties
Both a fax’s owner, as well as any users with edit permissions with whom the fax has been shared, can edit document properties.
-
Perform one of the following:
-
Right-click anywhere in the fax row or click the three dots next to the fax you want to view properties for, then select Properties from the drop-down menu.
-
Or, select the check box next to a fax, then click Properties.

-
-
Modify document properties as needed, then click Save.
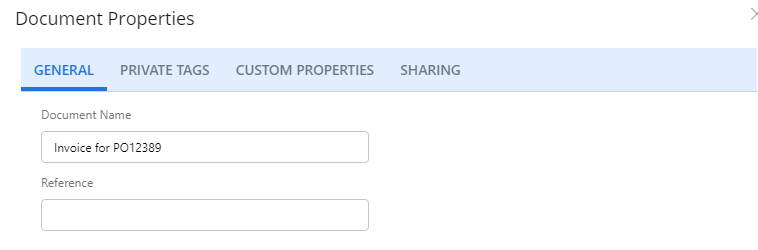
General tab
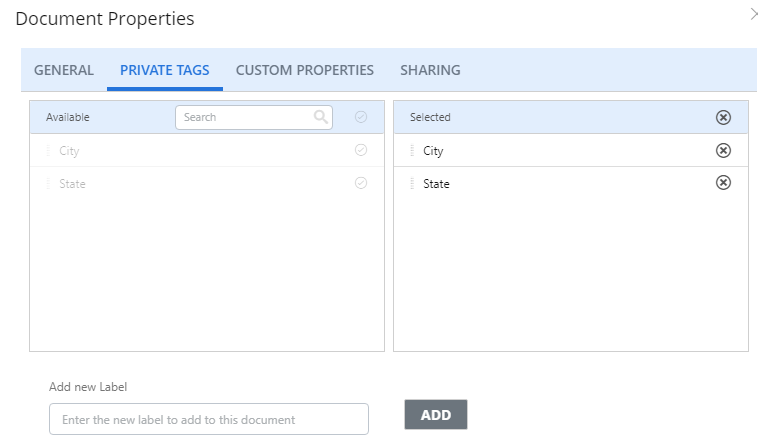
Private Tags tab
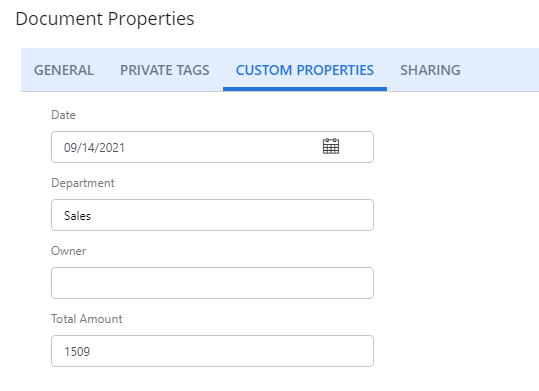
Custom Properties tab
Each of the faxes in your Inbox has several properties: time received, number of pages, shared time, and owner. Faxes can be further organized by adding customized properties. Account managers define custom properties that will be available here.
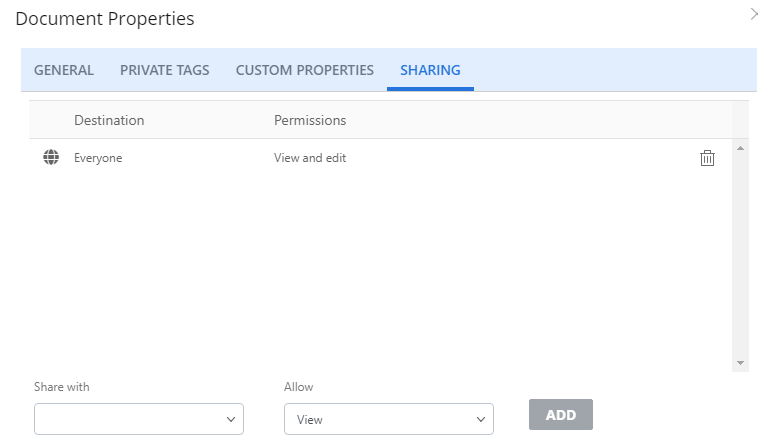
Sharing tab
See Share a document for more information.
Share a document
Sharing a document allows other users to view and possibly edit and/or share a document.
-
Perform one of the following:
-
Right-click anywhere in the fax row or click the three dots next to the fax you want to share, then select Properties from the drop-down menu.
-
Or, select the check box next to a fax, then click Properties.
-
-
Click the Sharing tab.
-
Select the user or group you want to share the document with from the Share with drop-down list, or select Everyone to share the document with everyone on the account.
-
Select the sharing permissions you want to allow from the Allow drop-down list. The following options are available:
-
View
-
View and edit
-
View and share
-
View, edit and share
-
-
Click Add.
-
Click Save.
As the owner of the document, you can remove or change sharing permissions for shared users at any time. To remove sharing permissions, click Delete item next to the user or group you have shared the document with.
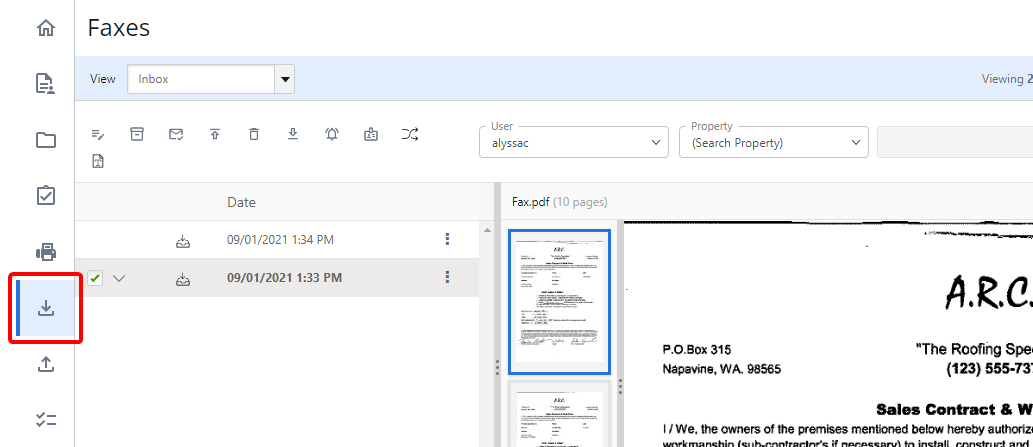
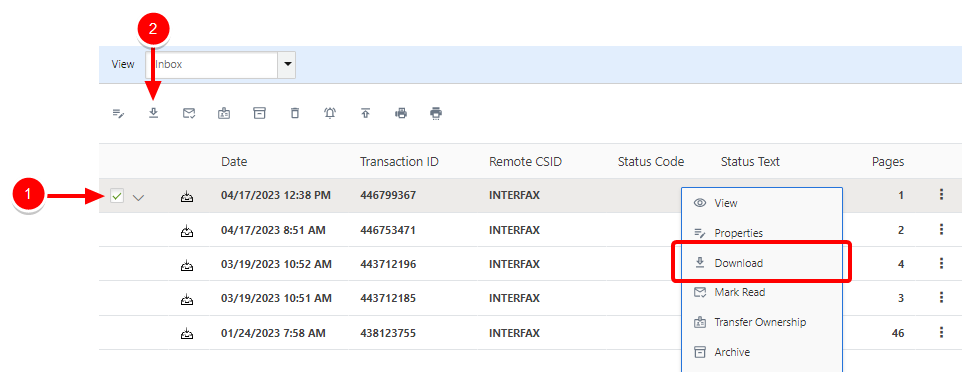
Download documents
-
Perform one of the following:
-
Right-click anywhere in the fax row or click the three dots next to the fax that contains the documents you want to download, then select Download from the drop-down menu.
-
Or, select the check box next to one or multiple faxes that contain the documents you want to download, then click Download.
-
-
Select a download format. Documents can be downloaded in PDF, TIFF, or PNG format.
-
In the Save As dialog box, navigate to the location where you want the file to be saved.
-
Edit the file name as necessary, then click Save.
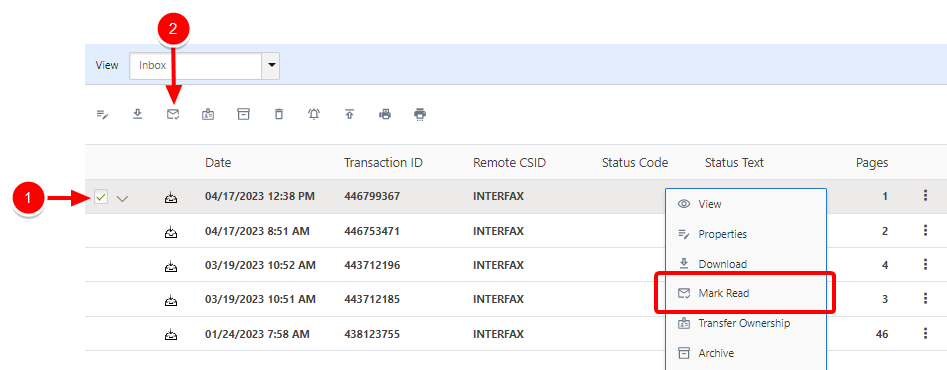
Mark a fax as read/unread
The CloudFAX Inbox works very similar to how an email Inbox works in terms of read and unread faxes. The date and details for new faxes are displayed in bold. You can acknowledge faxes by marking them as read. Once marked as read, they will no longer be displayed in bold.
To mark a fax as read, perform one of the following:
-
Right-click anywhere in the fax row or click the three dots next to the unread fax you want to mark as read, then select Mark Read from the drop-down menu.
-
Or, select the check box next to one or multiple unread faxes, then click Mark Read.
To mark a fax as unread perform one of the following:
-
Right-click anywhere in the fax row or click the three dots next to the read fax you want to mark as unread, then select Mark Unread from the drop-down menu.
-
Or, select the check box next to one or multiple read faxes, then click Mark Unread.

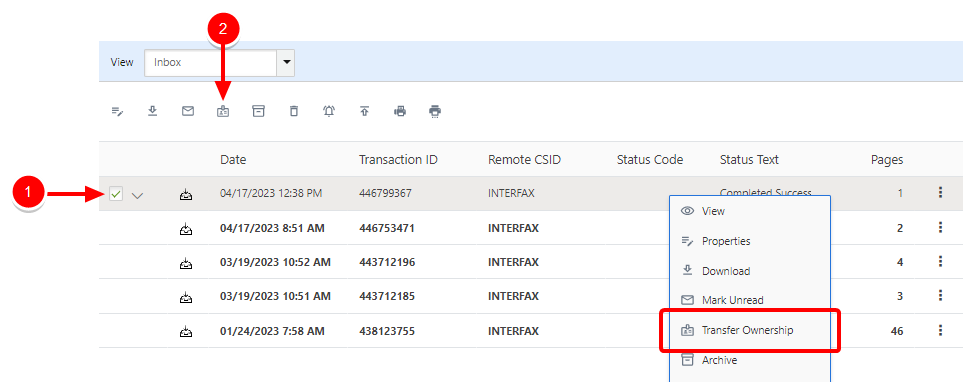
Transfer ownership of a fax
If you are the owner of a shared fax, you can transfer that ownership to another user.
-
Perform one of the following:
-
Right-click anywhere in the fax row or click the three dots next to the fax you want to share, then select Transfer Ownership from the drop-down menu.
-
Or, select the check box next to a fax, then click Transfer Ownership.
-
- Select the user you want to be the new owner of the fax from the Transfer ownership to drop-down menu. CloudFAX sends an automatic notification to the user.
- Select the Send message to user check box and type a message to send a personal message along with the notification.
-
To change your own access to this fax, select an option from the Retain access to document drop-down list. The following options are available:
- No Access: You will no longer have access to the fax.
- View: You can view the fax, but cannot edit or share it.
- View and edit: You can view and edit the fax, but cannot share it.
- View and share: You can view and share the fax, but cannot edit it.
- View, edit and share: You can view, edit, and share the fax.
-
Click Transfer.
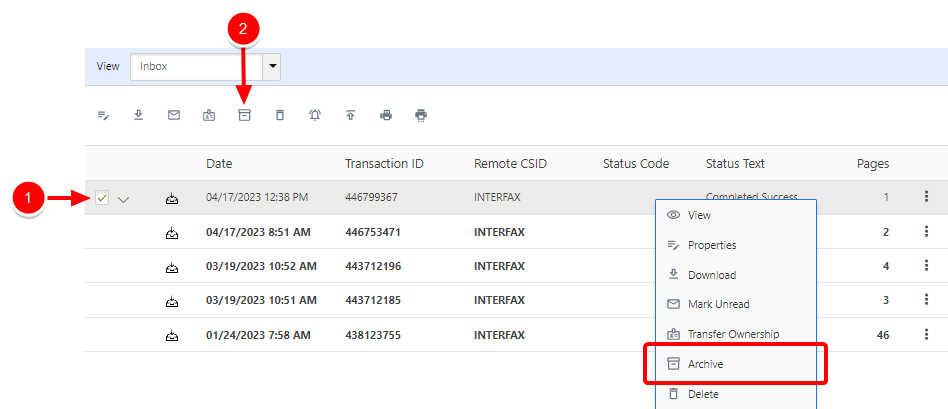
Archive a fax
Owners of a fax and users with 'View and edit' permission for a shared fax can archive faxes to hide them from the Inbox.
Archiving a fax hides it from users queues. Once hidden, users can change the Inbound Faxes view to Archived in order to view archived faxes and return them to the Inbox if necessary. See Archived for more information.
-
Perform one of the following:
-
Right-click anywhere in the fax row or click the three dots next to the fax you want to archive, then select Archive from the drop-down menu.
-
Or, select the check box next to one or multiple faxes, then click Archive.
-
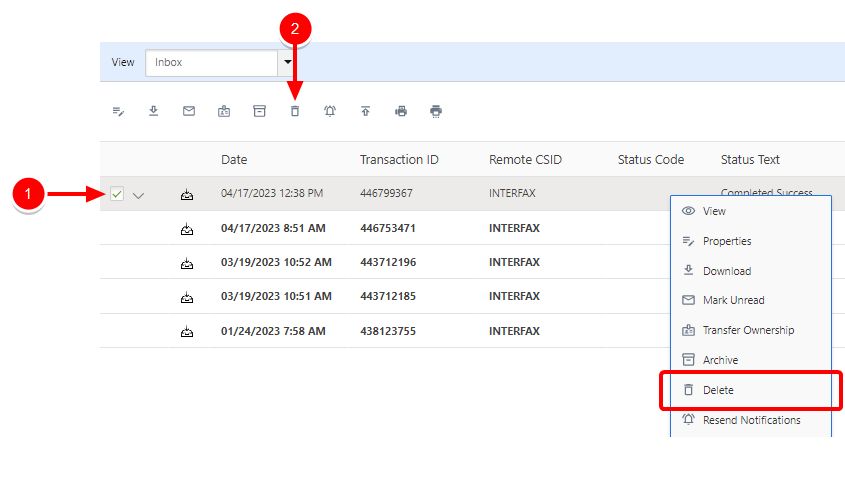
Delete a fax
The ability to delete faxes depends on the level of permissions you have for the fax.
- If you are the owner of a fax, you have the permission to delete the fax. The fax is moved to Trash and removed from the queues of all shared users.
- If you are not the owner of a fax, you still have permission to delete a fax. The fax is removed from your Inbox only. It is not moved to Trash, and all other shared users can still see the fax in their Inboxes.
Once deleted, faxes will be moved to Trash until deleted permanently 7 days from the time of deletion, or when manually cleared by you. See Trash for more information.
-
Perform one of the following:
-
Right-click anywhere in the fax row or click the three dots next to the fax you want to delete, then select Delete from the drop-down menu.
-
Or, select the check box next to one or multiple faxes, then click Delete.
-
- Click Delete to confirm the deletion.
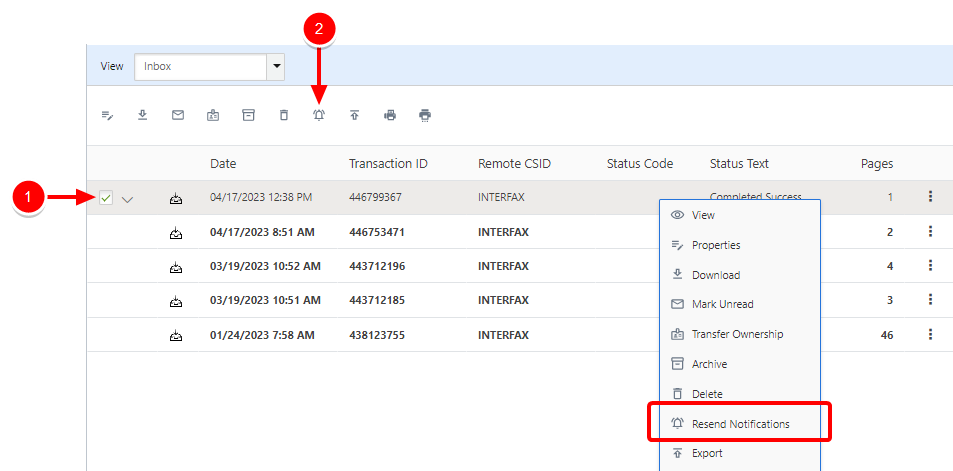
Resend Notifications
-
Perform one of the following:
-
Right-click anywhere in the fax row or click the three dots next to the fax you want to resend notifications for, then select Resend Notifications from the drop-down menu.
-
Or, select the check box next to one or multiple faxes, then click Resend Notifications.
-
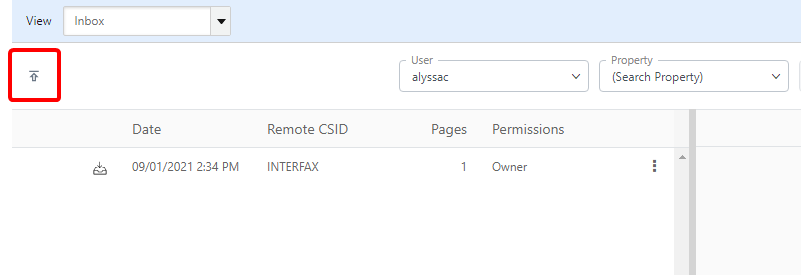
Export as CSV or XML
You can export a CSV or XML file that contains fax information for all faxes in your Inbox, or for specific faxes. The following information is contained in a CSV or XML export.

-
Ensure that you don't have any faxes selected in your Inbox, then click Export.
-
Select a file format.
-
In the Save As dialog box, navigate to the location where you want the file to be saved.
-
Edit the file name as necessary, then click Save
-
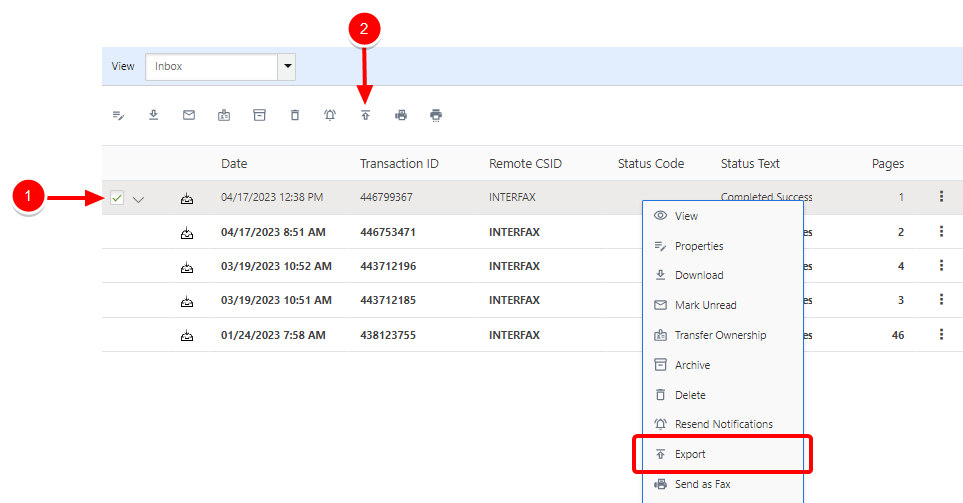
Perform one of the following:
-
Right-click anywhere in the fax row or click the three dots next to the fax you want to export as a CSV or XML file, then select Export from the drop-down menu.
-
Or, select the check box next to one or multiple faxes, then click Export.
-
-
Select a file format.
-
In the Save As dialog box, navigate to the location where you want the file to be saved.
-
Edit the file name as necessary, then click Save.
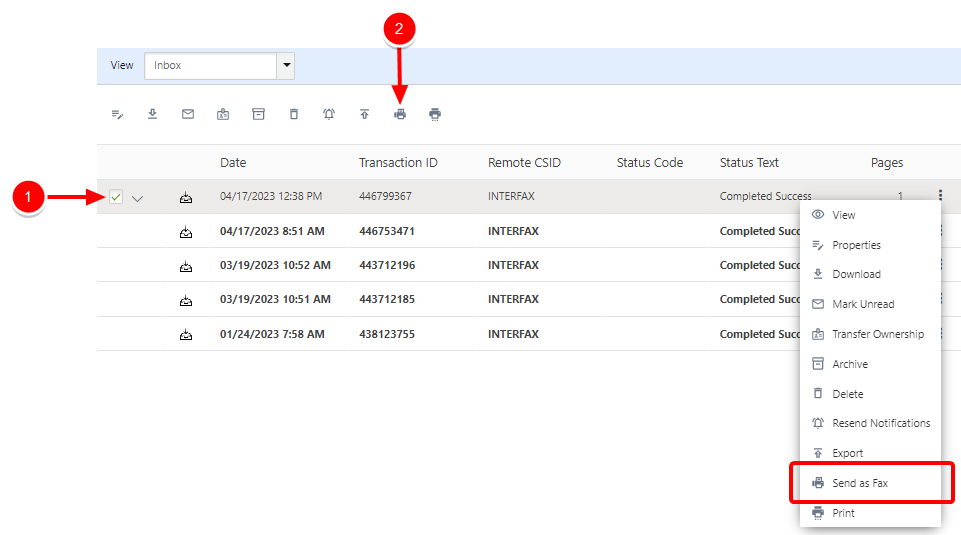
Send documents from an inbound fax as a fax
-
Perform one of the following:
-
Right-click anywhere in the fax row or click the three dots next to the fax that contains the documents you want to send as a fax, then select Send as Fax from the drop-down menu.
-
Or, select the check box next to one or multiple faxes that contain the documents you want to fax, then click Send as Fax.
-
Send Fax will open with the selected document(s) attached. See Send Fax for more information.
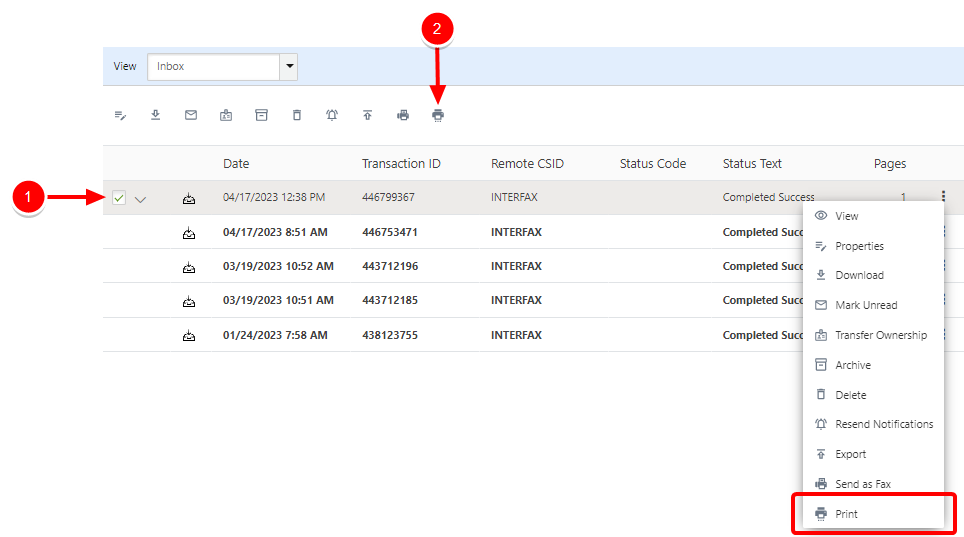
Print a fax
-
Perform one of the following:
-
Right-click anywhere in the fax row or click the three dots next to the fax that you want to print, then select Print from the drop-down menu.
-
Or, select the check box next to one or multiple faxes, then click Print.
-
-
In the Print dialog box, make any necessary changes to the print settings, then click Print.
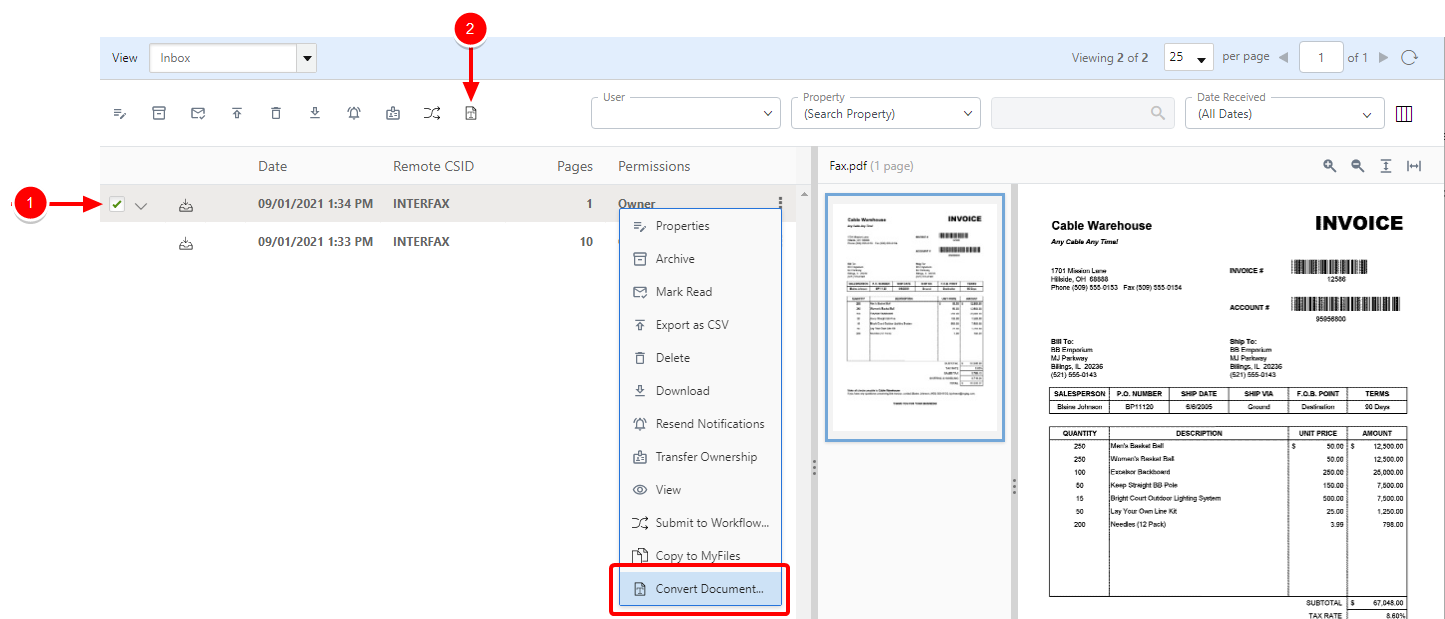
Convert a document
Any user that is assigned to a role with the Convert Documents permission can convert faxes to other formats. Users can convert documents into the following formats.
- PDF/A
- DOC, DOCX
- XLS, XLSX
- TIFF
- RTF
- TXT
-
Perform one of the following:
-
Right-click anywhere in the fax row or click the three dots next to the fax you want to convert, then select Convert Document... from the drop-down menu.
-
Or, select the check box next to one or multiple faxes, then click Convert Document....
-
-
Select the appropriate format in the Convert Document(s) window.
-
Click the down arrow next to the fax icon to expand and view fax versions and details.
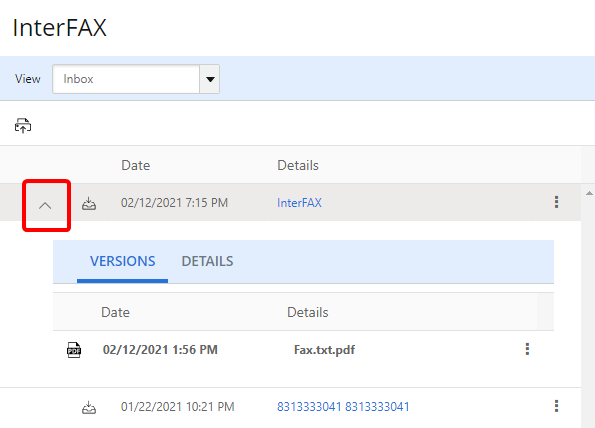
You can click the three dots next to the document to delete the document before the conversion is completed, if necessary.
-
Click Refresh to update the MyFiles list and complete the conversion. Large documents may require additional time for the conversion.
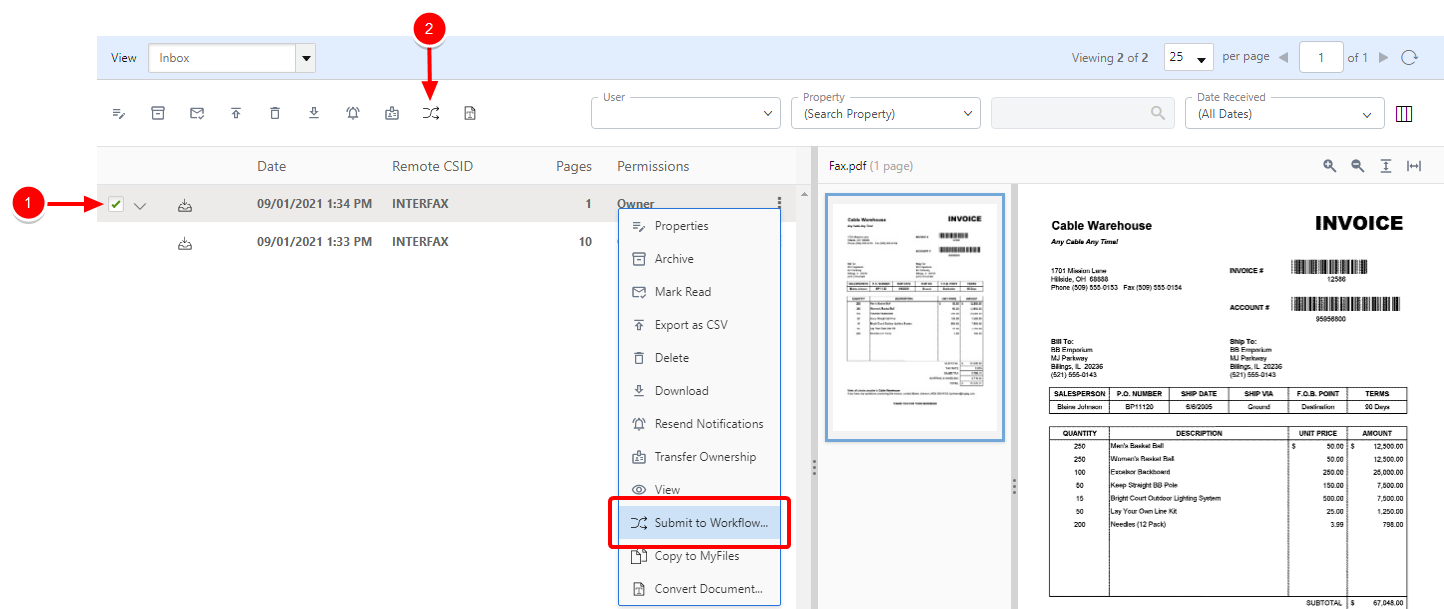
Submit a fax to a workflow
-
Perform one of the following:
-
Right-click anywhere in the fax row or click the three dots next to the fax you want to submit to a workflow, then select Submit to Workflow... from the drop-down menu.
-
Or, select the check box next to one or multiple faxes, then click Submit to Workflow....
-
- Click the name of the workflow you want to submit the fax to.
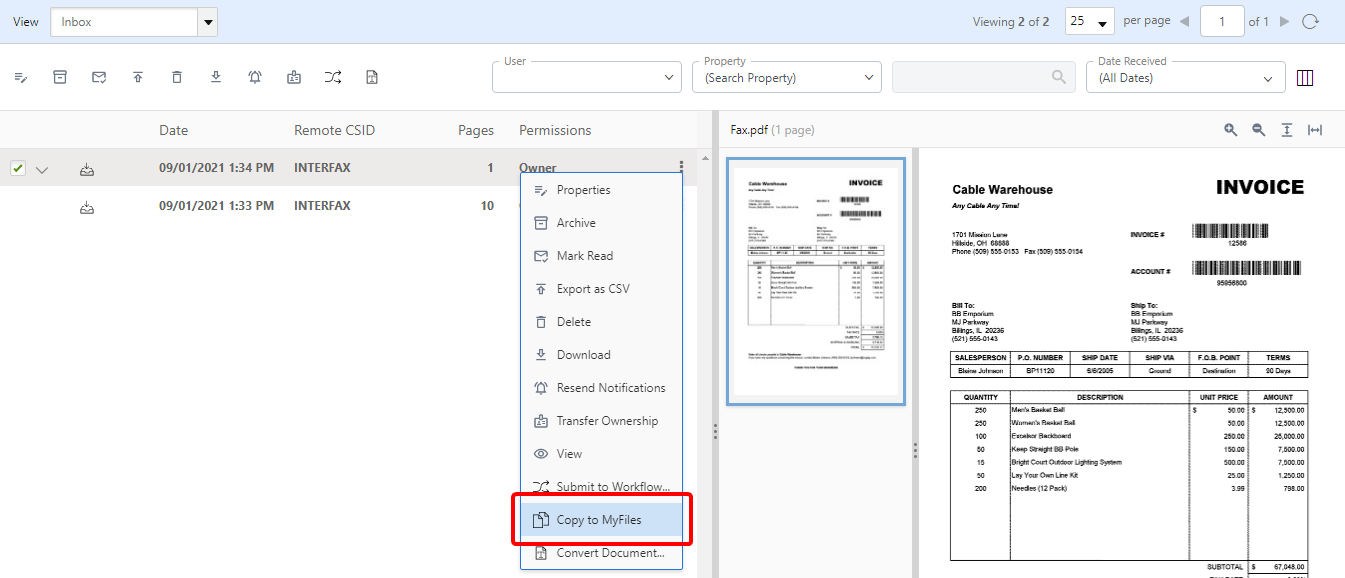
Copy a fax to MyFiles
-
Right-click anywhere in the fax row or click the three dots next to the fax you want to copy to MyFiles, then select Copy to MyFiles from the drop-down menu.
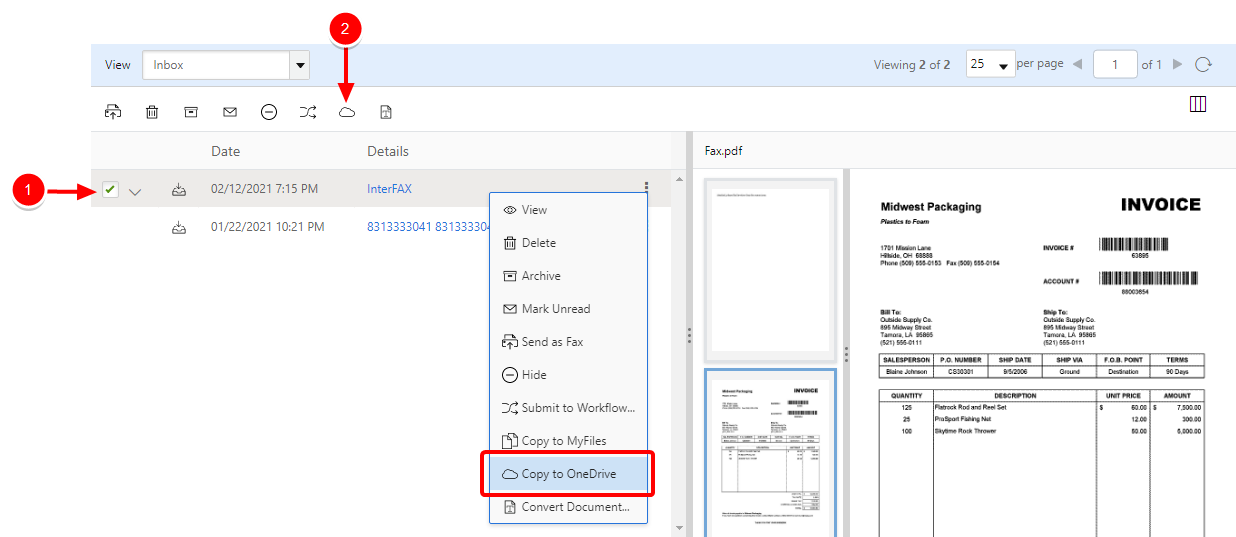
Copy a fax to OneDrive
You can copy faxes from your CloudFAX Inbox to your Microsoft OneDrive folders. This option will only be available if the OneDrive integration has been enabled for your account and you are assigned to a role that has permission to the integration.
-
Perform one of the following:
-
Right-click anywhere in the fax row or click the three dots next to the fax you want to copy to OneDrive, then select Copy to OneDrive from the drop-down menu.
-
Or, select the check box next to one or multiple faxes, then click Copy to OneDrive.
-
- Select the appropriate OneDrive folder to copy to.
- Click Copy.
Note: If the document already exists in OneDrive, then the copied document appears in the OneDrive folder with a date and time stamp appended to the filename.