Editing a user profile
For more information, see Accessing user data.
Editing user information
You can make changes to general information and custom fields in a user's profile.
To make changes to a user's profile:
-
Select
 Home in the left pane, and then select Profiles.
 -
Locate the user's profile in the table, and then select the phone number link.
The user's profile opens.

-
To edit the general information at the top of the profile, select Actions at the top of the page, and then select Edit Profile.
The Edit Profile form lists the profile details.

-
Enter your changes in one or more fields, and then select Update.
-
To add, edit, or delete values in the custom fields on the user profile, at the bottom of the form, select the Custom Fields tab.
-
To add or edit an entry, locate the field name, select
 Menu at the end of the row, and then select Edit.
 The Edit field form opens.

Add or edit the value in the field, according to the data type. When you are done, select Create, to add a new value, or Update to edit an existing value.
-
To delete an entry in a profile field, locate the field name containing the value to delete, select
 Menu at the end of the row, and then select Delete. Select OK to confirm.
-
Deleting a profile
You can delete a user's profile. To delete a user's profile:
-
Select
Home in the left pane, and then select Profiles.
-
Locate the user's profile in the table, and then select the phone number link.
The user's profile opens.
-
Select ACTIONS at the top of the page and select Delete Profile.
A confirmation modal appears to confirm if you want to delete the profile. Select “YES, DELETE PROFILE” to delete the profile.
Note: Permanent deletion is dependent on your external systems and CRM syncs. If the profile is not fully removed from platforms integrated with Mobile Commons, it may be recreated. Deleting the profile deletes the profile and all its associated data. These deleted profiles appear as non-clickable links in the Inbox and Outbox pages with no actions menu.
![]()
Deleting a user's address
To delete a user's address in their profile:
-
Select
Home in the left pane, and then select Profiles. -
Locate the profile in the table, and then select the phone number link.
-
Review the profile details at the top of the form.
Note: You cannot reverse this action, so make sure that you intend to delete this user's address.
-
Select Actions at the top of the page, and then select Delete Address.
Subscribing a user to a campaign
Caution: You may add a user or group of users to a campaign only if they had given permission to receive messages from your company, for example, if you are entering a user or group who have added their names to a sign-up sheet.
To subscribe a user to a campaign directly from their user profile:
-
Select
Home in the left pane, and then select Profiles. -
Locate the user in the Profiles table, and then select the phone number link.
-
Select the SUBSCRIPTIONS tab to open the Subscriptions table, which lists the status of the user's subscriptions, Active or Opted Out.
-
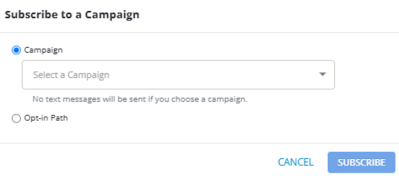
Above the Subscriptions table, on the right, select SUBSCRIBE TO CAMPAIGN.
The "Subscribe to Campaign" modal opens, displaying radio button options for both "Campaign" and "Opt-In Path."
-
Campaign: Select a campaign from the drop-down list. When you select a campaign, the user will become an active subscriber to the campaign as soon as you select SUBSCRIBE. They will receive broadcast and message schedule messages but not the Welcome message for the opt-in path.
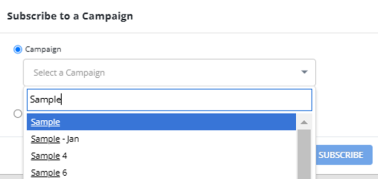
You can also search the campaigns by entering the campaign names in the search field available within the campaign selection drop-down menu. The search supports partial matches, making it easier to find the desired campaign. Scroll through the filtered list and select the appropriate campaign.
-
Opt-in Path: When you select an opt-in path, the Welcome message for the opt-in path will be sent to the user as soon as you select SUBSCRIBE.
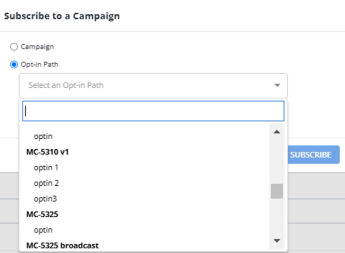
Note: In the Opt-In Path drop-down, campaigns are displayed in black bold font, with their associated opt-in paths listed below them.
-
-
Select SUBSCRIBE.A confirmation message appears to confirm the subscription.

Note: If the user has previously opted out of the selected campaign, the profile will not be subscribed to the campaign.
Opting out from subscriptions
A user may remove their mobile device from a program by texting an opt-out keyword to the code provided. You can opt a user out from one subscription or from all subscriptions.
Tip: Be respectful of the mobile user’s wishes and act promptly on opt-out requests.
To opt a user out from all subscriptions:
-
Select
Home in the left pane, and then select Profiles. -
Locate the profile in the table, and then select the phone number link.
-
Select Actions at the top of the page and select Opt out from all.
The user status at the top of the page changes to
 .
.
To opt a user out of one subscription:
-
Select
Home in the left pane, and then select Profiles. -
Locate the profile in the table, and then select the phone number link.
-
Select the Subscriptions tab.
-
Locate the campaign name, select
Menu at the end of the row, and then select Opt-Out. -
Select OK to confirm.
The subscription status in the Status column changes to
.
Reactivating user subscriptions
If a user has opted out of their subscriptions accidentally, you can reactivate one or all of the user's subscriptions.
Caution: You may reactivate a user only if you are certain that they opted opt accidentally. This action will be audited for compliance with the prohibition on sending messages without permission.
To restore all subscriptions for a user:
-
Select
Home in the left pane, and then select Profiles. -
Locate the profile in the table, and then select the phone number link.
-
Select Actions at the top of the page and select Reactivate.
The user status at the top of the page changes to
 .
.
To restore one subscription for a user:
-
Select
 Home in the left pane, and then select Profiles.
 -
Locate the profile in the table, and then select the phone number link.
-
Select the Subscriptions tab.
-
Locate the campaign name, select
Menu at the end of the row, and then select Reactivate. -
Select OK to confirm.
The subscription status in the Status column changes to
.
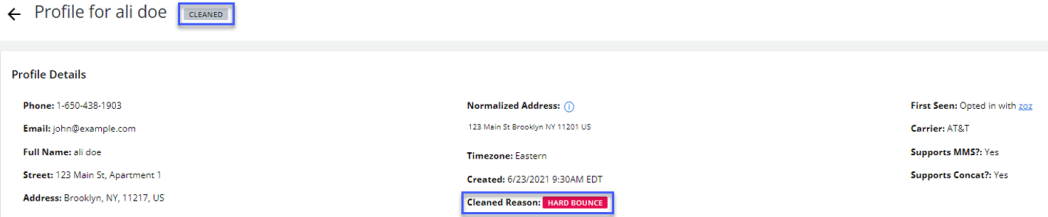
Unclean a cleaned profile (applicable for cleaned profiles only)
You can unclean a cleaned profile accessible through the “Cleaned Profiles” section. When a profile is cleaned, a cleaned reason and cleaned tag  additionally appears on a user’s profile in the profile details.
To unclean a cleaned profile:
-
Select
 Home in the left pane, and then select Cleaned Profiles.
 -
Locate the profile to unclean from the cleaned profiles table.
-
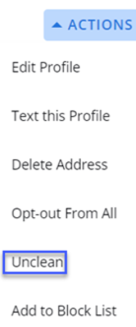
Select Actions at the top of the page and select Unclean.
Once uncleaned, the profile will be accessible in the “Profiles” section and will no longer appear in the “Cleaned Profiles” section. For more information, see Cleaned Profiles
Blocking a user
You carrier will provide a deactivation list with phone numbers that are no longer in service or that have been recycled. You must process deactivations within three business days.
Caution: Use caution when blocklisting a user.
Note: If a mobile user changes carriers, you cannot transfer the record to the new carrier. The user must opt-in to your campaign again.
To block a deactivated user:
-
Select
Home in the left pane, and then select Profiles. -
Locate the profile in the table, and then select the phone number link.
-
Select Actions at the top of the page and select Add to Block List.
The user profile and all of their subscriptions are marked Opted out.
Note: If you are certain that the user was blocklisted by mistake, you can restore messaging to the user. From the Actions menu at the top of the page, select Remove from Block List . You will also need to reactivate any subscriptions. For more information, see Reactivating user subscriptions.