Create a Project
This is the second topic of the Use Projects guide.
When you first launch OL Connect Automate with the Projects feature enabled, a dialog appears prompting you to either create a new project or clone an existing one.
-
Create Project initializes a local Git repository on your system, which you can connect to a remote repository later if desired.
-
Clone Repository imports an existing project from a remote Git repository (for example, from GitHub).
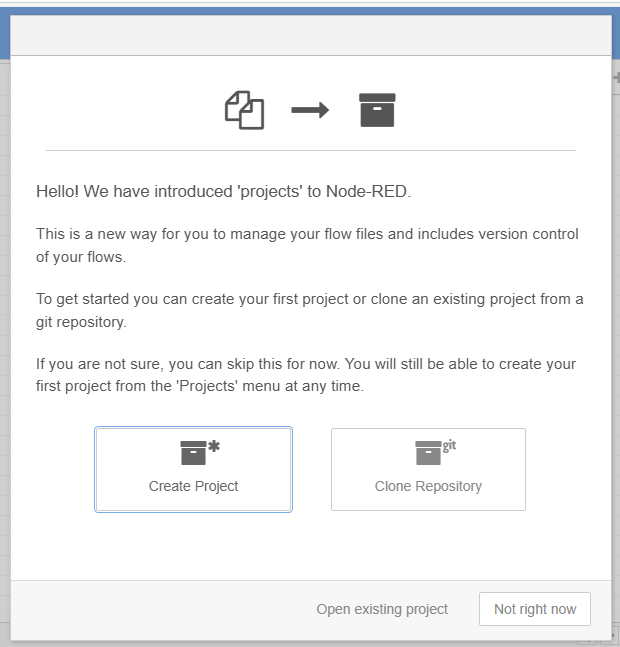
You can either walk through this setup process or click Not right now to skip it and configure projects later. To configure projects later, select the Projects > New options in the upper right menu. The initial setup process uses a series of dialogs, while the later setup process uses a single larger dialog that collects the same information.
Click Create Project to start setting up a new project.
Setup version control client
OL Connect Automate uses Git for version control. Git tracks changes to your project files, allowing you to commit updates locally and push them to remote repositories such as GitHub or GitLab.
When you commit changes, Git records the username and email address of the person making those changes. These details identify who made each change in the project’s commit history. This is the first information you enter when creating a project. You can modify this information later, in the Git Config section of the User Settings dialog, located in the Menu.
-
Enter a Username (can be any string).
-
Enter your Email address. The email address is not validated.
-
Click Next to continue
You can modify this information later, in the Git Config tab of the User Settings dialog, available from the upper right menu.

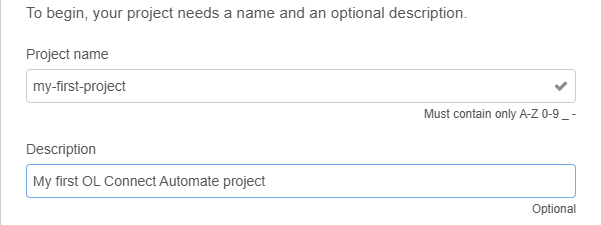
Name your project
Every project needs a name. A description is optional.
-
Enter a Project name. The name cannot have spaces, and only include letters, numbers, dash, and underscore. The entered name is validated against these rules. If the name is not accepted, please review and re-enter.
-
If desired, enter a Description.
-
Click Next to continue
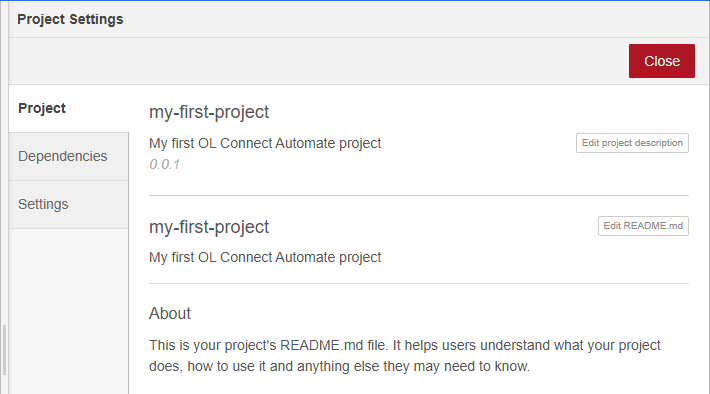
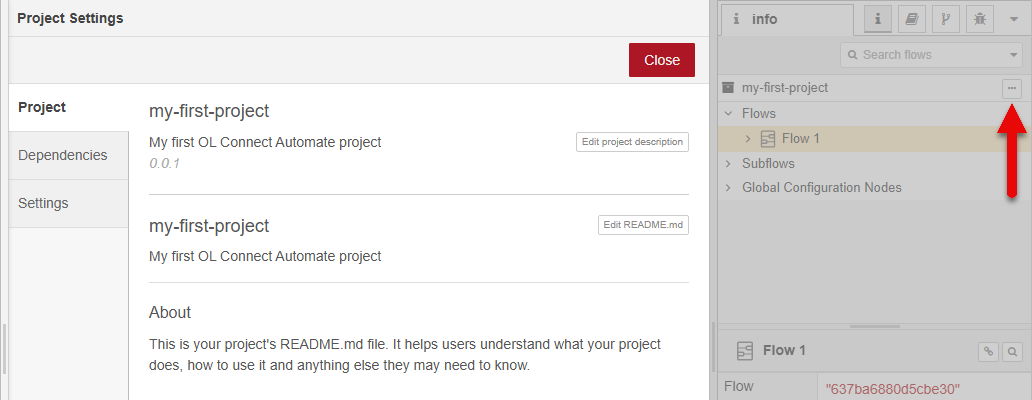
The Project information can be viewed and modified using the Projects Settings accessed via the Projects option in the menu.
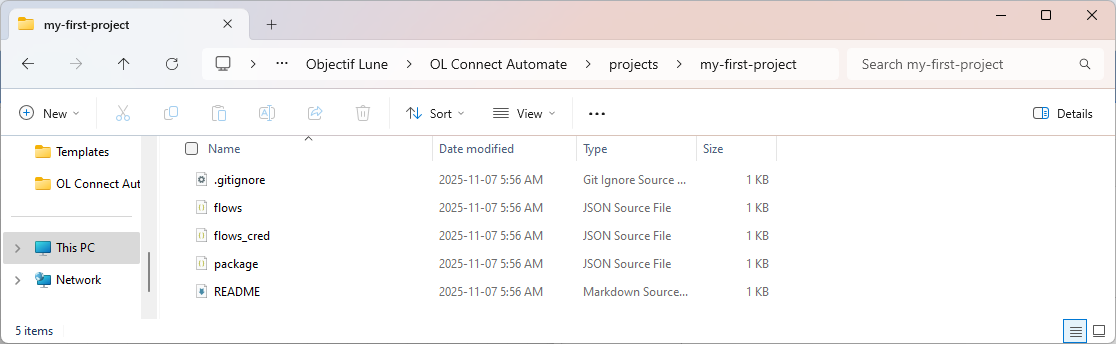
Create your project files
A project contains your flow file, a README file and a package.json file. It can contain any other files you want to maintain in the Git repository such as OL Connect resources like templates and data mapping configurations. Additional files are added directly to the project folder, as described below in Project location.
When creating the project, you can change the name of the Flow file or use the default, and click Next to continue.
The README file can be viewed and edited after the project has been created. Go to the Project Settings, via the Projects option in the upper right menu.
The README file serves as the main documentation for your project, providing context and guidance for anyone working with or reviewing it, similar to README files commonly used in Git repositories. The content supports markdown formatting for rich text and structured documentation.
The package.json file defines essential project information and it includes a list of node modules the project depends on. The Node-RED editor tracks what nodes you are using in a flow and helps you to keep that list of dependencies up to date. This ensures consistency across environments and makes the project portable, reproducible, and easy to share or update with colleagues or customers for example through version control.
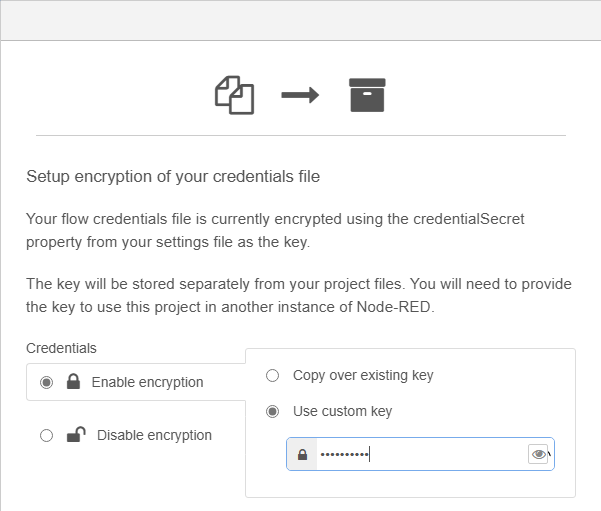
Encrypt your credentials file
OL Connect Automate stores your flow credentials outside of the project folder, in an encrypted credentials file. If you move or share your encrypted project, for example, to another instance of Node-RED or OL Connect Automate, you’ll need the key to decrypt and access the credentials.
-
When you create a project, you can choose to Disable encryption. The default, Enable encryption, is recommended.
-
If encryption is disabled, it can be enabled later from the Project Settings.
-
Once encryption is enabled, it cannot be disabled.
-
-
You can use the existing key, or create a custom key.
-
The existing encryption key is randomly generated during installation, and stored in
olca.settings.json. -
A custom key is recommended. Choose a credential key that’s easy to remember (but not that easy), or generate a strong, secure key using a password and store it in a password management tool.
-
The encryption key can updated in the Project Settings.
-
Click Create Project to finalize the project configuration. This action creates a local project folder with an empty flow file which is ready for you to start building your solution.

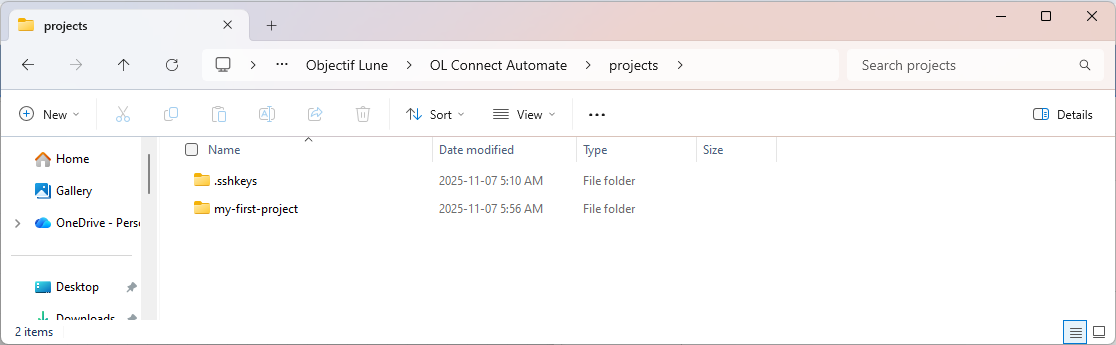
Project location
By default, all projects are stored in the following location:
C:\ProgramData\Objectif Lune\OL Connect Automate\projects
For example, if you created a project named my-first-project, the corresponding folder will be:
C:\ProgramData\Objectif Lune\OL Connect Automate\projects\my-first-project
With the steps above, steps, you’ve created a local project, which is managed by your local Git instance. This enables basic version control, allowing you to store intermediate versions of your flow, any OL Connect resources added to the project folder, and any other files added to the project folder.
Update Project Settings
As noted above, you can use Project Settings, accessible from the upper right menu to edit the project description, README content, encryption, and dependencies.
You can also access Project Settings by clicking the Show Project settings icon, the three dots, in the info panel.
Multiple Projects
You can create multiple projects. Setting up the version control client only needs to be done for your first project. To switch between or delete projects, select Projects in the upper right menu, and select Open. Your current projects are shown, and you can switch to or delete other projects, with the option to clear the workspace when switching projects.
Now that your project is created, you can Work with Projects.