Create a New Multi-Page PowerPoint Template Using a Custom Template
Note: A PowerPoint template must be created and uploaded into PowerPoint Branding before it will show up in this list. See Create a New Custom PowerPoint Template and Upload a PowerPoint Template in PowerPoint Branding for more information.
1. Click Power Point
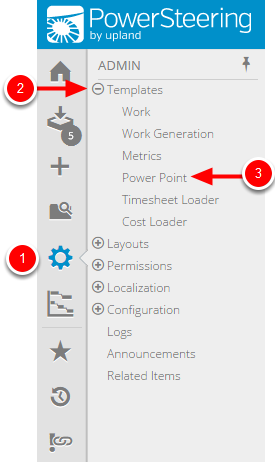
- On the Icon Bar click the Admin button.
- Click Templates to expand the menu, then click Power Point.
2. Click New Template
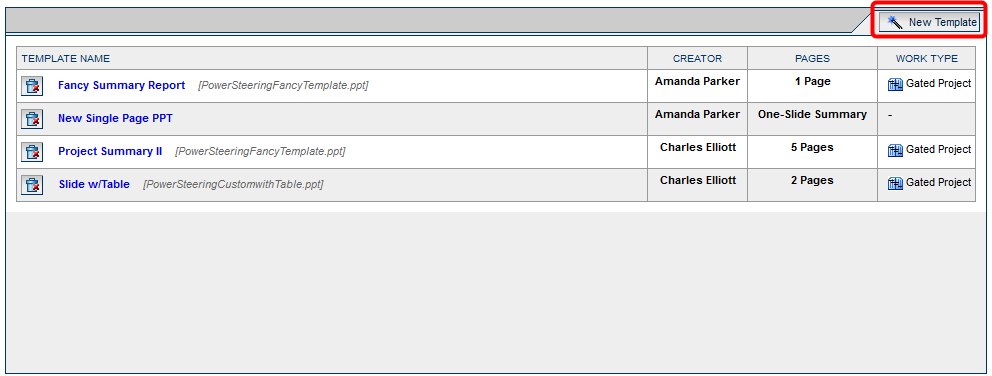
- Click New Template.
3. Enter Template Details
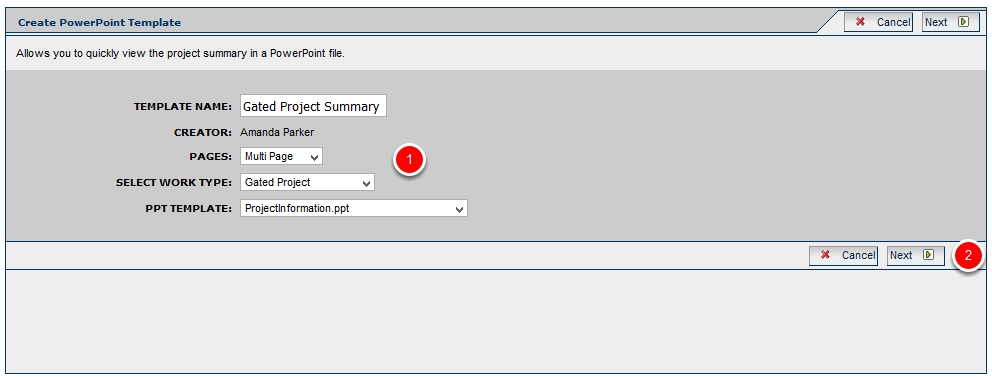
- Fill in the PowerPoint template details.
- Click Next.
Template Name: The name of the PowerPoint template. This name will display under Power Point option on the Project Navigation Menu.
Pages: Determines the number of pages in the PowerPoint template.
- Single Page: Select this option if you want to use the pre-formatted single-page PowerPoint template provided by PowerSteering.
- Multi Page: Select this option if you want to use a PowerPoint template that has been uploaded to PowerPoint Branding.
Select Work Type: Determines the work type that the PowerPoint template will be attached to. This is only an option for multi page templates.
PPT Template: Determines which PowerPoint template will be used. This is only an option for multi page templates.
4. Click Slide 1. New Slide
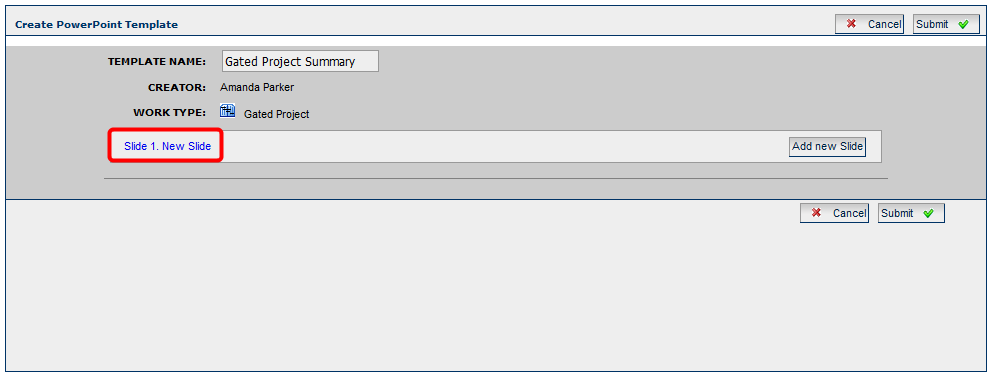
- Click the Slide 1. New Slide hyperlink to specify the data that you want to include on the first slide.
5. Enter Slide Information
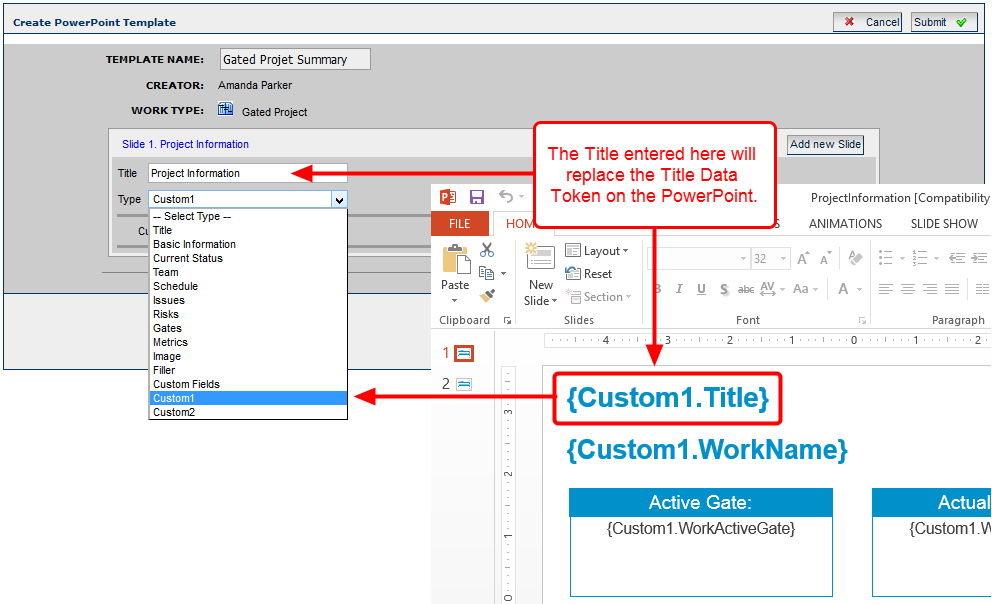
- Enter a Title for the slide. The title will replace the
- From the Type drop-down menu, select the type of data to display on the slide.
Note: For custom PowerPoint templates, the Type will match the data token you entered when creating each slide. For example, {Custom1.Title} should be entered on the first slide in the template, so you should see Custom in the Type drop-down menu. See Create a New Custom PowerPoint Template for more information about adding these data tokens during template creation.
6. Add Additional Slides (Optional)
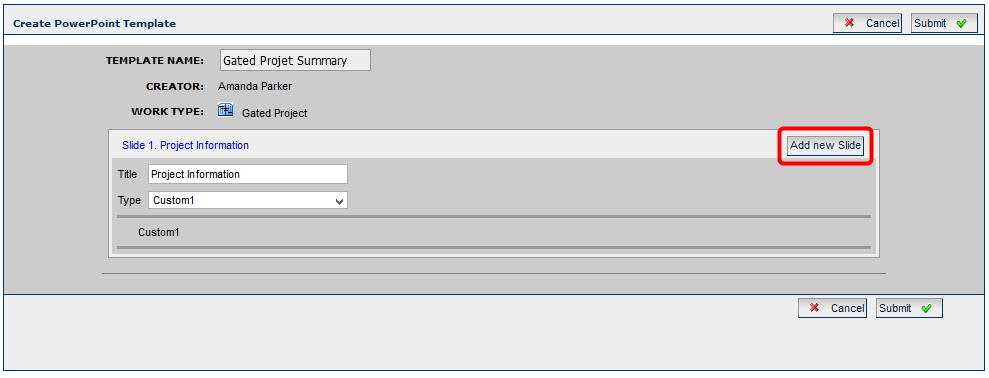
- If your custom PowerPoint template contains more than one slide, click Add new Slide.
6.1 Click Slide 2. New Slide
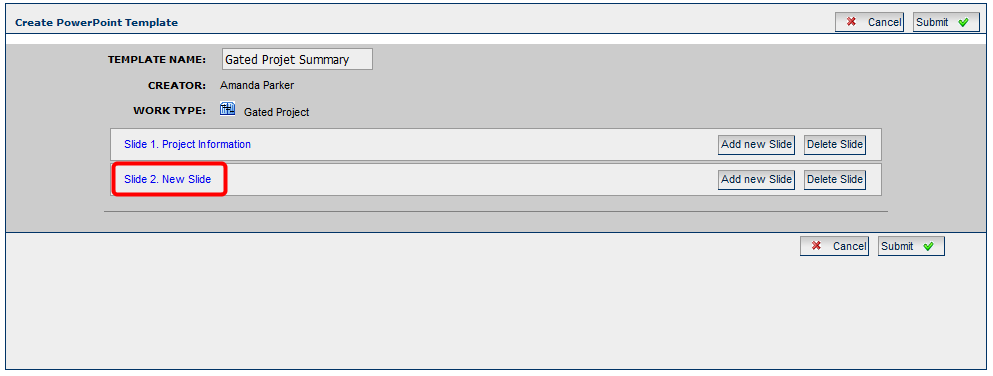
- Click the Slide 2. New Slide hyperlink to specify the data that you want to include on the second slide.
6.2 Enter Slide Information
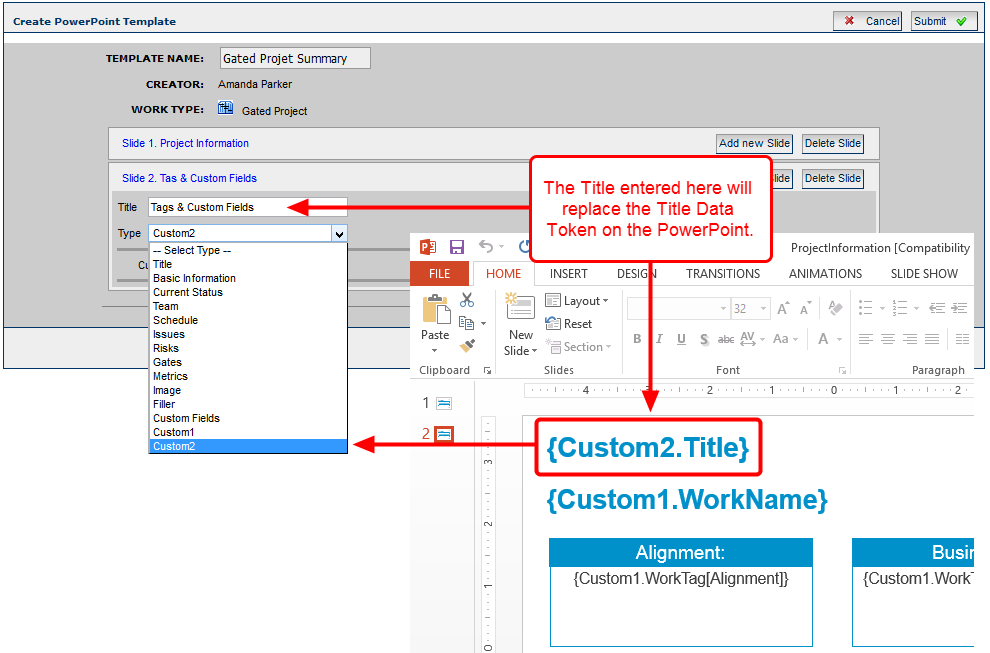
- Enter a Title for the slide.
- From the Type drop-down menu, select the type of data to display on the slide.
Note: For custom PowerPoint templates, the Type will match the data token you entered when creating each slide. For example, {Custom2.Title} should be entered on the first slide in the template, so you should see Custom2 in the Type drop-down menu. See Create a New Custom PowerPoint Template for more information about adding these data tokens during template creation.
7. Click Submit
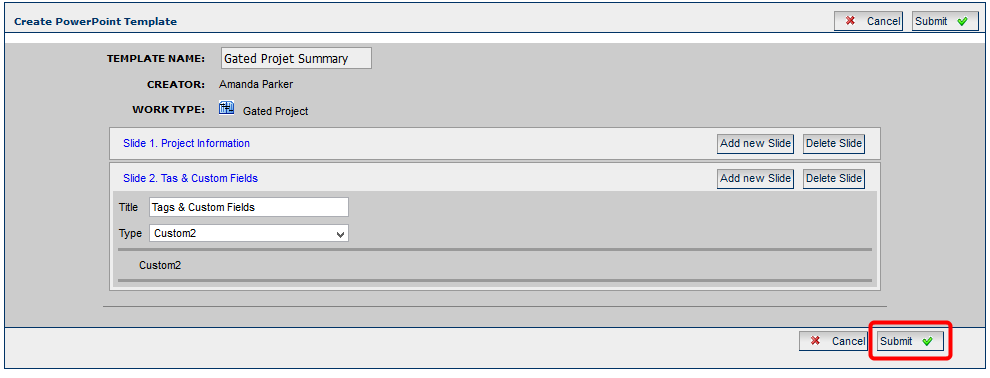
- When all of your slides have been added, click Submit.
8. View Template
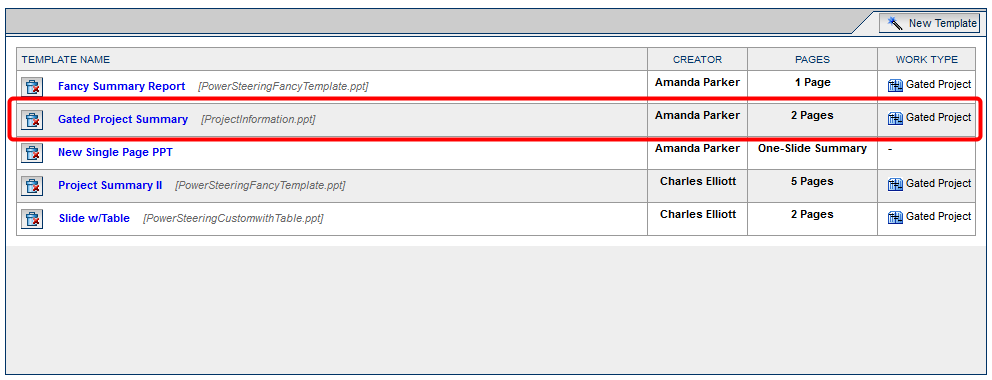
- View the newly created PowerPoint template. This template will now appear under the PowerPoint menu on the Project Navigation Menu for the associated work type.