Change the Status of Non-Gated Work
Statuses are used to communicate the current state of a work item to PowerSteering users. At a glance, they allow individuals to understand where the work item stands, what progress has been made, and what challenges might be present.
Note: Changing Statuses can affect the work item's schedule. Actual Start Dates are captured on PowerSteering work items when a non-active status (like "Proposed" and "Not Started") is changed to an active one (like "On Track").
The following are non-active Statuses:
- Proposed
- Not Started
- Completed
- Canceled
- Deferred
The following are active Statuses:
- On Track
- Needs Attention
- Delayed
- Track
Tip: PowerSteering administrators have the ability to customize the names of Statuses. See Manage Work Status Names for more information.
Tip: Comments can be enforced when work items are changed to specific Statuses. For example, comments can be made mandatory when users change the Status of a work item to "Canceled" or "Delayed". When this occurs, a "Comments" window appears: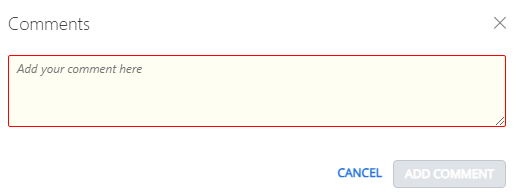
If the user closes the window without saving a comment, the Status will not be changed. The saved comment can be seen when users scroll over the the "Status" label on a work item's Summary Page:
This feature cannot be enabled by users or administrators; you must reach out to your PowerSteering representative if this is something you would like to implement for your PowerSteering environment.
Note: See Changing the Status of Gated Work for information on working with Statuses of Gated Projects.
Work statuses can be changed from multiple locations in PowerSteering:
Changing Statuses on the Summary page
Users most commonly change the Statuses of work items directly on the Summary page.
To change a Status from the Summary page:
Before You Start: Users will require the "Edit Status" Project permission on the work item in order to change the status.
-
Navigate to a work item.
Tip: Selecting Project → Most Recent Project from the Navigation Menu is an easy way to navigate to the work item you most recently viewed.
-
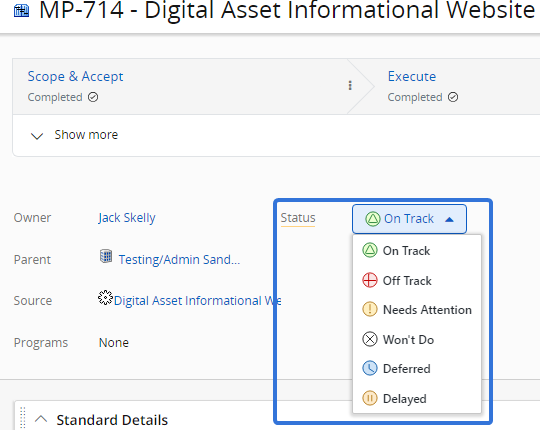
Directly select the work item's Status:

-
Select a new Status for the work item:
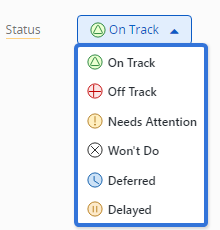
The work item's Status will immediately be changed as soon as the new Status is selected:

Changing Statuses from the "Descendants" Module
Users can change the Statuses of a work item's Descendants by using the "Descendants" module on the Summary page:
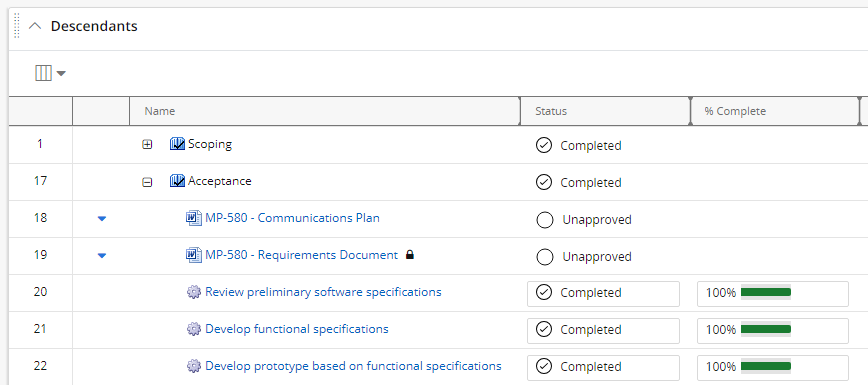
To change a Status from the Descendants module:
Before You Start: Users will require the "Edit Status" Project permission on a work item in order to change its status. If the "Edit Status" permission has not been given to "Higher" as well as "Project" on the original work item, the user will be able to edit the Status of the original work item but not the Status of its Descendants.
-
Navigate to a work item.
Tip: Selecting Project → Most Recent Project from the Navigation Menu is an easy way to navigate to the work item you most recently viewed.
-
Scroll down to the "Descendants" module:
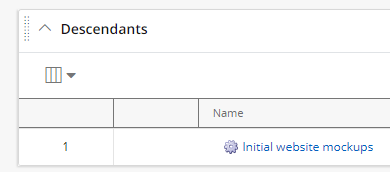
Note: The "Descendants" module can be renamed in PowerSteering. It might be called something else in your PowerSteering environment. Speak to an administrator if you cannot find the module.
-
Directly select the Status of one of the Descendants:

-
Select a new Status for the Descendant:
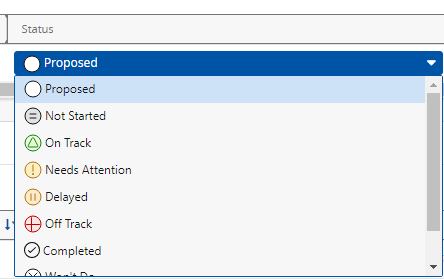
-
Select the Save button in the top right-hand corner of the module:
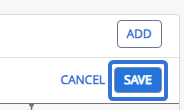
After selecting Save, the new Status will be saved for the Descendant.
Changing Statuses from Project Central
Users can change work item Statuses directly from Project Central. From here, they have the ability to change the status of the original work item as well as its Descendants at the same time using the "Status" column.
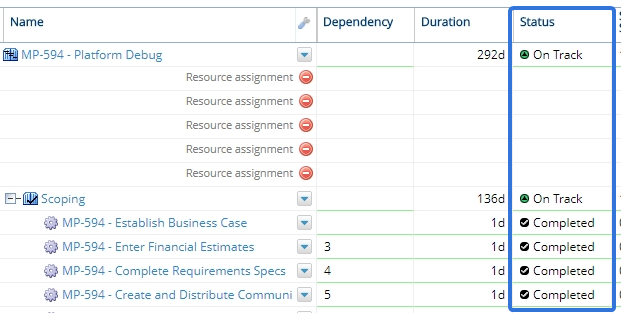
To change Statuses in Project Central:
Before You Start: Users will require the "View Project Central" and "Edit Status" Project permissions on a work item in order to change its status. If the "Edit Status" permission has not been given to "Higher" as well as "Project" on the original work item, the user will be able to edit the Status of the original work item but not the Status of its Descendants.
-
Navigate to a work item.
Tip: Selecting Project → Most Recent Project from the Navigation Menu is an easy way to navigate to the work item you most recently viewed.
-
Select Project → Project Central from the Navigation Menu:
Click thumbnail to play.
-
Select your preferred Project Central Layout from the list.
-
Select the "Status" value of any work item in the layout:

Note: Depending on the layout, the Status column could be located anywhere on the grid. It might even be excluded from the layout altogether. If you do not see it, select Columns → Project → Status from the top toolbar to add it:
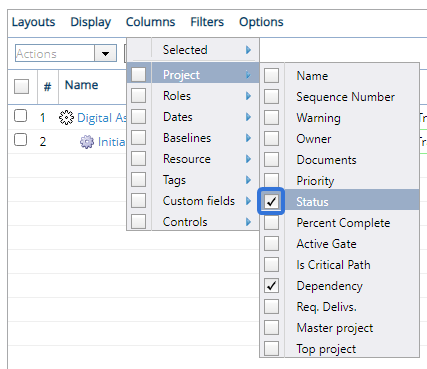
See Add / Remove Project Central Columns for more information. -
Select a new Status for the listed work item:
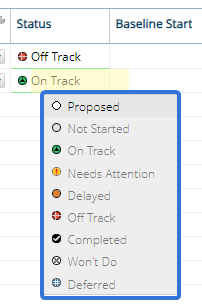
-
Repeat Steps 4-5 for any other work items in the layout.
-
Select the Save button at the bottom of the screen:

After selecting Save, the new Statuses will be saved to the work items.
Changing Statuses from the Dashboard
Users can change work item Statuses directly from the Dashboard. From here, they have the ability to change the statuses of any work items in the selected Portfolio using the "Status" column.
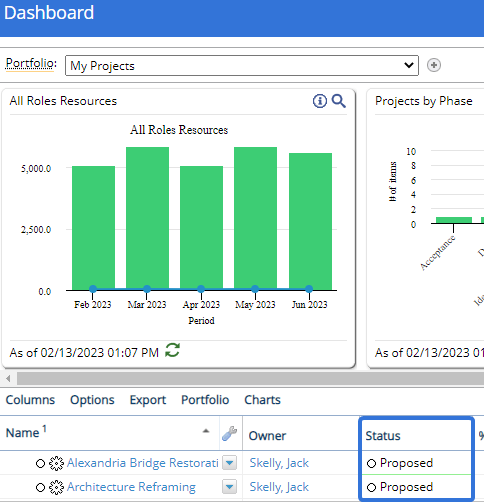
To change Statuses on the Dashboard:
Before You Start: Users will require the "Edit Status" Project permissions on a work item in order to change its status. If the user does not have the "Edit Status" permission for the listed work item on the Dashboard, the user will not be able to change that work item's Status.
-
Select Review → Dashboard from the Navigation Menu:
Click thumbnail to play.
Tip: Dashboards can be configured to appear on a user's Home page. See Configure My Home Page for more information.
-
Use the "Portfolio" drop-down menu to select the Portfolio that contains the work item(s) you would like to edit Statuses for:

-
Use the "Layout" drop-down menu to select a Dashboard Layout to view your Dashboard with:

Note: The Dashboard Layout you select will need to contain the "Status" column. If you are unsure which layout to choose, reach out to an administrator.
-
Select the Go button:

-
Select the "Status" value of any work item in the Dashboard:
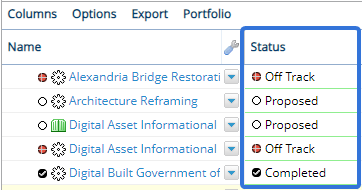
-
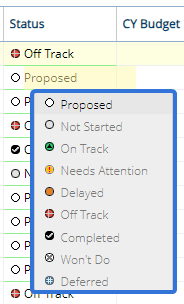
Select a new Status for the work item:
-
Repeat Steps 5-6 to change the Statuses of any other listed work items.
-
Select the Save button at the bottom of the page:

After selecting Save, the new Statuses will be saved to the work items.

