Assign Approval Roles
A Gated Project in PowerSteering represents a multi-stage process that is subject to review and approval at specific checkpoints (also known as Gates).
Gates can be assigned one or more work item Roles that are responsible for approving the Gate once the Pre-Advance Conditions have been met. The users assigned to the selected Roles will be given approval authority over whether the Gate is ready to be advanced. Alternatively, each Gate can be configured to not require any approval at all.
Note: The "Advance on any approval" setting can be toggled while editing the work item's details:
When "Yes" is selected, only one of the Gate's assigned approvers will need to approve a request. If "No" is selected, all of the approvers will need to approve the request.
To edit gate approval roles and requirements:
Before You Start: Users require the "Set Approval Roles" Project Task permission on the work item to determine approval Roles on each Gate.
-
Navigate to the work item.
-
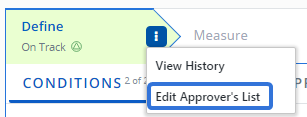
Select the "Options" menu of the current gate:

-
Select Edit Approver's List from the drop-down menu:

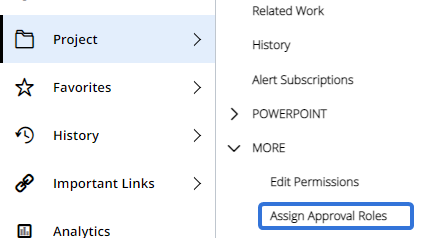
Note: Selecting Assign Approval Roles from the "More" section of the "Project" menu will also bring you to the page:

-
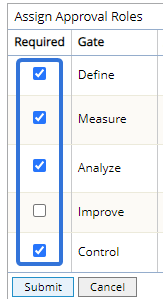
Select which gates will require approval and which ones will not:

Note: Unselected Gates will not require approval to be advanced.
-
Use the drop-down menus in the "Approver" column to indicate which Project roles will be responsible for approving the gate:
Click thumbnail to play.
-
Select the Submit button.
After selecting Submit, the approval settings will be set to the Gate. A list of approvers can be seen under the "History" tab on the Gate panel:

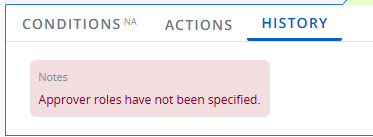
Note: If an approval Role that was chosen for the Gate is not currently filled on the work item, the "History" tab will display a warning message:
