Advance a Gate
Once all the designated approvers have approved a Gate request, the Gate can be advanced to the next one. The Post-Advance Actions that are attached to the Gate (which can be seen under the "Actions" tab) will take place once the Gate has been advanced:
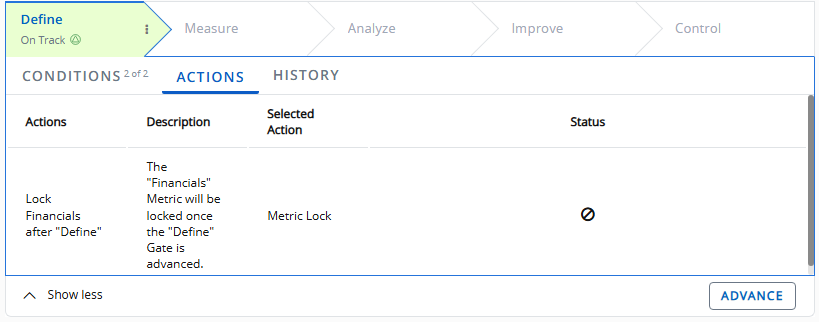
The "Status" column displays an icon that reflects one of the following statuses:
 : The action has not been applied yet.
 : The action was not successfully applied after the Gate was advanced.
 : The action was successfully applied after Gate advance.
Tip: Users can click directly on the icon to view more details. This is especially useful when actions fail to apply ( )because it allows users to see the reason(s) behind the failure:
Tip: This feature should be used in conjunction with the Gate advance banner. For example, the banner might claim that certain actions failed to be applied after a Gate advance:
When this occurs, simply select the previous Gate and open the "Actions" tab to view details on the failures:
Click thumbnail to play.
Note: If "Advance on any approval" has been set to "Yes" while editing the Project's details, only one of the designated approvers will be required to advance the Gate.
Note: "Advance" is a replaceable term in PowerSteering. Your organization may use a different label to represent Gate advancement on your site.
Tip: Administrators can enable and configure the Gate Advance Agent to automatically advance Gates when their Pre-Advance Conditions are met.
To advance a Gate:
Before You Start: You may or may not be able to advance Gates based on how PowerSteering administrators have configured your environment's Phase Advancement settings. See Gate Advance Configuration for more information.
-
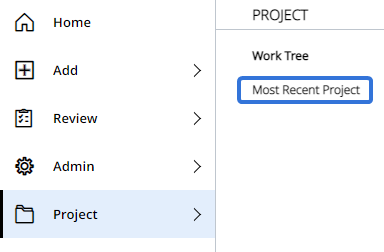
Navigate to the Gated Project's Summary Page.
Tip: Selecting Most Recent Project from the "Project" menu will bring you to the most recent work item you have visited:
-
Select the Advance button directly below the Gate panels.
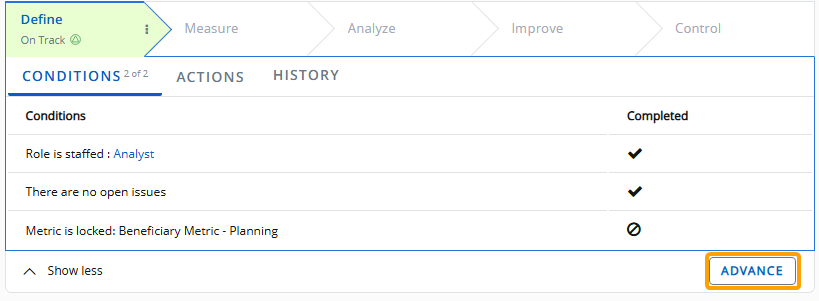
Note: The buttons you see here will depend on your permissions, your role, and the Phase Advancement settings configured by an administrator.
-
(Optional) Review the Post-Advance Actions that will take place once the Gate is advanced.
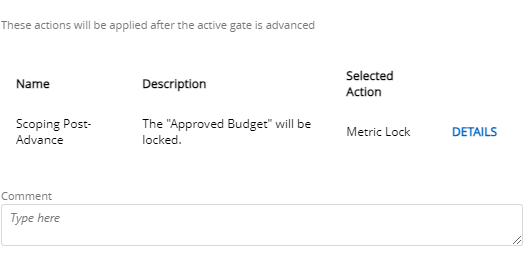
Note: Administrators can attach Post-Advance Actions to Gates.
Tip: Selecting Details next to a Post-Advance Action will display additional details of the action that will take place.
Tip: From here, you can also leave a comment to go along with the Gate advance.
-
(Optional) Use the checkboxes to determine which of the Gated Project's Related Work you would like to advance as well.
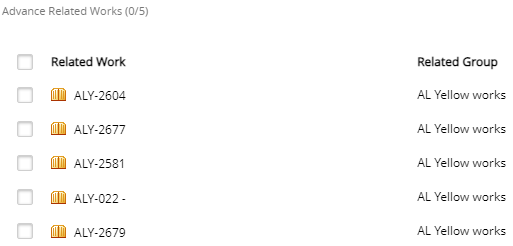
Note: The Gated Project's Related Work will only appear in the list if the same Gated Project Template was used to create it and it is currently on the same Gate. Also, only Gated Projects that the user has permission to advance will appear in the window. If the user does not have permission to advance the Gated Project, it will not be listed.
Additionally, "Advance Related Works" will need to be enabled while updating the Object Type's settings and the "Advance Related Works" checkbox needs to be selected while editing the Gated Project's configuration settings. -
Select the Advance button.

After selecting the Advance button, the Project (as well as any selected Related Works) will move on to the next Gate. The previous Gate will display a "Completed" status:
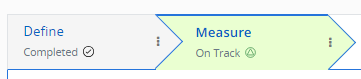
Tip: Previous Gates can be reactivated. See Reactivate a Gate for more information.
Users will see one of three banners at the top of the page after advancing the Gate:
-
Successful gate advance and Post-Advance Actions: A green banner will appear if the Gate advance is successful and the Post-Advance Actions (if any) have been applied:

-
Successful advance but unsuccessful Post-Advance Actions: A yellow banner will appear if the Gate advance is successful but at least one Post-Advance Action has not been applied:
Note: This banner will continue to appear whenever the Project Summary page is opened until the banner is closed by the user.
Tip: To see which actions failed and why, users can view the "Actions" tab under the Gate panel.
-
Unsuccessful gate advance: A red banner will appear if the Gate could not be advanced:

Additionally, a report on each Related Work included in the Gate advance will also immediately appear.
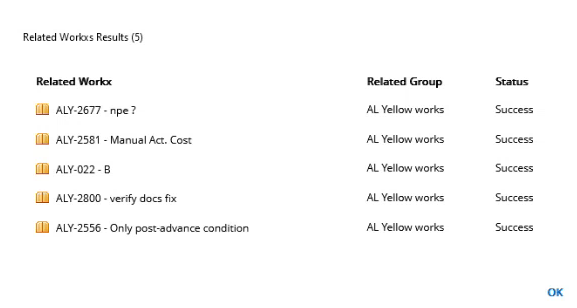
Note: Gated Projects that were listed are expected to successfully advance if selected. Failures are most likely due to a recent change in data (i.e. one of the Gated Project's Pre-Advance Conditions was no longer satisfied after the window was opened).