The Chart of Accounts list is where (if using an internal accounting system) you store your organization's entire general ledger accounts. After setting up the connection with the accounting system, if you have already imported accounts, they appear on the Chart of Accounts page.
This article details how to access and manage the general ledger accounts stored in the Chart of Accounts when using an internal accounting system.
Access the Chart of Accounts
- From the Icon Bar click Setup
 .
. - From the Navigation Menu click Financial to expand the corresponding menu.
- From the Financial menu items, click System.
- Upon the Financial Settings page displaying, navigate to the Chart of Accounts tab.
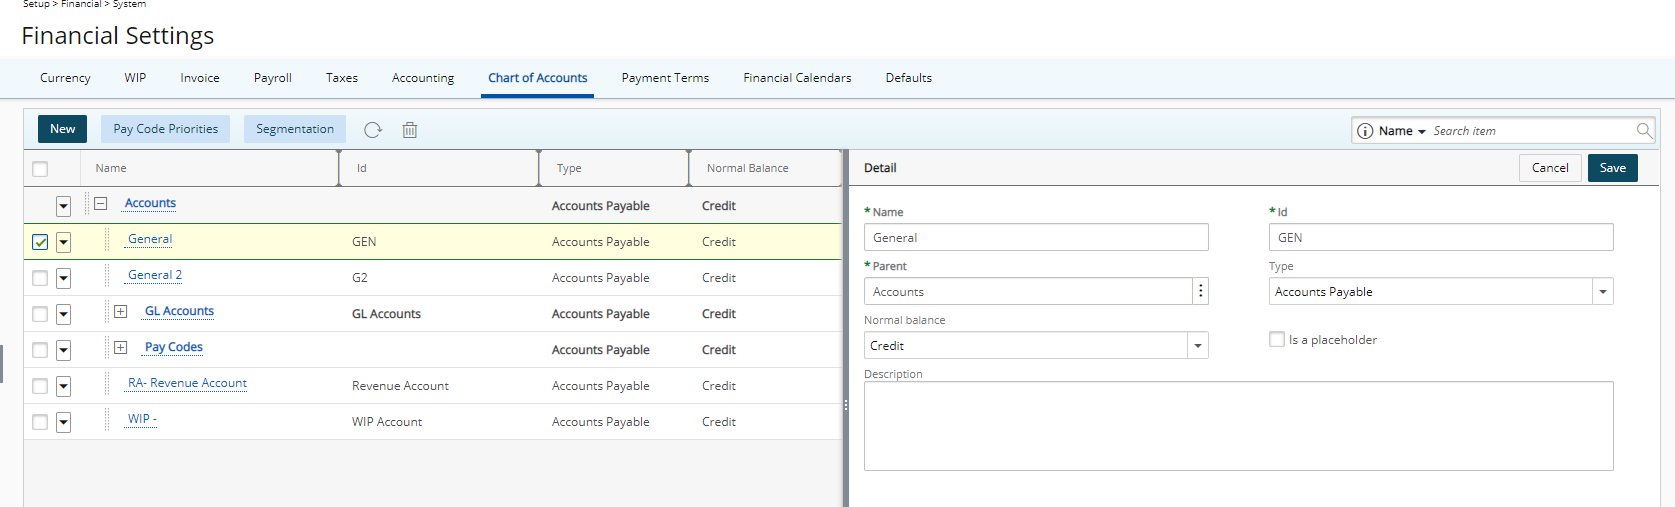
Available options
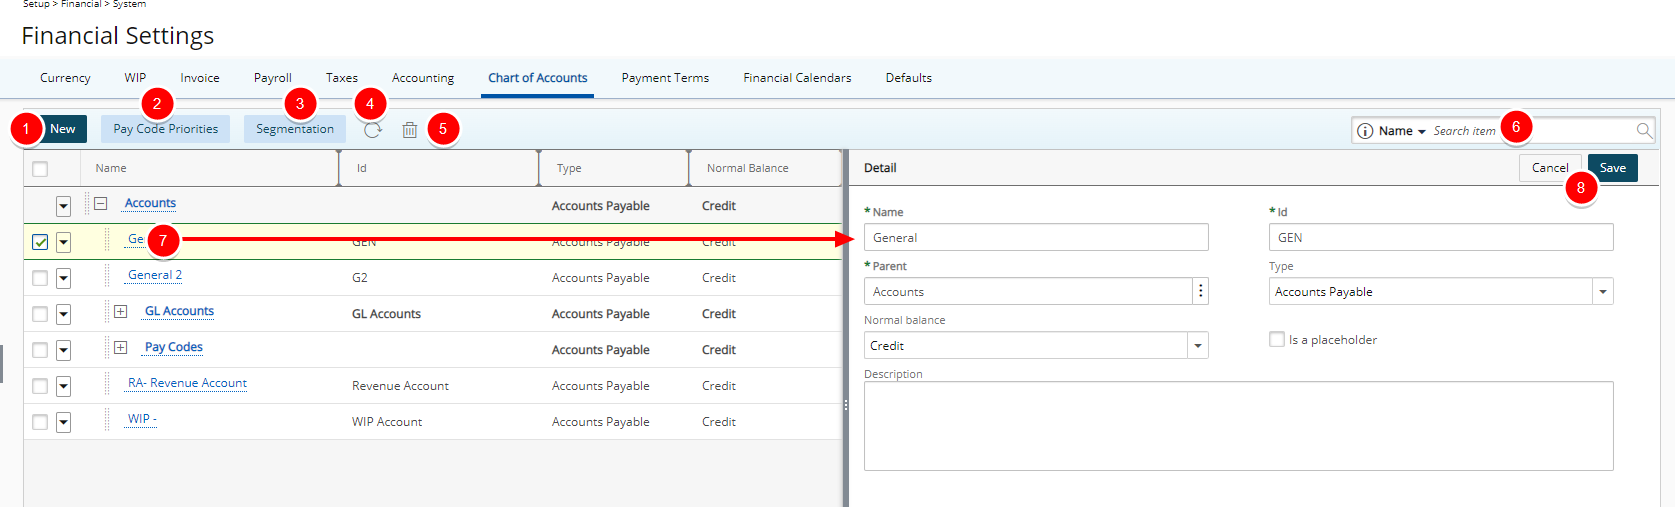
- New: Create a new Account.
- Pay Code Priorities: Click to access the Pay Code Priorities dialog box. Pay codes determine the type and rate of compensation for users when determining payroll. These pay codes can be applied for regular, overtime, double overtime, leave time and charges. Associating pay codes to process normal time, overtime, double overtime and leave time ensures that each employee is properly compensated.
Note: For more information on how to set up segmentation and pay codes for different accounting systems, refer to the appropriate PSA Connector Guides.
- Segmentation Click to access the Pay Code Priorities dialog box. Segmentation is the result of referring to an account stored (in your accounting software General Ledger) by a set of segment codes. These segment codes can represent various account structures, which can be actual account numbers, divisions or regions. The purpose of using segmentation is to be able to "map" the different PSA objects to specific General Ledger Account segment codes in your accounting software.
- Click Refresh
 to reload the page.
 - Delete
 : Delete selected item.
 - Search: Search for Accounts by Name or Id.
- You can access and modify the details of an existing Account by clicking on its Name. The right pane will display the details of the selected Account.
- Upon modifying an Account, you can click Save or Cancel directly from the right pane.