This article provides a step-by-step guide to setting up the Microsoft Teams PSA Workflow Notification Bot.
The Bot supports Single Sign-On (SSO), allowing users to authenticate seamlessly with their existing credentials.
Caution: SSO login is required to access and use actionable links within Teams notifications. This functionality is available for the following Workflow Notifications: Expense Reports, Leave Requests, Timesheets, Work Items, and Projects, enabling real-time, in-context actions directly from Microsoft Teams.
Getting Started
- For assistance, please contact PSA Support. Upon completion of backend configurations, you will be provided with a link to download the PSA Workflow Notification Bot zip file (V3.0).
- There are two ways to upload a custom app into your Teams tenant store:
- Configure the PSA Workflow Notifications. For further details see: Set up the Microsoft Teams PSA Workflow Notification.
- Users can then install the PSA bot. For further details see discover and adopt section.
Note: These steps must be performed for each of your environments (example staging and a production).
Uploading a Custom App into the Tenant Store
Uploading a custom app to your Teams tenant store allows users in your organization to access and use it directly within Microsoft Teams.
Note: If your Bot is already installed, uploading the V 3.0 .zip file displays an Update screen instead of Add. This occurs because the Bot version has been incremented, triggering an upgrade.
Upload via Teams Admin Console
- Open the Microsoft Teams Admin Center (https://admin.teams.microsoft.com) and log in.
- Navigate to Teams apps > Manage apps in the left-hand menu.
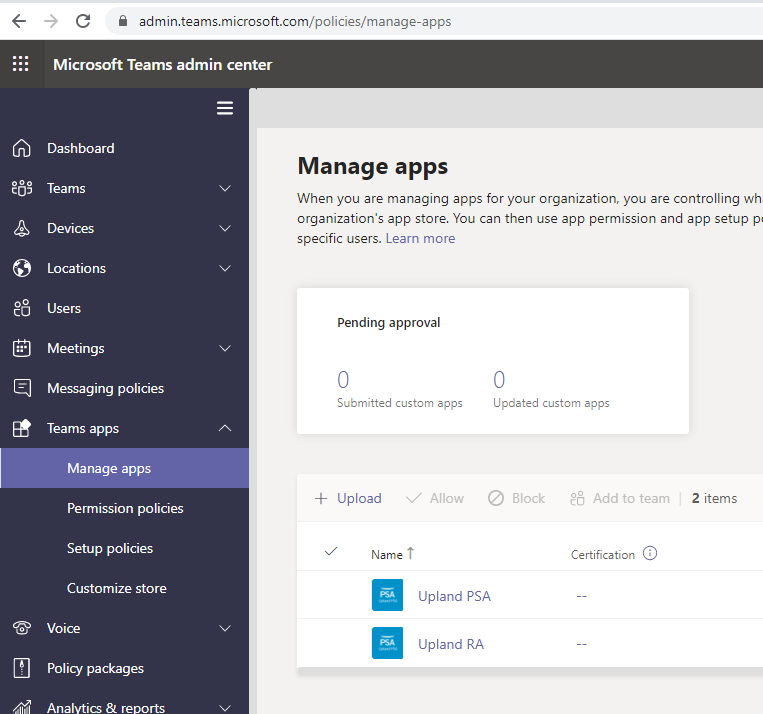
- Click Upload and select the .zip package of the custom app.
- Confirm and save.
- The app will now be available in the tenant store for installation.
Upload via Teams Application
Use the following steps to upload and install the PSA Workflow Notification Bot .zip (V3.0).
- Open Microsoft Teams and log in with an account that has permission to upload custom apps.
- Click on the Apps icon in the left-hand navigation bar.
- At the bottom of the Apps panel, select Upload a custom app.
- Choose Upload for [Your Tenant Name].
- Browse and select the .zip file of the app. An install dialog displays.
- Add your app to Teams.
- The app will now appear in your tenant’s app store and can be installed by users.
Tip: By default, for users to find the app they have to go to your organization's app store and browse or search for it. To make it easy for users to get to the app, you can pin the app to the app bar in Teams.
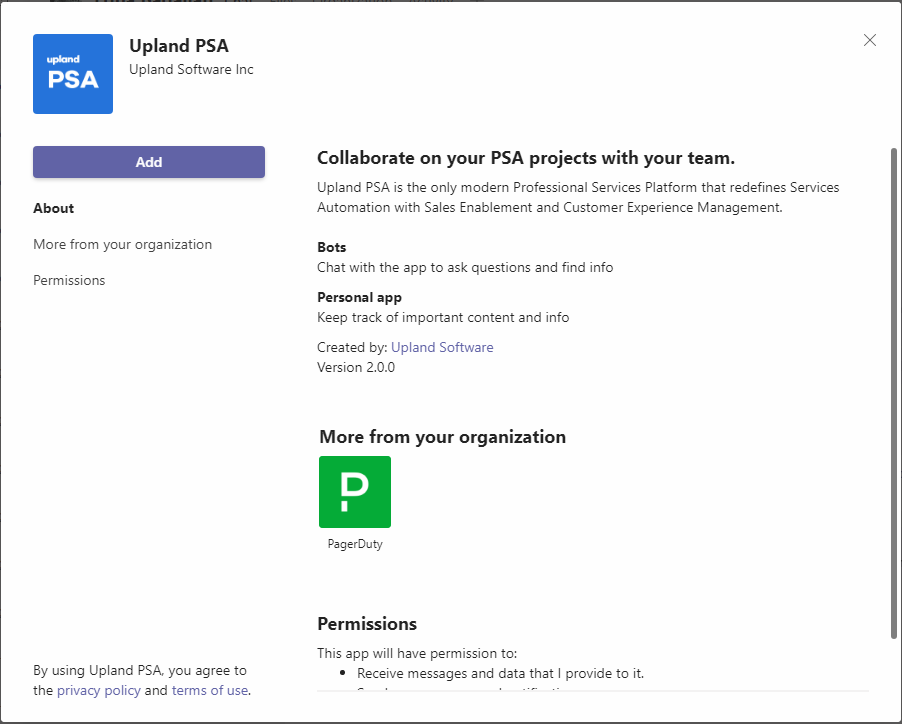
Discover and Adopt
Users who have permissions to the app can find it in your organization's app store.
- Go to Built for Your Organization Name on the Apps page to find your organization's custom apps.
- Add the app to your Teams.
- Enter your Organization Name and click Connect.
- Click Sign in and enter your credentials.
Tip: The email address used to login to MS Teams must also be associated with the User in PSA.
- Upon enabling and performing an action in PSA that will trigger the MS Teams notification, and the completion of the Notifications Delivery Automation Processing Service, you will receive the respective MS Teams notification.
See also: