System settings apply throughout the application. These include the settings such as the Start Date, period type, Regional Setting, Security Profiles, outgoing mail settings, etc. It contains key information that enables you to set up different parts of the application.
Caution: Any changes performed in this section do not take effect until the application is exited and/or restarted.
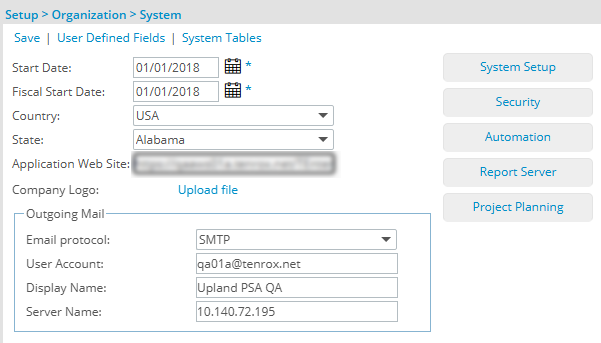
- Start Date Select the Start Date.
- Select the Start Date carefully since you may want to store and track historical information relevant to the company, and this can only go back as far as your start date. It may not pay off in savings and reportable positive results, however, to simply 'dump' all your company's informational archives into PSA.
- The Start Date should be chosen keeping in mind whatever your original purchase decisions were for integrating with PSA. Generally the Start Date should be long enough ago to contain all useful metrics you will be tracking, but recent enough so you don't have reams of outdated information, and that the information you do have (and will collect into the future) will be easy to report on.
- Enter the Start Date from which the period is in effect and the first day that data collection may begin.
- Selecting the Start Date in the future may prevent you from logging on to the application. This is because License Expiry takes effect. Also, pay extra attention while choosing the Start Date in the past—since all subsequent data entries related to time would rely heavily on the system's start date.
- Fiscal Start Date: Enter the Fiscal Start Date, when the organization's fiscal year begins.
- Country: Select the Country in which your organization resides.
- State: Select theState (or Province) in which your organization resides.
- Application Web Site: In the Application Web Site box, specify the URL path to PSA to be used in the email notifications.
- Company Logo: Select a Logo which will display in Reports.
Tip: The logo must be in .JPG format and for best results should be 60px x 60px in size.
- In the Outgoing Mail section, select SMTP as the email protocol. This section holds the information of the "From" account for the email notifications sent out by the application and is necessary for the sending of email notifications. Type in the credentials for SMTP account:
- User Account: Enter the User Account
- Display Name: Enter the Display Name
- Server Name: Enter the Server Name
Note: There is no incoming mail service.
- Click Save to apply your changes.
- Click Back to return to the previous page.