Associating a Workflow Role to a Security Profile is a critical process that ensures users have the appropriate access and permissions required to perform their tasks efficiently within the system. By associating specific Workflow Roles to corresponding Security Profiles, you can control and manage user permissions based on their functions. This association not only enhances security by restricting unauthorized access but also streamlines workflows by providing users with the necessary tools and resources pertinent to their roles. This structured approach ensures operational integrity and optimizes productivity across the organization.
This article details how to associate a Workflow Role to a Security Profile.
Associate a Workflow Role to a Security Profile from the Workflow Role edit page:
The steps below detail how to Associate a Workflow Role to a Security Profile from the Workflow Role edit page. Through the example here illustrates a Timesheet Workflow Role, the manner in which to associate a Workflow Role to a User is the same with the main difference being the navigation to access the Workflow Role Edit page. For further details visit Accessing the Workflow Edit page article.
- From the Icon Bar click Setup
 .
. - From the Navigation Menu click Timesheet.
- Select Timesheet Workflows.
- From the top of the Workflows page, click Workflow Roles.
- Upon the corresponding Workflow Roles list page displaying you can either:
- Choose a Role and then click the Associations button.
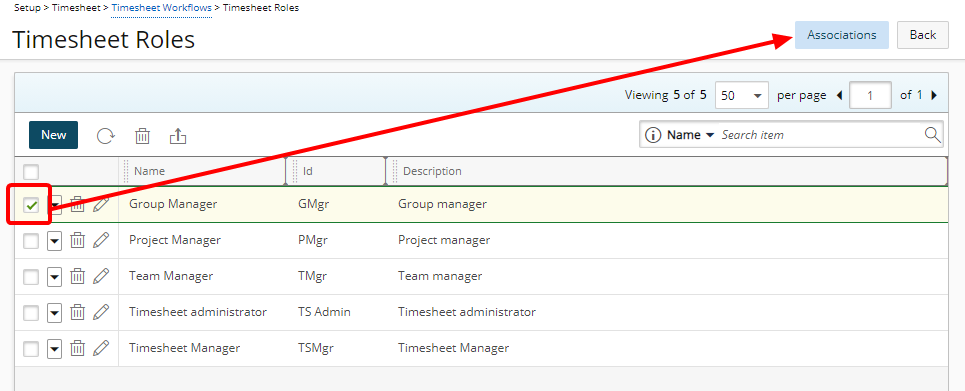
- Access the Role context menu and then click Associations.
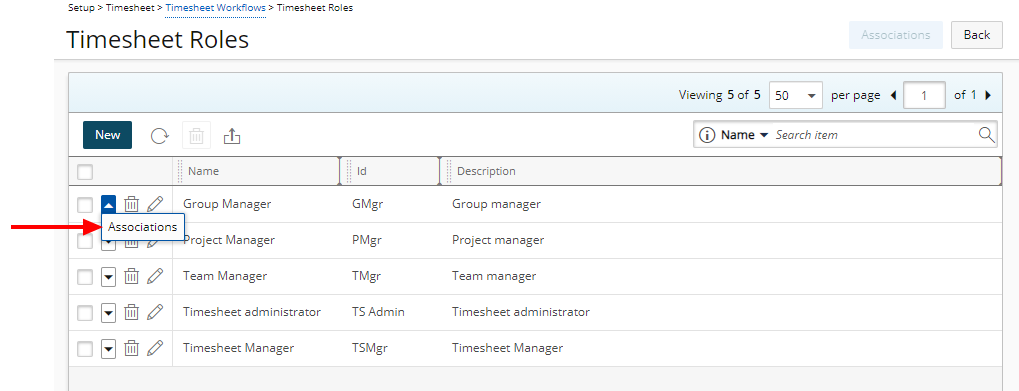
- Choose a Role and then click the Associations button.
- Upon the Assign page displaying, click the Assign To selection box and choose Security Profiles.
Note: By Default Users is selected.
- Select the Security Profile(s) you wish to Assign, from the left table.
Tip: You may wish to narrow your list so that you retrieve just the right amount of information you need. To do so you can perform a search. Select a search criterion from the list of available search criteria and then enter a corresponding value in the Search box. Click the Search icon to narrow down the Users list. For more information on the contains-in logic search click here.
- Click the Add
 button.
 - View the list of assigned Security Profile(s).
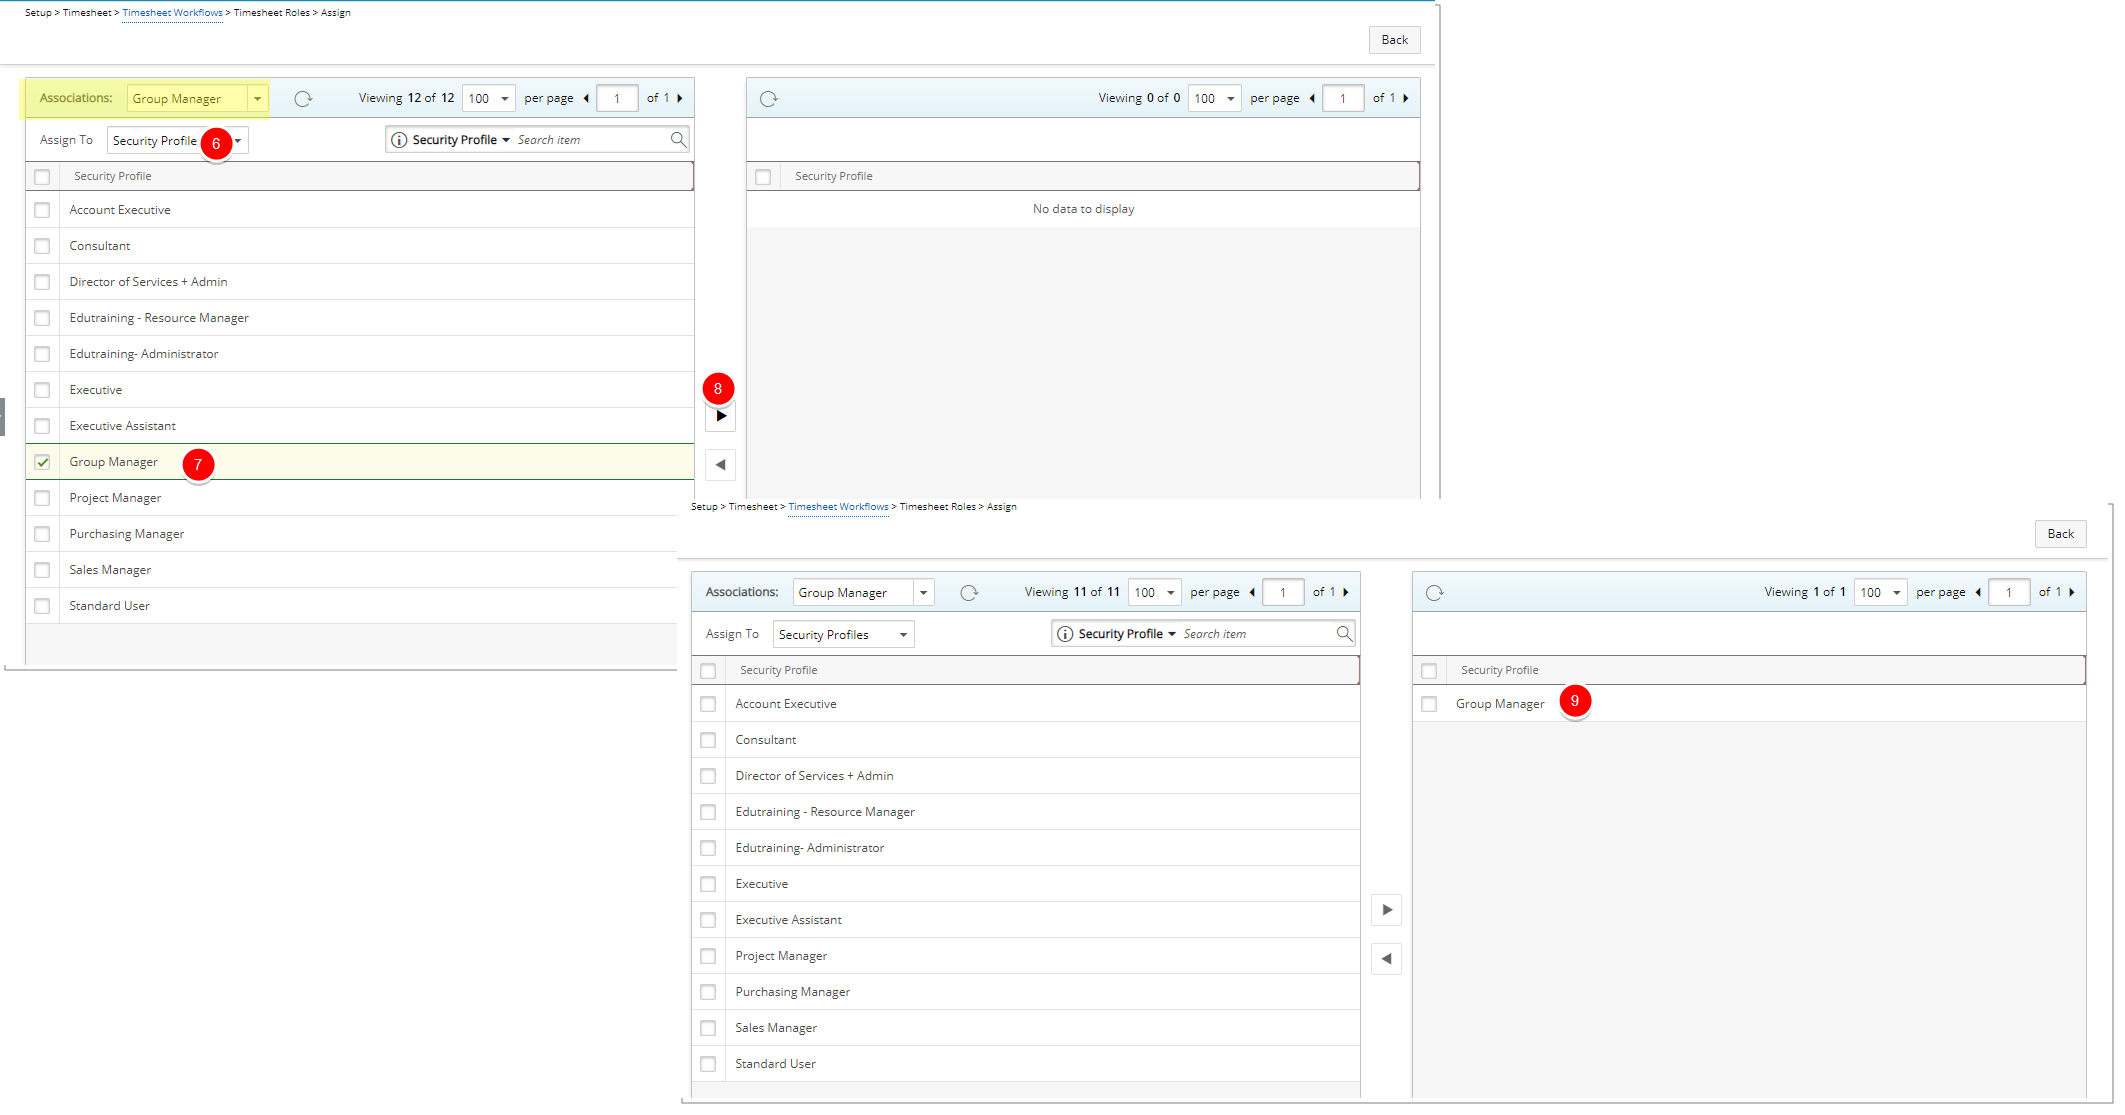
- Click Back to return to the previous page.
- View the Workflow and the State assignment wherein this Workflow Role has been assigned.
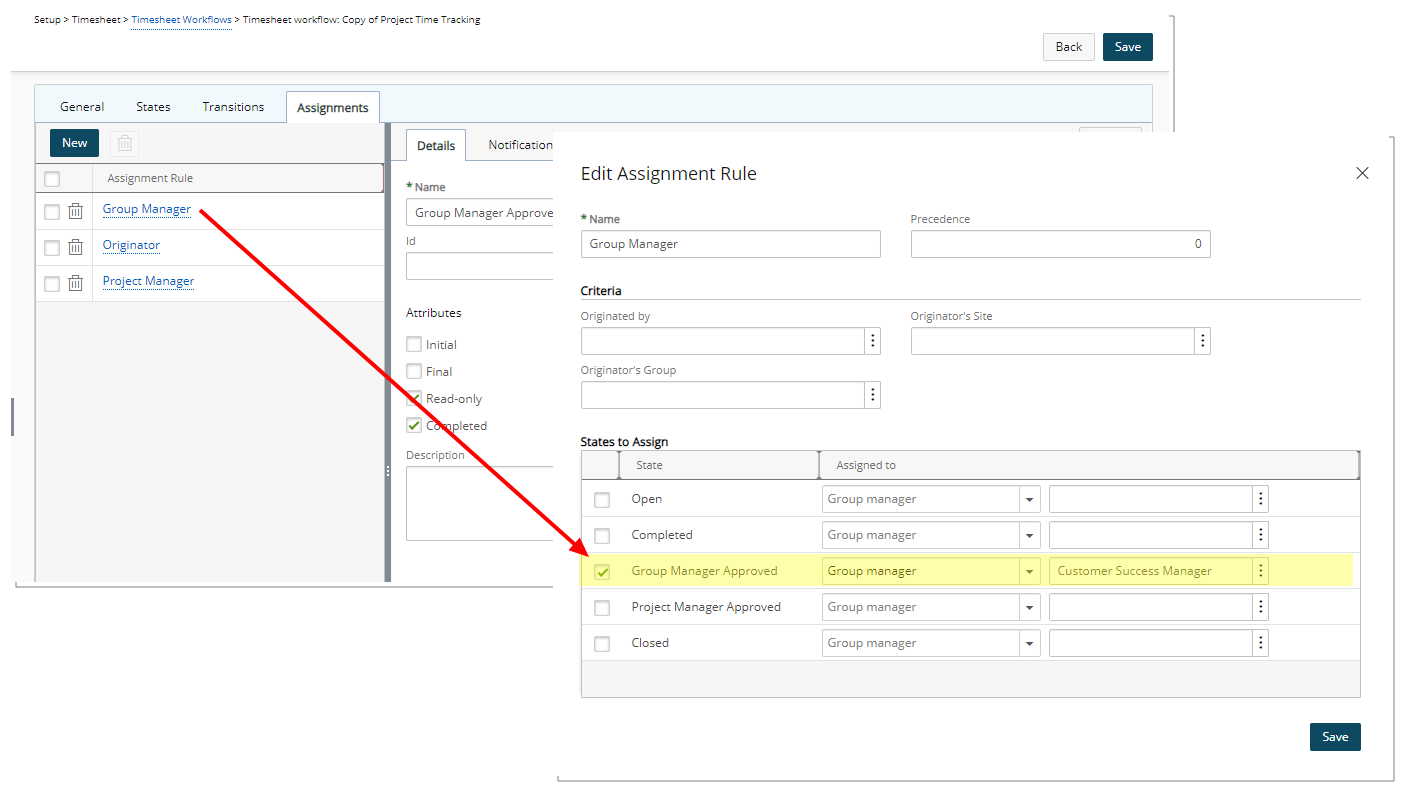
- With the Workflow successfully revised, Entries can be moved through the process, being transitioned from State to State. Users belonging to the associated Security Profile, will be able to view the Entry and select the Transition.
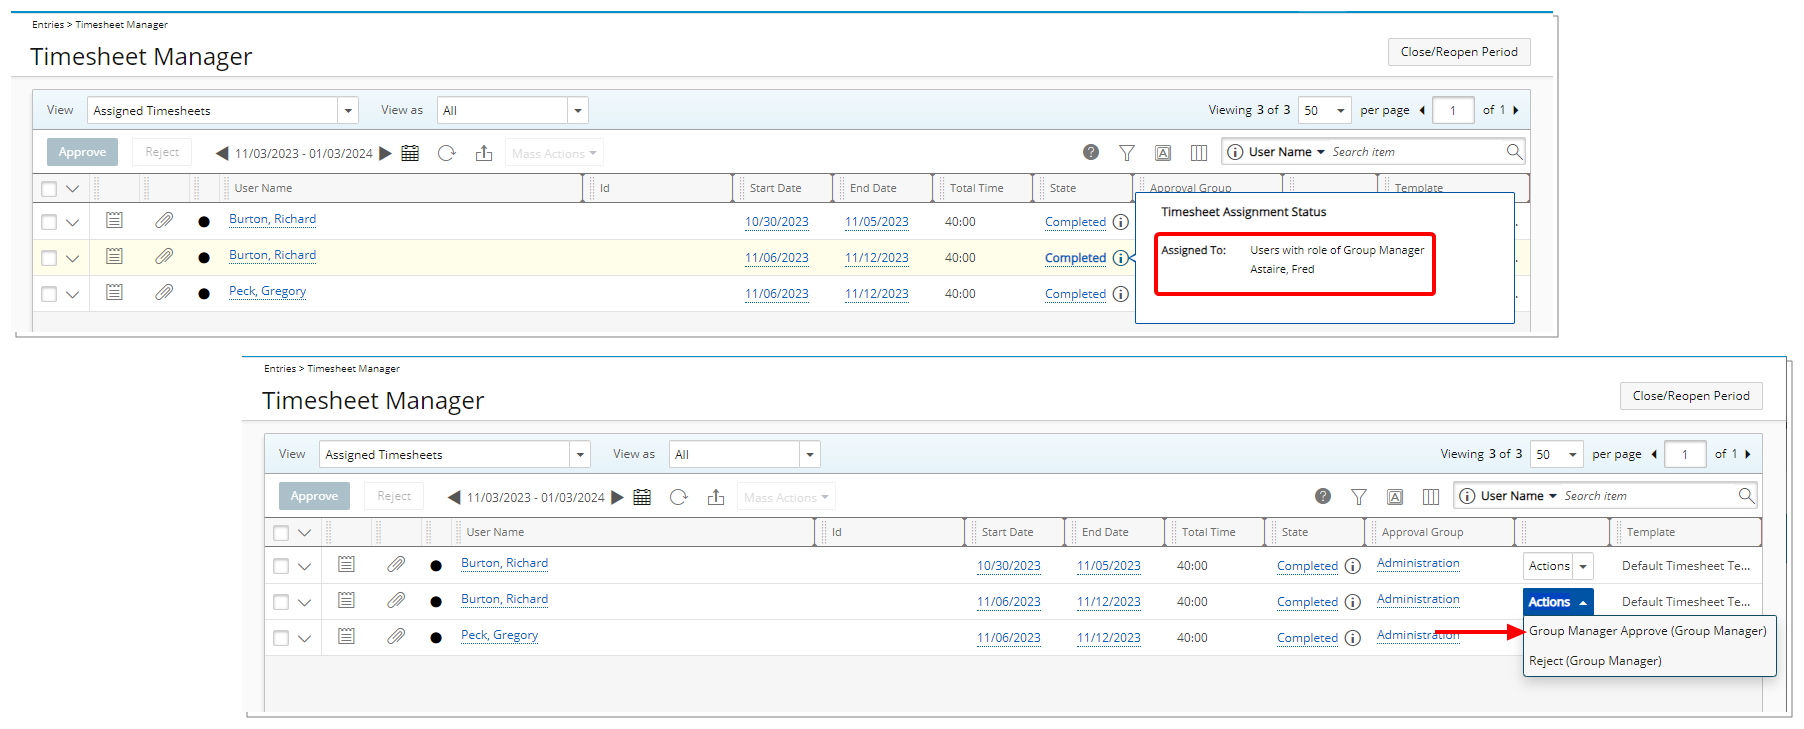
Note: In this example, as it is a Timesheet Entry, with the appropriate rights, the Entry and Transition can be seen and selected from the Timesheet Manager page, in addition to the Entry page.