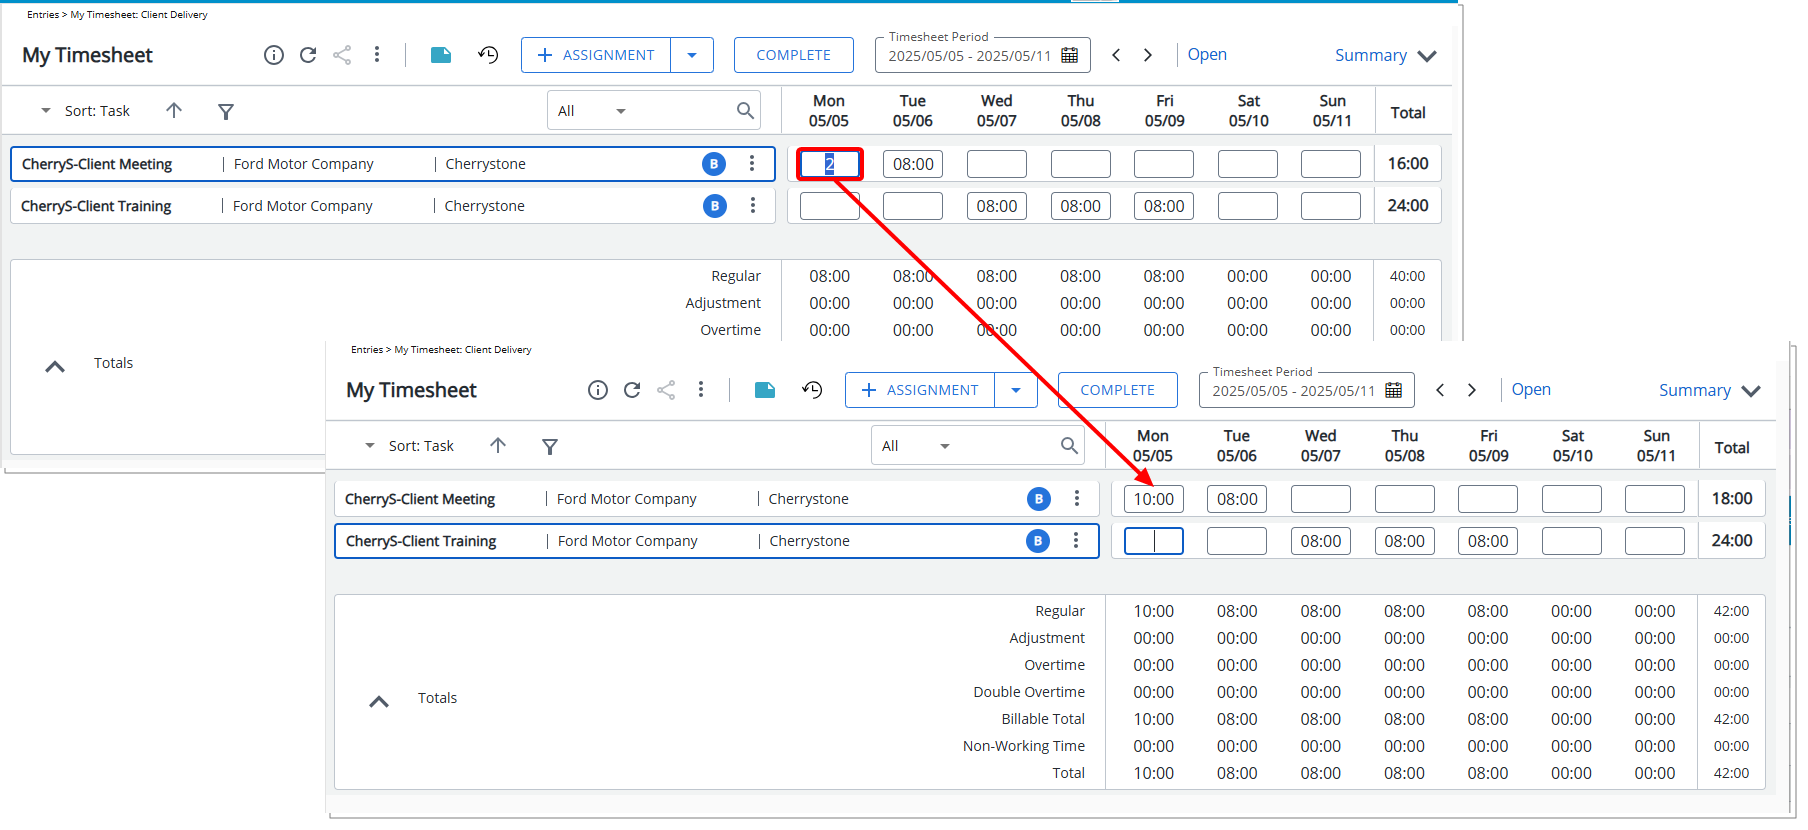
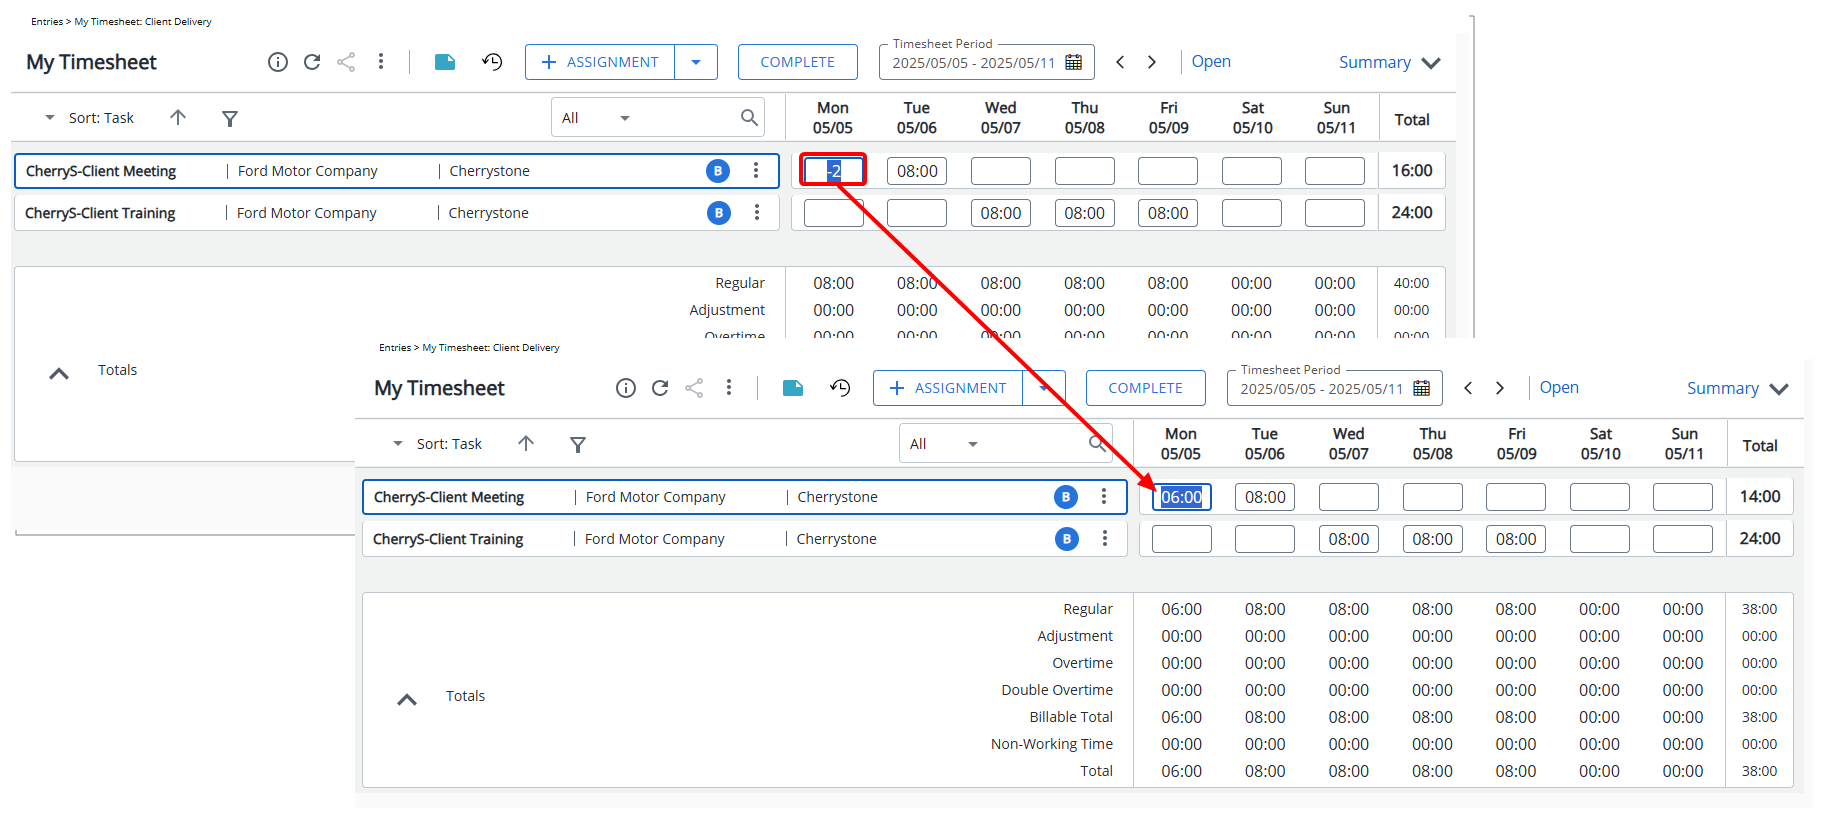
If your Timesheet Template includes the Can inline update time entries setting, you can quickly adjust your Time Entries without having to delete or re-enter them. This feature lets you add or subtract time directly from an existing entry, right from within your Timesheet.
Note: This feature must be enabled in your assigned Timesheet Template. If you don’t see the inline update option, contact your administrator. For further details refer to Enabling Inline Updates for Time Entries.
- From the Icon Bar click Entries
 .
. - From the Navigation Menu click My Timesheet.
Tip: You can access your timesheet through different avenues, which are further detailed in Accessing My Timesheet.
- Navigate to the Period where your existing entry is located.
- Click the Calendar
 button and select the appropriate period.
 - Click the Next
 /Previous
  buttons to navigate to next/previous Period.
 - Click Today to navigate to current Period.
- Click the Calendar
- Hover over the entry to reveal the context menu.
- Click the + button.
- Enter the time adjustment directly in the Time Entry cell.
- To add time, enter a positive number (e.g., 2).
- To subtract time, enter a negative number (e.g., -2).
- To add time, enter a positive number (e.g., 2).
- The system will automatically update the Time Entry total.