This article details how to access the Timesheet History page and the available options to you.
Note: To allow Users access to the new and improved My Timesheet in your Sandbox/Implementation/production environments, you must add them to the New Timesheet list. For further details refer to Adding users to the New Timesheet list. If you prefer, you can choose to enforce the use of New Timesheet for all Users at the global level.
Accessing the Timesheet History page
- From the Icon Bar click Entries
 .
. - From the Navigation Menu click My Timesheet.
Tip: You can access your timesheet through different avenues, which are further detailed in Accessing My Timesheet.
- Upon My Timesheet page displaying, navigate to the required Period by following one of these steps:
- Click the Calendar button and select the appropriate period.
- Click the Next/Previous buttons to navigate to next/previous Period.
- Click Today to navigate to current Period.

- Access the Timesheet History dialog box either by:
- Clicking the Timesheet context menu
 button. From the available options click Timesheet History.
OR - Clicking the Timesheet History
 button.
- Clicking the Timesheet context menu
- View the Timesheet History page.
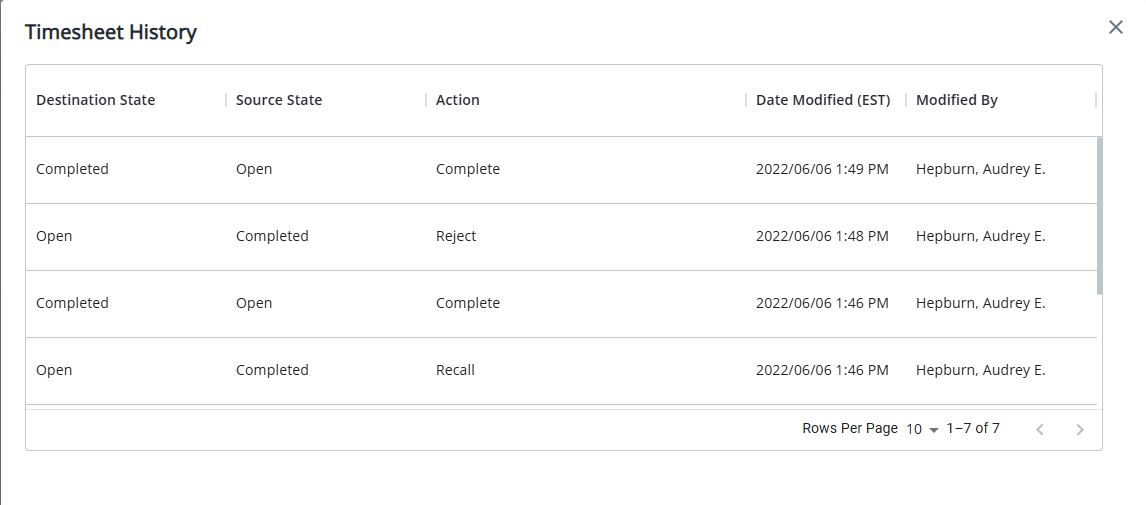
Available options from the Timesheet History page
By default, the Timesheet History table displays the following information: Destination State, Source State,Action, Date Modified and Modified By. You can choose to Filter the information based on Destination State, Source State,Action, Date Modified and Modified By criteria and sort the columns based on descending or ascending order. Furthermore, you can:
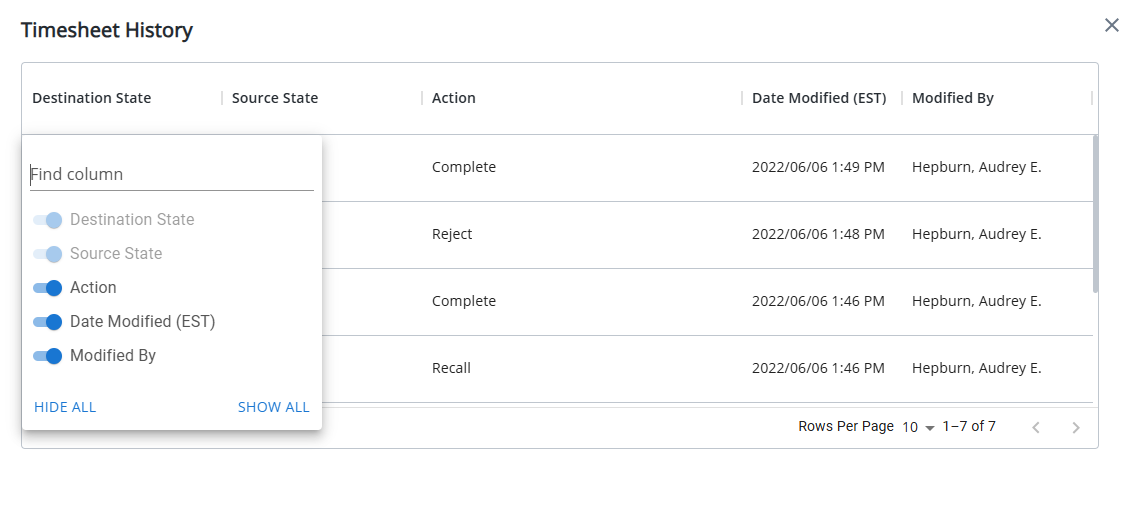
- Show or hide columns based on your needs from the table context menu located within the header.
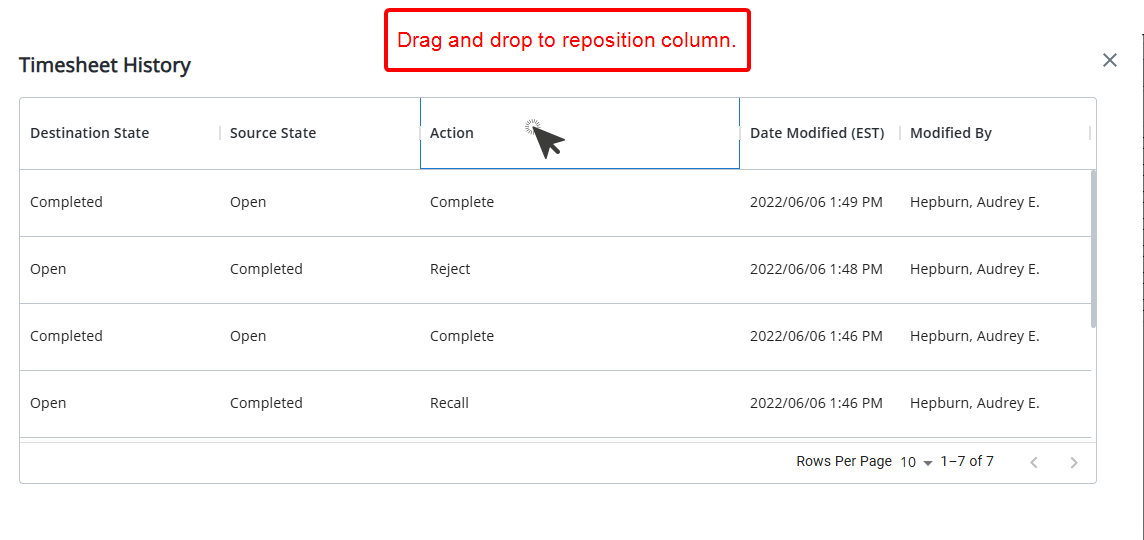
- Rearrange the column position by drag/dropping it to a new location.
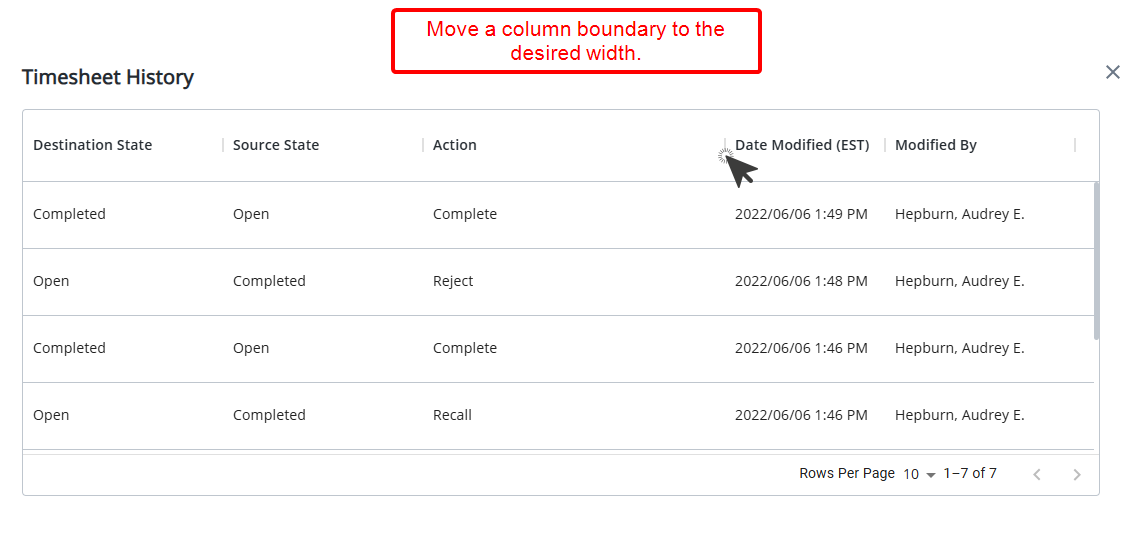
- Adjust the column widths by dragging the column boundary.
- The dialog box can be re-positioned, allowing you to move it to a convenient location on the page.
Note: The Date Modified column displays the date/time according to the Time zone of the Active Site associated with the logged User.
Applying a Filter
Filter the History page based on a selected criteria:
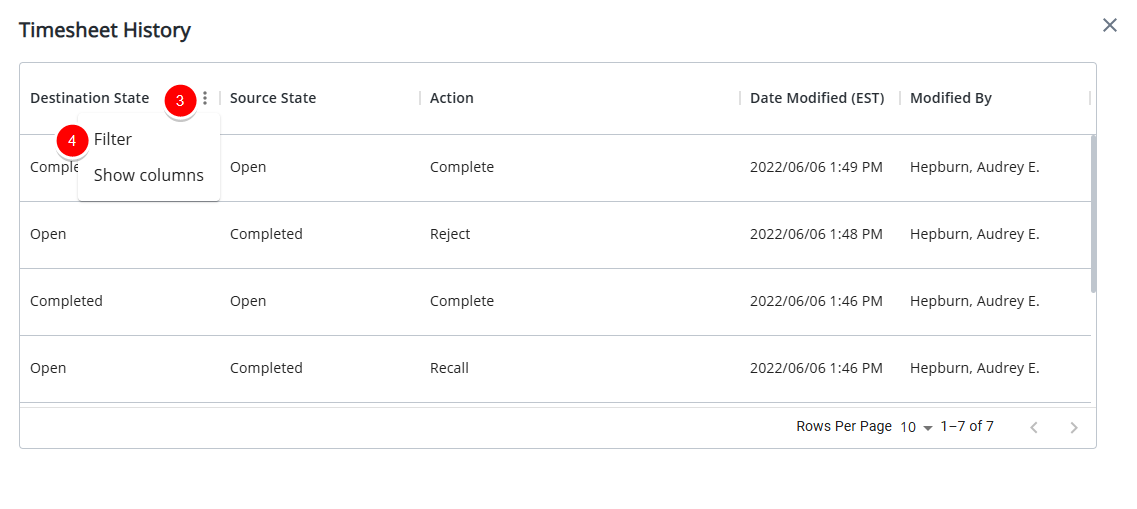
- From the Timesheet History page, mouse over the table header.
- The Menu
 button will appear upon hovering over a column header.
 - Click to access the corresponding options.
- From the available options click Filter.
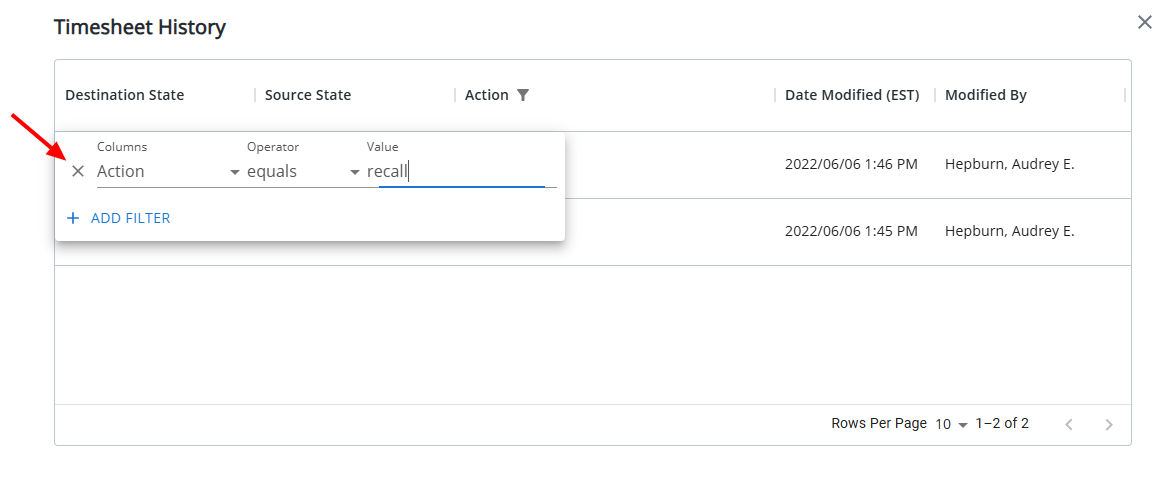
- From the Columns options choose the required item.
- Select the corresponding Operator from the available options.
- Then enter or select the corresponding Value. In our example we are going to filter the history based on the Recall action.
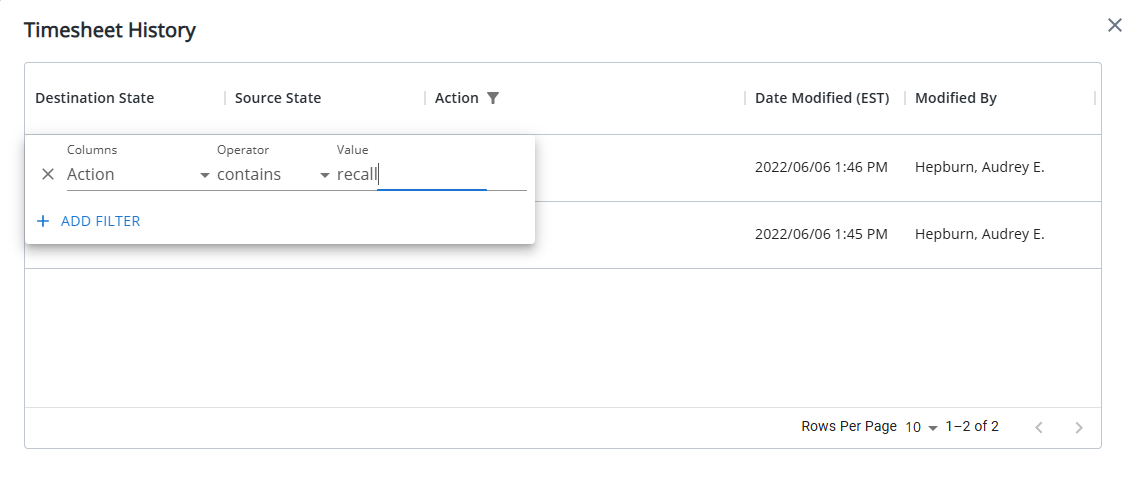
- Click anywhere on the page to apply the Filter.
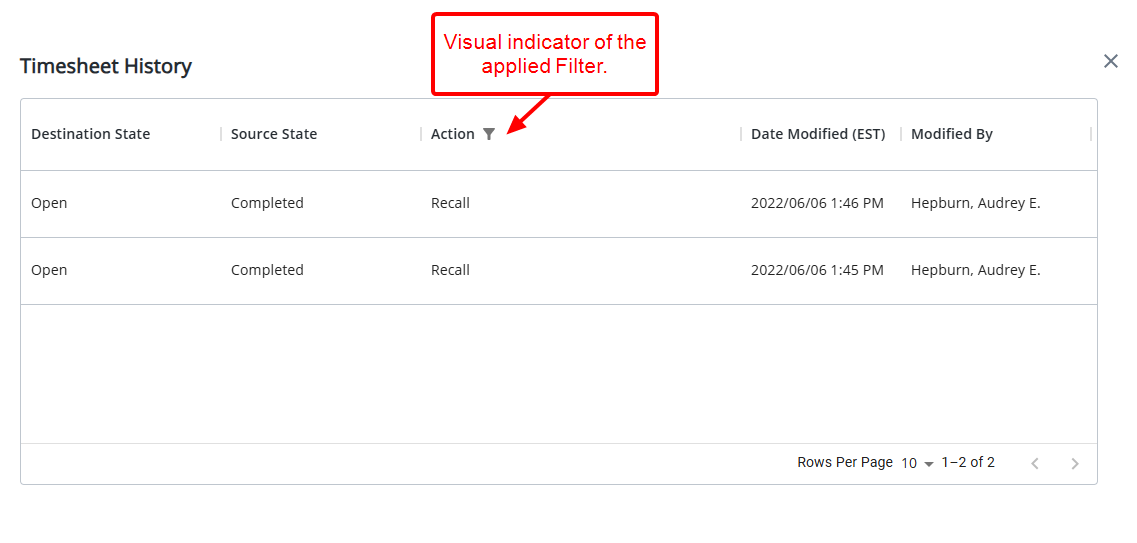
- You can access the Filter by clicking the Filter icon located against a filtered column.
- Click the x button located against a filter row to remove the it.
Sorting columns
To sort the columns based on ascending or descending order:
- From the Timesheet History page, move your mouse over a column header.
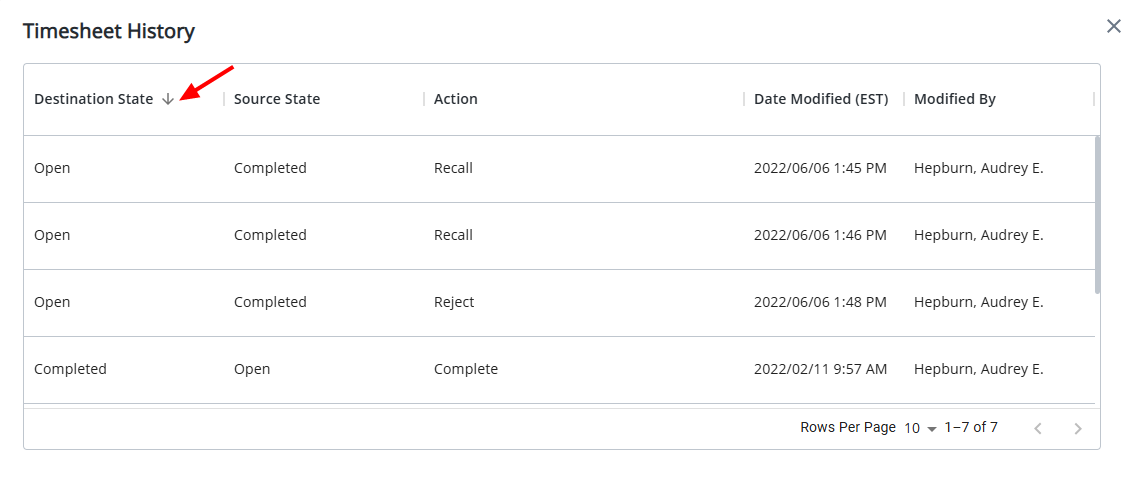
- Click the up/down arrow to sort the column in ascending or descending order.
- Note that an arrow indicates the descending (
 ) or ascending (
 ) order applied to the column.
Show/Hide columns
- From the Timesheet History page, mouse over the table header.
- The Menu
 button will appear upon hovering over a column header.
 - Click to access the corresponding options.
- From the available options click Show columns.
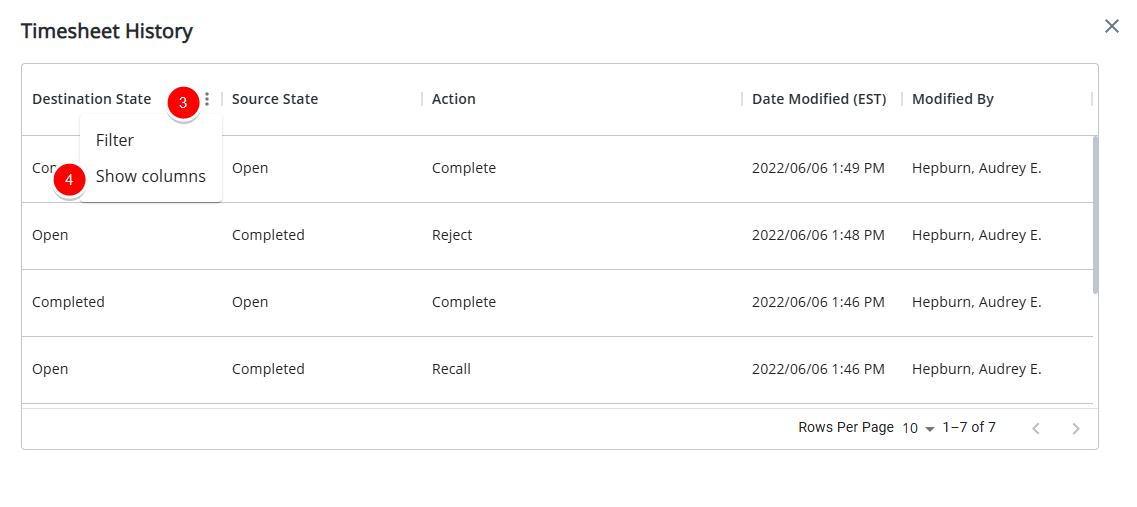
- Select the columns you wish to display or hide.
You can choose to show or hide the following options: Action, Date Modified and Modified By.
Rearrange the column position
To rearrange column positions, simply drag and drop a column in it's new position.
Adjust the column widths
To adjust a column width, simply move a column boundary to the desired width.
