When the Enforce Start and End Time is turned on, the Start/End tab displays wherein the Start/End Time can be selected and corresponding Notes entered (where applicable). Upon saving, the Total Hours are calculated and displayed in the corresponding Time Entry box.
This article details how to enter time for a Timesheet Template where the Enforce Start and End Time is turned on allowing users to specify the Start and End Time of having worked on a Task by clocking in or out.
Note: The Enforce Start and End Time setting is mutually exclusive with the In/Out Timesheet capability.
Caution: To allow Users access to the new and improved My Timesheet in your Sandbox/Implementation/production environments, you must add them to the New Timesheet list. For further details refer to Adding users to the New Timesheet list. If you prefer, you can choose to enforce the use of New Timesheet for all Users at the global level.
-
Access My Timesheet by doing either a or b:
- Click the Enter time link from the Home page.
- From the Icon Bar click Entries
 .
.
From the Navigation Menu click My Timesheet.
- Navigate to the Period you wish to enter Time for by following one of these steps:
- Click the Calendar button and select the appropriate period.
- Click the Next/Previous buttons to navigate to next/previous Period.
- Click Today to navigate to current Period.

- If the required Assignment/Task is already displayed on your Timesheet, you can begin entering time otherwise click the +Assignment button to access the New Assignment dialog box where you can pick new Assignments. For a further details on how to pick an Assignment refer to Picking an Assignment article.
- Click a Time Entry cell corresponding to the required day to enter your time.
- Note that the Time Entry Details panel is now displayed with the Start/End tab.
- Select a Start Time and the corresponding End Time.
Note: When clicking on the down arrow against a Start Time entry cell, the list returns only the available Start Times, omitting any Time intervals that have already been used.
- If required enter a Note.
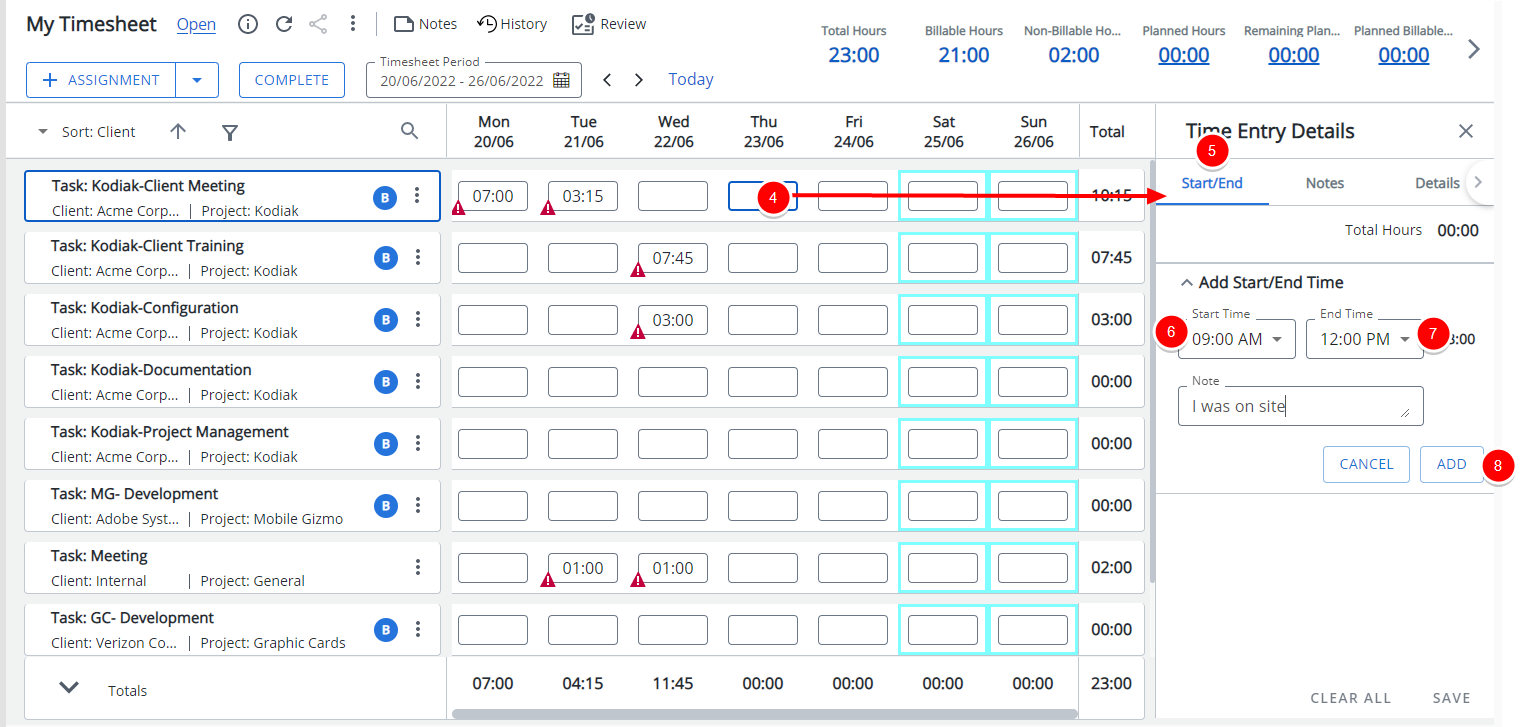
- Click the Add button to add a new line item.
- Select a different Start/End Time and Enter a corresponding Note.
- Clicking the Add button will update the Total Hours and add a new Start/End Time line on top of the list.
- Clicking Cancel will reset any selections made.
- Repeat steps 9-10 as many times as required.
- When finished, click Save which will save your Entries. Note that your total time is updated only after saving.
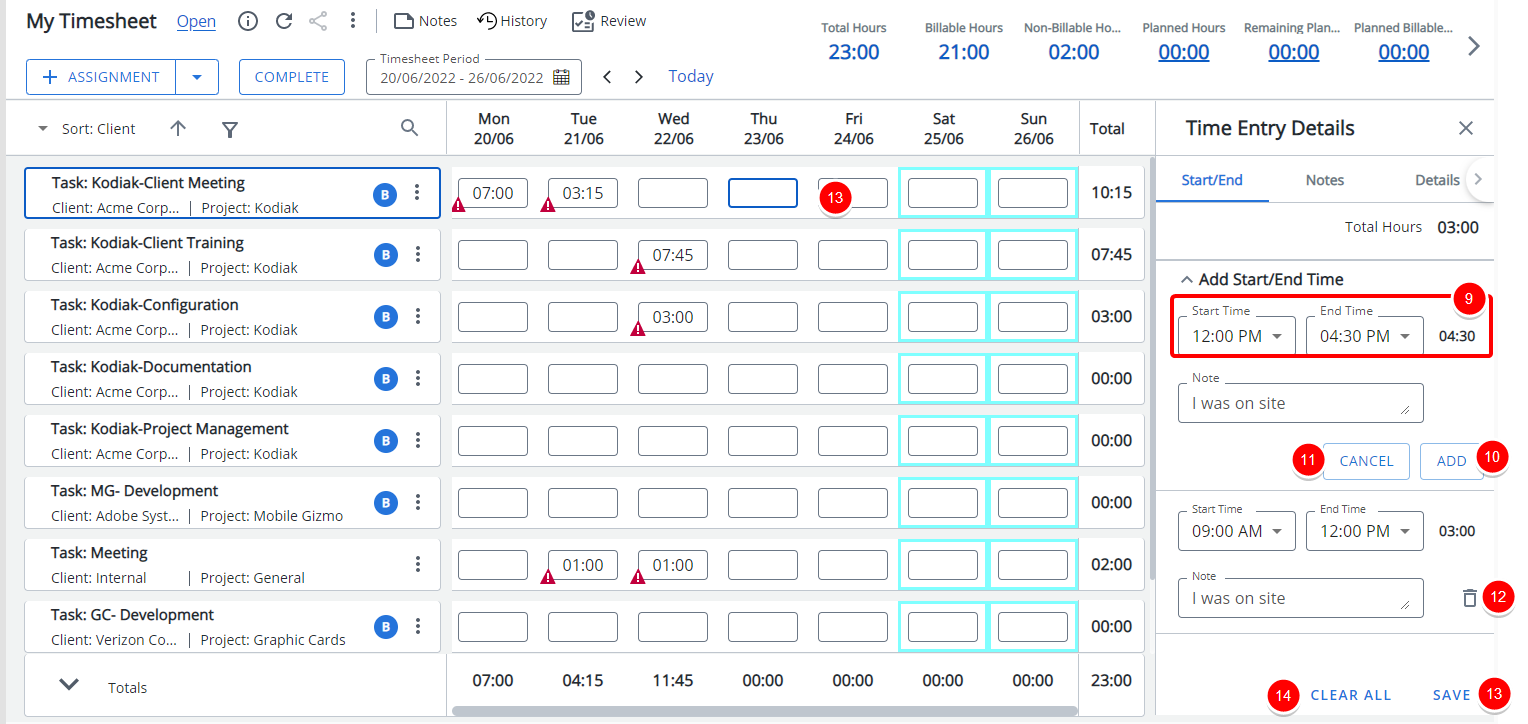
- You may choose to click Clear all which will clear all selections/entries.
Note: When modifying the Time span increment, the Start Time and End Time boxes of a previously saved Time Entry will be empty. As the selected increment is no longer available.