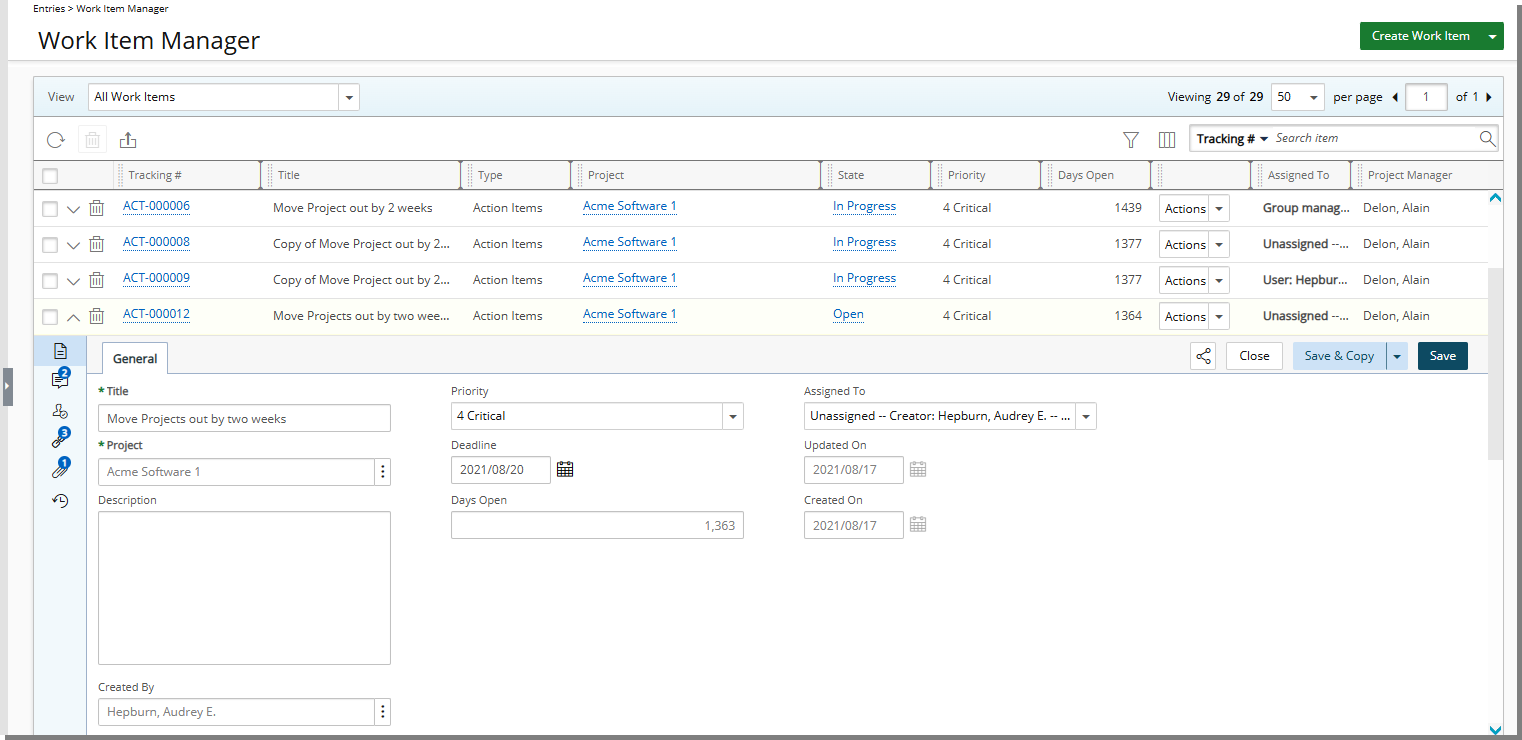
The Work Item Manager page is a dedicated area, accessed through the Entries menu, allowing you to manage, create and associate Work Item Entries.
The page lists the Work Item Entries with their associated Project, Type, Tracking #, Title, State and the corresponding number of Days Open.
Note: By default, the list is sorted by last modified Work Item Entry date.
Accessing the Work Item Manager
- From the Icon Bar click Entries
 .
. - From the Navigation Menu click Work Item Manager.
Available options from the Work Item Manager list page
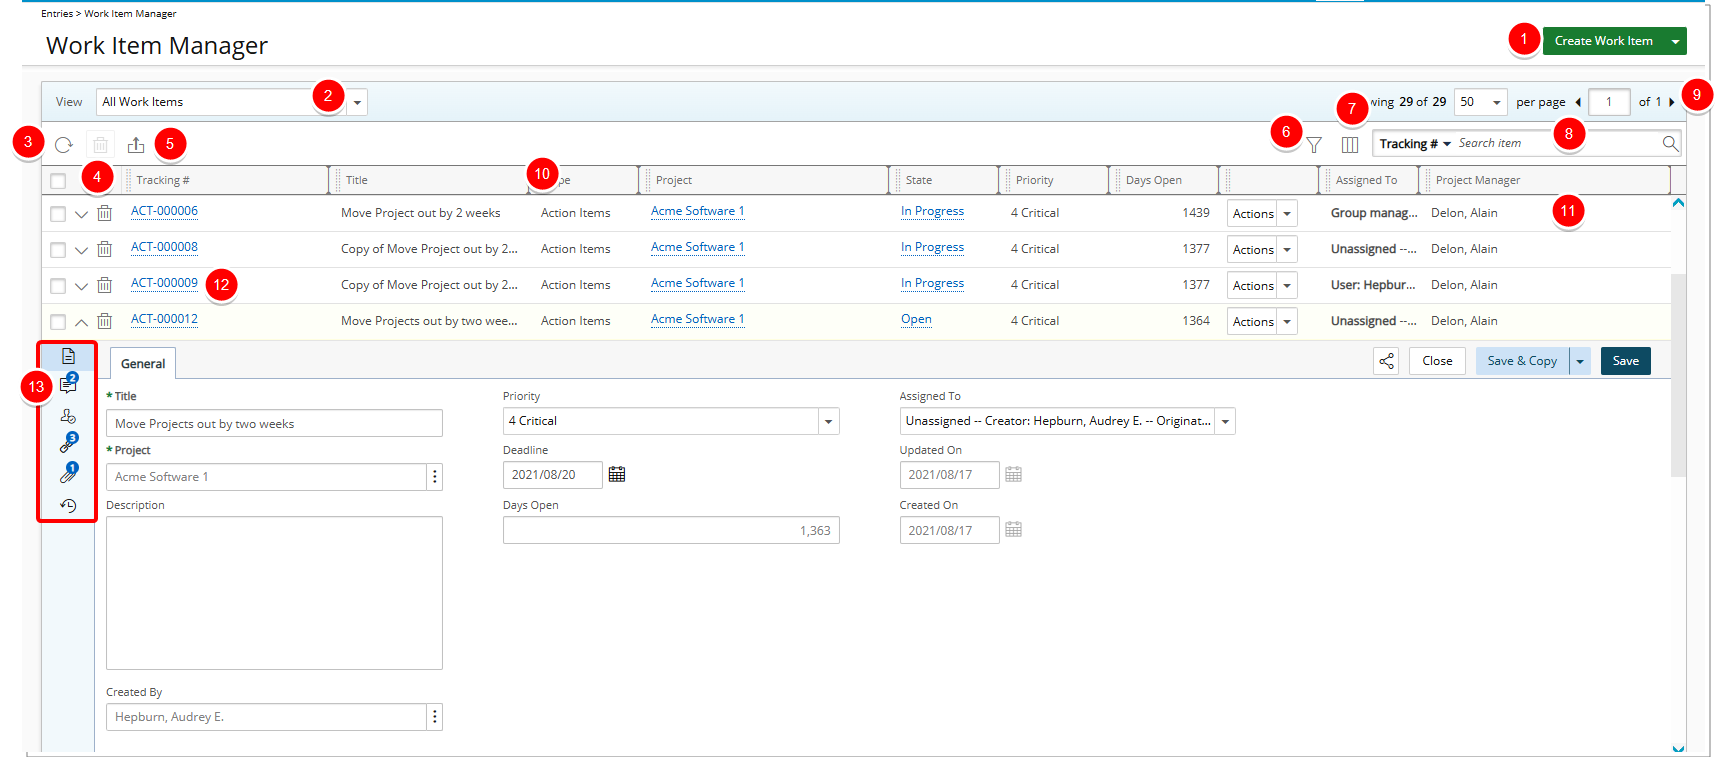
- Create a new Work Item Entry.
- Access the Views.
- Refresh the page.
- Delete Selected Work Item Entries.
- Export the list to Excel. Note that numeric columns are formatted as number or currency in the exported Excel files, allowing you to perform calculations directly on the data. For further details refer to Export to Excel.
- In addition to any User Defined Fields associated to the Work Item, by default, you can apply a Filter
 based on the Filter criteria available for each Work Item Manager Views.
 Note: On-Page/Run Time Filters applied to the Work Item Manager View are exclusively available to the User creating them and applied upon subsequent visits by the same User across all browsers.
- Access and modify the Column Selection. In addition to any User Defined Fields associated to the Work Item, by default, these columns are displayed for:
- All Work Items, Assigned Work Items, My Available Work Items and My Work Items Views: Tracking#, Title, Type, Project, State, Priority, Days Open, Actions, Assigned To and Project Manager. You can choose to add: Created By, Created On, Deadline, Impact Score, Impacted Deliverables, Mitigation Strategy, Probability, Severity and Updated On.
- Work Items by Portfolio and Work Items by Project Views: Project, Client, State, Priority, Health and Project Manager.
- Search for a Work Item Entry.
- All Work Items, Assigned Work Items, My Available Work Items and My Work Items Views: By default, the following criteria are available for all out-of-the-box Views: Tracking #, Title, Type, Project, State Project Manager, and Created By and Originator.
- Work Items by Portfolio and Work Items by Project Views: Project, Client, State and Project Manager.
- Pagination is available at the top right corner to facilitate easy navigation across pages. For further details refer to Pagination.
- From the table header:
- You can easily sort the columns by ascending or descending order simply by clicking a column header. Note that an arrow indicates the descending (
 ) or ascending (
 ) order applied to the column.
 - Click
 and move a column to the desired position.
 - You can dynamically resize column(s), to your preferred width. Simply move your cursor to the column boundary (
 ) you want to resize. When the cursor becomes a resize cursor, click and drag the column accordingly.
- You can easily sort the columns by ascending or descending order simply by clicking a column header. Note that an arrow indicates the descending (
- Easily Action on an Entry.
- Click the Tracking # to access the respective Work Item Entry edit page.
Note: User(s) assigned to the current State of the Work Item can modify the Work Item Entry.
- Click the Expand button on the drawer to access the corresponding Work Item Entry tabs:
- On the General tab, you can modify general Work Item Entry information.
- On the Comments tab, you can create or manage Comments.
Note: If comments exist, a count is displayed next to the icon, providing a visual indication of the number of comments.
- You can easily manage the State and Direct Assignments from the Assignments tab.
- From the Linked Items tab you can link to existing or newly created Work Item Entries.
Note: If linked items exist, a count is displayed next to the icon, providing a visual indication of the number of linked items.
- From the Attachments tab, you can create or manage Notes as well as Documents & Links.
Note: If attachments exist, a count is displayed next to the icon, providing a visual indication of the number of attachments.
- From the History tab, you can access and view the detailed History.