This article covers selecting the Booking Properties when adding a new booking in the Add Booking dialog box.
- From the Icon Bar click Project List
 .
. - From the Project List page, select the Project you wish to edit by following one of these steps:
- Click the Project context menu button
 to expand it. From the available options click Edit.
OR - Click the name of the Project you wish to access.
Tip: Use the search capability for an efficient way of finding the specific project. For further details refer to Searching for a Project within the Project List page.
- Click the Project context menu button
- Hover your mouse over the Planners tab and click the Work Plan option.
- Click New and then select Booking. For further details on how to create a Booking refer to Adding a Booking on a Project Work Plan.
- Navigate to the Notes tab.
- Click the Show Formatting Options
 button to access the Rich Text editor to format your Note.
 - Select the required Note Type.
- Enter the required note in the text field and format it as needed using the available options in the Rich Text Editor.
Note: If Enable Mentioning in Comments & Notes is turned on in System Configuration, you can mention team members using @ notation. A placeholder message—“Type @ to mention and to notify someone”—appears next to the cursor as guidance.
- Click Send
 to save the note and send notifications to mentioned users. You can add additional notes by repeating steps 5 and 6 as needed, or edit or delete a saved note.
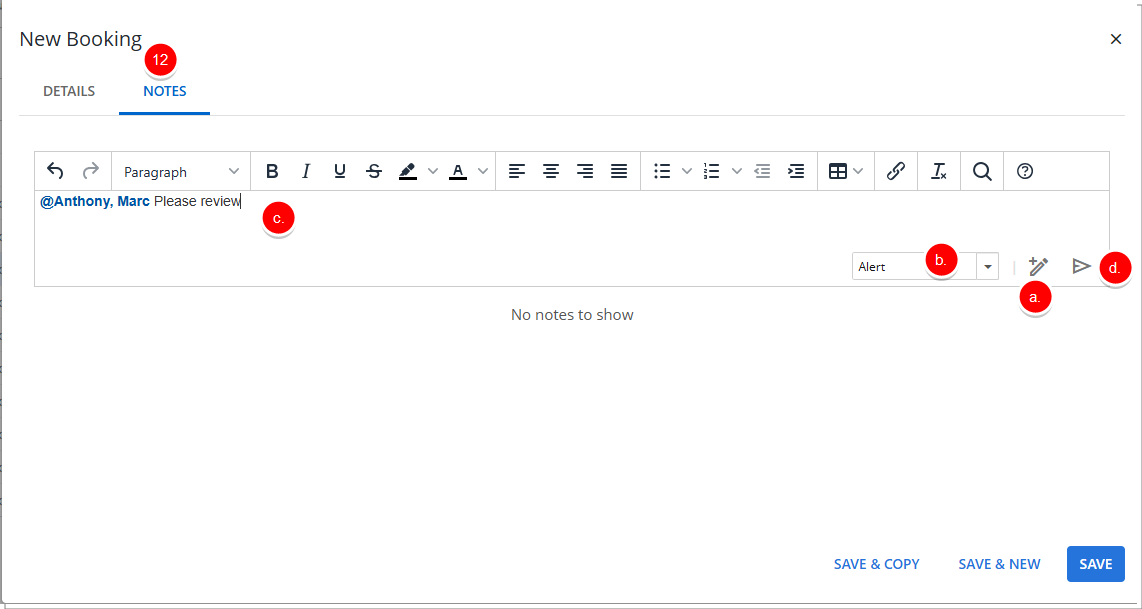
- Click the Show Formatting Options
- Select Save to save the Booking, close the Add Booking dialog box, and return to the Work Plan.
Tip: The saved booking line is highlighted in light blue for a few seconds. The highlight then fades back to the normal background color. This helps you quickly spot the booking.