Selecting the Can Add Notes option within a Financial Planner Template allows users to enter Notes against editable cells (manual Entries) within the Financial Planner.
A yellow bar visually indicates the presence of a Note entry against the cell.
This article details how to enter Notes against an editable cell (manual Entry) within the Financial Planner. For more details on how to select the Can Add Notes option refer to Allowing Users to enter Notes against manual Entries within the Financial Planner.
- From the Icon Bar click Project List
 .
. - From the Project List page, select the Project you wish to edit by following one of these steps:
- Click the Project context menu button
 to expand it. From the available options click Edit.
OR - Click the name of the Project you wish to access.
Tip: Use the search capability for an efficient way of finding the specific project. For further details refer to Searching for a Project within the Project List page.
- Click the Project context menu button
- From the Project Edit page, hover your mouse over the Planners tab and select Financial Planner from the available options.
- Expand the Category and/or Line Item where manual Entries exist.
- Click inside a manual Entry box.
- Upon the black triangular icon appearing
 , click it to open the Notes dialog box.
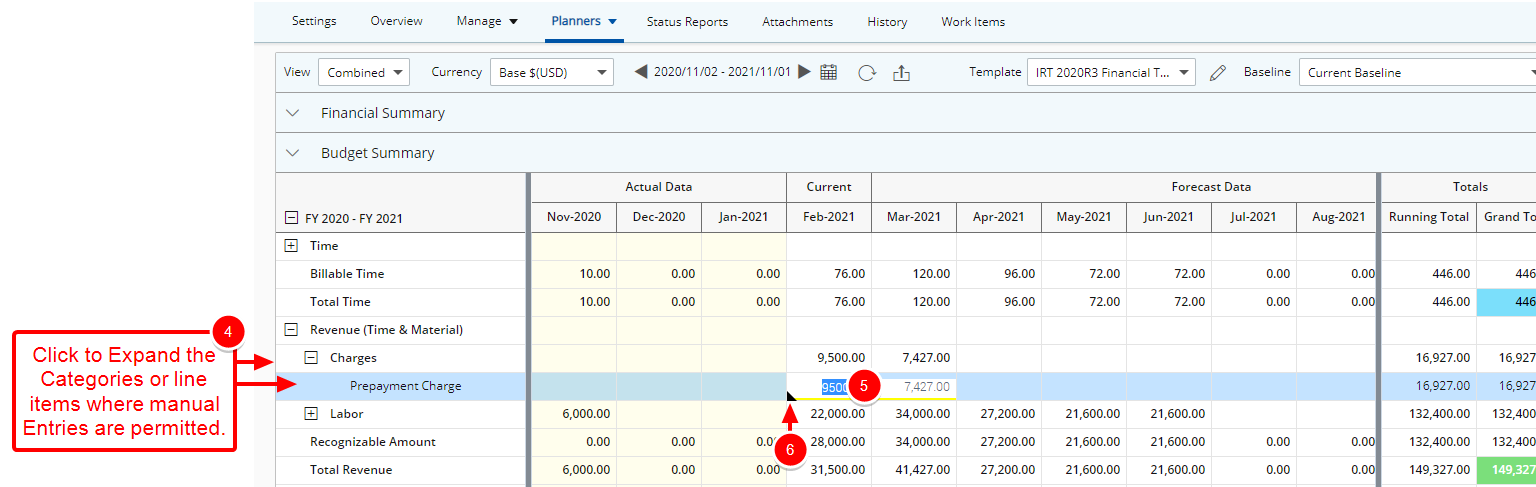
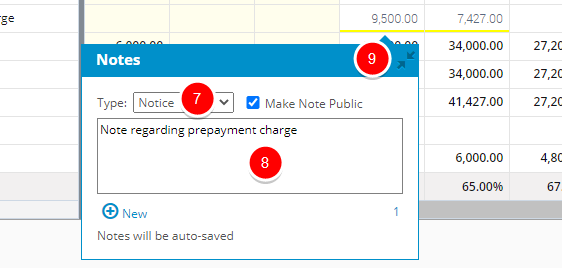
- Click the Type box and choose a Note Type from the following options:
- Alert: Select this type to flag the note for the specific entry as an alert and critical for reviewer/approver to read.
- Invoice: Select this type to flag the note and the specific entry as an invoicing matter, to be invoiced or pertaining to a specific invoice.
- Notice: Select this type to flag it as a general note regarding the specific entry.
- R&D: Select this type to flag the note and the specific entry as associated to Research & Development (if this is applicable within the organization).
- Rejection: Select this type, to enter a rejection note.
- Specifications: Select this type to indicate the note as providing a specification.
- Status: Select this type to indicate the note as providing a status.
- Clear the Make Note Public box to flag the Note as private. otherwise the option is selected by default.
- You can Type @ to mention and to notify someone.
- You can enable the rich text editor by clicking the Show Formatting Options
 button. For further details refer to Rich Text Editor.
 - Enter the required Note information.
Note: You can mention multiple Users in a single Note, including the same user more than once. However, each User will receive only one notification, regardless of how many times they are mentioned.
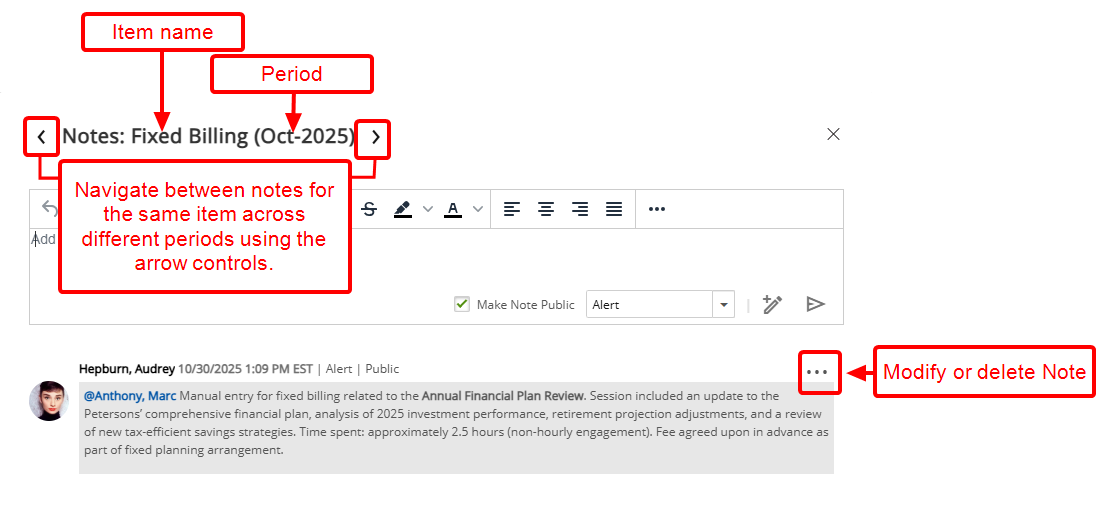
- Click Send
 . Mentioned users will receive the notification via email and the Notification Center
  , ensuring they are aware of relevant updates or required actions. For details see Mention Users in Comments and Notes.
 - The dialog box will refresh and display your note below the text area.
- Click the Close
 button to exit the dialog box.