Managing Recover module settings
Note: Depending on your project setup, some settings require a role with sufficient permissions.
From the Fast Feedback Dashboard:
-
From the menu bar at the bottom of the screen, click Settings.
You can also click the System (
 ) icon and then click Settings.
The Settings page opens.
-
Click Recover in the left pane.
-
Depending on your permissions, you can do the following:
Creating Recover action list steps
If you have the Recover module installed, you can define the stages that items of feedback must pass through before being resolved (for example, Reviewed by Legal).
For more information on working with customer feedback, see Managing tasks with the Recover module.
From the Settings page:
-
Click Recover in the left pane.
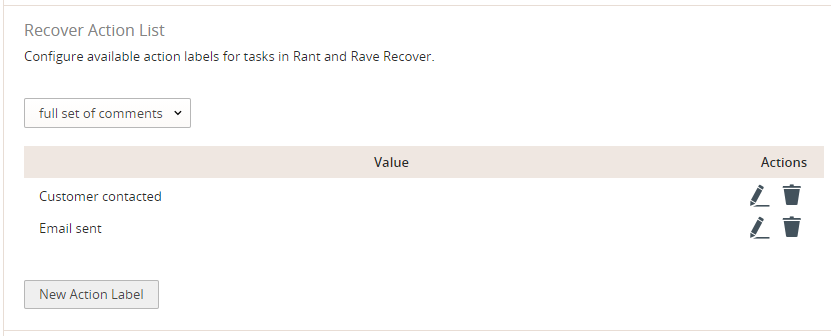
The Recover action list shows the action labels for steps to be completed when completing feedback tasks.

-
To create a new step, click New Action Label.
A new row is added at the bottom of the list.
- Enter the label name, of up to 20 characters.
- To confirm the new field action label, click the tick (
 ).
). To remove it, click the cross (
 ).
).
The label is added to the list.
- To confirm the new field action label, click the tick (
- To change an existing action label, click the Edit (
 ) icon at the end of the row.
 - To delete an action label, click the Delete (
 ) icon at the end of the row, and then click the cross (
 ) to confirm.
Managing rules for assigning feedback
If you have the Recover module installed, you can create rules that automatically assign important items of customer feedback to specific users. The rules are activated by customized alerts and then assigned to a user. The new assignee is automatically sent an email containing the title of the task, and who it was assigned by. For more information, see Creating feedback alerts.
For more information on working with customer feedback, see Managing tasks with the Recover module.
Creating a new rule for assigning feedback
From the Settings page:
-
Click Recover in the left pane.
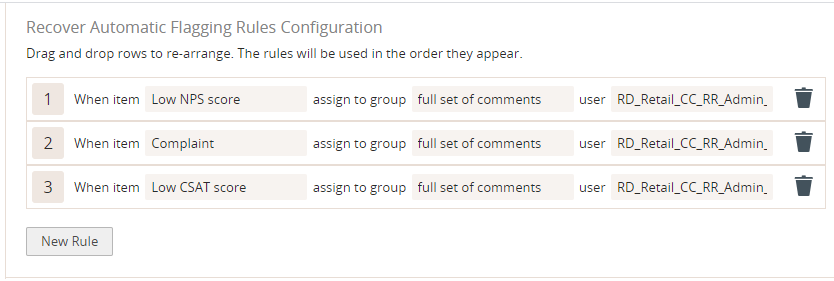
The Recover Automatic Flagging Rules Configuration list shows the rules for automatically assigning feedback. The number in the left column indicates the rule's position in the list.

-
To create a new rule, click New Rule.
A new row is added under the last rule in the list.
-
To select the alert that will activate the new rule, click filter preset and select a filter from the drop-down list.
If no filters exist, or you need to create a new one, see Creating feedback alerts.
-
Click assign to group and select the full set of comments from the drop-down list.
-
Click the user field, start typing the user's name, and then select the user from matching names in the drop-down list.
Note: Users are defined during project setup. If you need to add, amend, or delete users, contact your Fast Feedback Administrator.
The rule is saved automatically as soon as you select the user name. It is added below the existing rule.
Tip: Rules are applied in the order they appear in the list. To change the order, drag and drop one or more rules to rearrange the list.
Editing and deleting the rules for assigning feedback
As your business rules change, you may wish to assign alerts to different users. Additionally, you may wish to change the order in which rules are applied.
From the Settings page:
-
Click Recover in the left pane.
The Recover Automatic Flagging Rules Configuration list shows the rules for automatically assigning feedback. The number in the left column indicates the rule's position in the list.

- To edit an existing rule, click a field and select a new value from the drop-down menu:
To change the alert that will activate the new rule, click the filter preset field.
If you need to create a new filter, see Creating feedback alerts.
To change the assigned user, start typing the user's name, and then select the user from matching names in the drop-down list.
Note: Users are defined during project setup. If you need to add, amend, or delete users, contact your Fast Feedback Administrator.
The rule is saved automatically as soon as you select the user name. It is added below the existing rule.
Tip: Rules are applied in the order they appear in the list. To change the order, drag and drop one or more rules to rearrange the list.
-
To delete a rule, click the Delete (
 ) icon at the end of the row.
Caution: Use caution when deleting rules. There is no confirmation step.
Adding the Root Cause Values
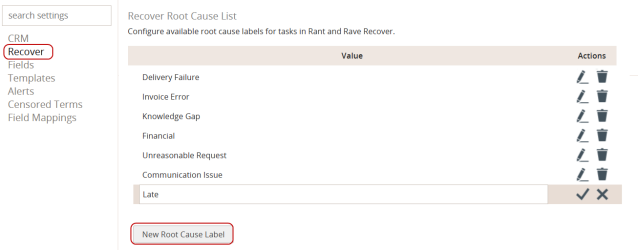
Admins can configure root cause labels for tasks in Recover. To learn more, refer to Defining the root cause of a task.
From the Settings page:
-
Click Recover in the left pane.
-
Scroll down to Recover Root Cause List section.
-
Click New Root Cause Label, enter a suitable value and select tick
 icon.
icon.
