SSL Configuration Server and Device
The following server and device tasks are required to configure SSL between the AccuRoute Server and Ricoh (Android) device.
See About Ricoh Android Device SSL Configuration for more information.
Adding the SSL URL to the Device Group Properties
Using the Server Administrator, you must add the SSL URL to the Device Group Properties.
To add the SSL URL to the Device Group Properties
-
Start the AccuRoute Server Administrator.
-
Expand Devices on the Server Administrator tree.
-
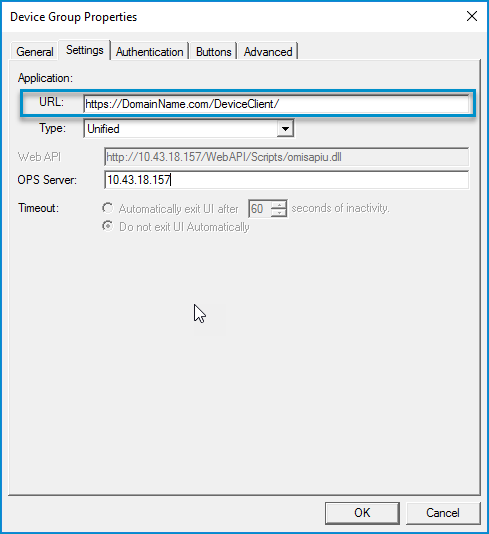
Right-click the appropriate device group and select Properties. The Device Group Properties dialog box appears.
See the Device Group Properties dialog box below.
-
Click the Settings tab.
-
Ensure your fully qualified domain name appears correctly in the URL.
-
Click OK.
Adding the Self-Signed CA certificate to the Ricoh device
Using the Ricoh device, you must add the Self-Signed CA certificate to the Ricoh device.
To add the Self-Signed CA certificate to the Ricoh device
-
Copy the Self-Signed CA certificate to a Secure Digital (SD) card.
-
Select Apps > User Tools.
See the Ricoh device > User Tools display below.

-
Select Screen Features.
-
Select Security.
-
Select Install from SD card.
-
Select and install the Self-Signed CA certificate.
-
Select Trusted credentials.
See the Ricoh device > Security > Trusted credentials display below.

8. Verify that the Self-Signed certificate appears in the System list.
See also
About Ricoh Android Device SSL Configuration
SSL Configuration Server Certificate Request
SSL Configuration Device Client and Web API