How to Configure Your Microsoft Search Target
The following topics describe how to create a Microsoft Search Target in Connectivity Hub.
For more information about Targets, see What is a Target?
Prerequisites
See Microsoft Search Engine Prerequisites.
Tip:
Target directory
Make sure to use this target with Azure or Microsoft search directory.
See below details about target directory configuration:
Caution:
Multi-server support
Support for multi-server indexing is not fully implemented in Microsoft Search target. Please use one server for indexing.
Register the Azure Active Directory Application
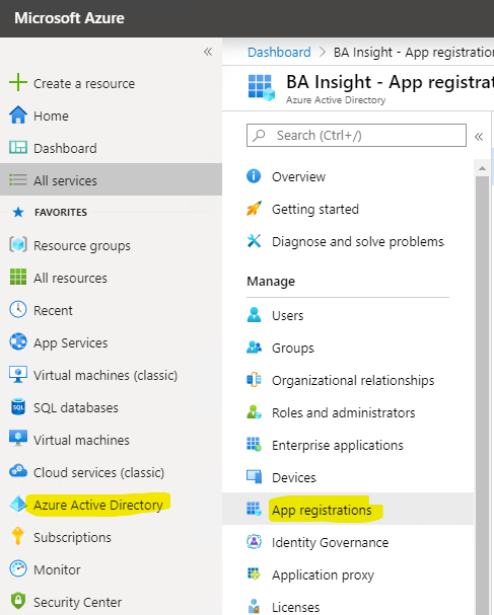
- Login to Microsoft Azure with the tenant Admin credentials.
- Click Azure Active Directory and then App registrations. See the graphic below:
- Create a New registration or select an existing registration.
- From the Overview page of the application, record the following IDs:
- Application (client) ID
- Directory (tenant) ID
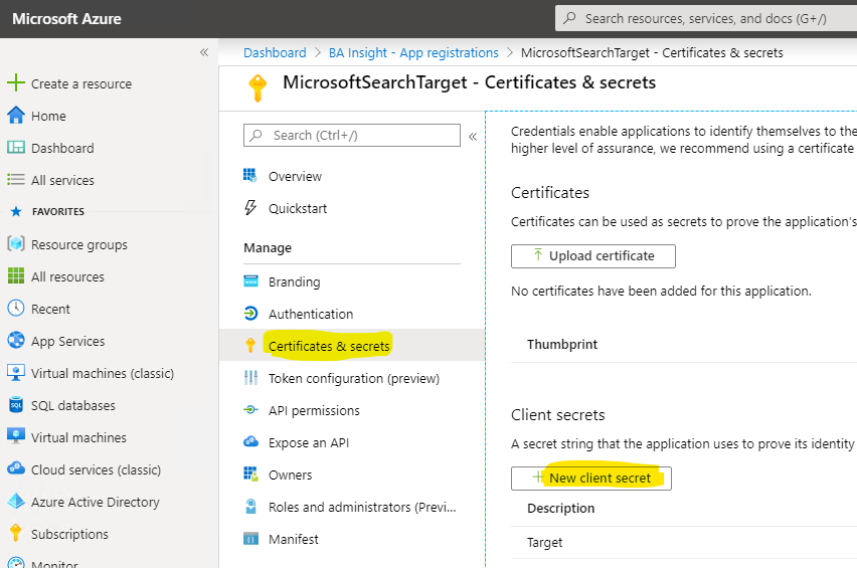
- Navigate to the Certificates & secrets page. See the graphic below.
- Click the "New client secret" button to generate a new client secret. Record the client secret .
- Click API permissions under Manage in the left-side navigation.
- Click Add a Microsoft Graph permission.
- Select the Application permissions category.
- Add the following permissions
-
- ExternalItem.ReadWrite.OwnedBy
- ExternalConnection.ReadWrite.OwnedBy
- Grant admin consent by selecting "Grant admin consent for <tenant>."
Target Configuration
To add the Microsoft SearchTarget, follow these steps:
- Go to the Connectivity Hub Target page.
- Select New Target.
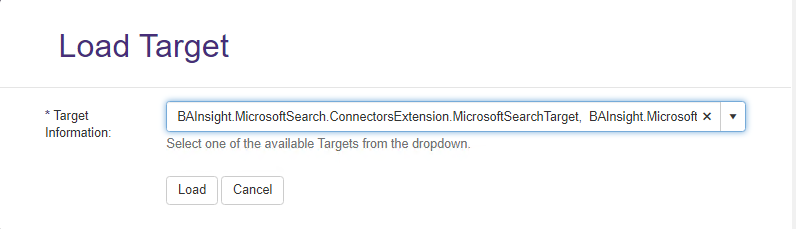
- The Load Target page appears. See below.
- Use the drop-down menu to select your Target.
- Select the Target Info tab.
- Title (required): Enter a name in the Title field.

- Select the General Settings tab and update the default settings as needed.
- Select the Custom Settings tab:
- Enter the Client ID recorded from the "Register the Azure Active Directory application" section.
- Enter the Client Secret recorded from the "Register the Azure Active Directory application" section.
- Enter the Tenant ID recorded from the "Register the Azure Active Directory application" section.
- Specify the Authority endpoint.
- Optional.
- Default: https://login.microsoftonline.com .
- For tenants in the Azure Government cloud this value must be changed to https://login.microsoftonline.us.
- Specify the Graph endpoint .
- Optional.
- Default: https://graph.microsoft.com.
- For tenants in the Azure Government cloud this value must be changed to https://graph.microsoft.us.
- Specify the Schema Registration Timeout.
- Optional.
- See Microsoft graph search doc for guidance.
- Security tab:
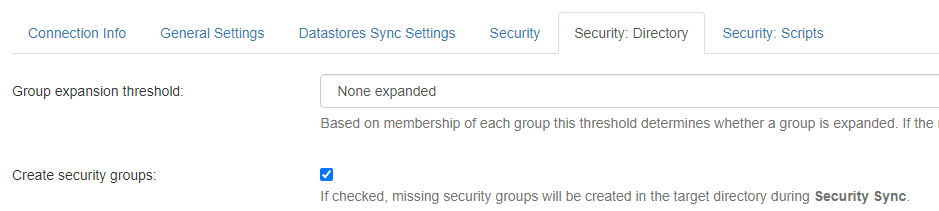
- Select "TargetDirectoryAcl' as security model

- And on the connection associated to the MS Search content, select Create security groups:
- Select "TargetDirectoryAcl' as security model
How to Configure Metadata Properties for Graph Search
Currently, Microsoft Graph Search application is in beta.
The options for configuring metadata in MS Graph Search are in flux.
See the following Microsoft resources for guidance:
-
https://docs.microsoft.com/en-us/graph/api/resources/externalitem?view=graph-rest-beta:
-
https://docs.microsoft.com/en-us/graph/api/resources/property?view=graph-rest-beta
You must configure your content source metadata to satisfy Microsoft's requirements.
Connectivity Hub Metadata Management page for your content source displays a warning if you exceed the current known limitations.
Note: The MS Search does not allow "_" and "." characters in metadata property names. The Target automatically trims these characters from the property names.
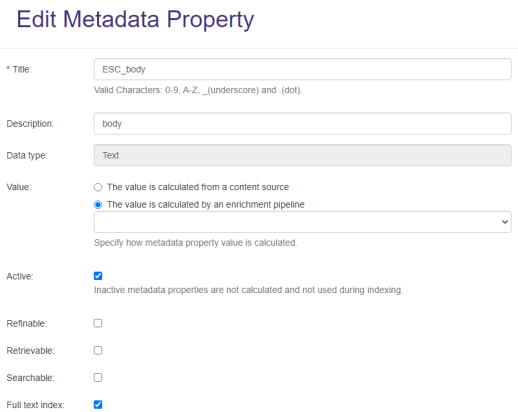
How Index the Content of Your Documents (Full-text) with Microsoft Search
- To index the content of your documents (such as PDFs or MS Office documents) with Microsoft Search, you must connect your content source to the BA Insight Tika Text Extractor service.
- Follow the instructions on the page: Azure Cognitive Search: How to Extract Plain Text from Documents.
- Make sure to mark the property returned by Tika Text Extractor service as Active and Full Text Index:
- After you add a Target, run a Full Target Update job.
- Then, run an Incremental Target Update job to update your Target.
How to Search for Indexed Items
Set up a Custom Vertical and Display Template (tenant level)
Use the following instructions to set up a custom vertical and display template (tenant level) for displaying indexed ExternalItems .
See Microsoft documentation for more information about creating a custom search vertical.
Note: Site collection level search for ExternalItems is not currently available
- Perform a full crawl on the configured MS target.
- Go to the modern Admin Center: https://admin.microsoft.com.
- Navigate to Settings → Microsoft Search → Connectors
- Verify that the Connector was created.
Note: Connectors that index ExternalFiles do not appear in the list.
- Verify that the Connector was created.
- Navigate to the Settings → Microsoft Search → 'Verticals' tab.
- Click 'Add a new vertical' and enter a name.
- Pick your Connector as the Content Source.
- Provide a filter query to narrow the scope of your vertical (optional).
- Click 'Add vertical' and be sure to 'Enable' it after you reorder verticals as needed.
- Navigate to Settings → Microsoft Search → Result Types
- Click 'Add a new result type'.
- Use the card designer to craft your display template.
- Copy the JSON file and complete display template creation.
Set Up a SharePoint Site
Use the following instructions to set up a SharePoint site and display ExternalFiles in the 'All" and 'Files' tab:
- Create a SharePoint site collection with a modern search page.
- Import a SharePoint module in PowerShell using the following command:
Install-Module -Name Microsoft.Online.SharePoint.PowerShell3 -
Set up SERP using the below PowerShell script:
$orgName = Read-Host -prompt 'Enter the name of your organization'

$userName = Read-Host -prompt 'Enter user name'

$userCreds = Get-Credential -UserName $userName -Message "Type the password"Connect-SPOService -Url https://$orgName-admin.sharepoint.com -Credential $userCreds

$url = Read-Host -Prompt 'Please enter the SharePoint site URL'

$site = Get-SPOSite -Identity $url

Set-SPOSite $url -DenyAddAndCustomizePages 0

$pwd = Read-Host -AsSecureString 'type the password'

$context = New-Object Microsoft.SharePoint.Client.ClientContext($url)

$credential = New-Object Microsoft.SharePoint.Client.SharePointOnlineCredentials($userName, $pwd)

$context.Credentials = $credential

$web = $context.Web

$context.Load($web)

$web.AllProperties["AllVerticalContent"] = "Combined"$web.Update()

$context.ExecuteQuery()

$web.AllProperties["FilesVerticalContent"] = "Combined"$web.Update()

$context.ExecuteQuery()

Write-Host "Success" -ForegroundColor Cyan

Read-Host -Prompt 'Press enter to exit'