Add and Manage Program Templates
Program Templates can contain nearly all the same data as a Program in order to simplify the process of creating Programs and to increase consistency across them. Data in a Program Template is copied when a Program is initially created.
Example: An organization might start taking on a large number of digital initiatives. To accommodate them, Lorna creates a new Program Template called "Digital Program Template". Programs that are created with this template should be used to organize all of the Projects that support the digital initiatives. The Program Template will create pre-defined characteristics that will be applied to each Program created with it.
The following Program Template details will be inherited by the Programs that are created with them:
-
Portfolio
-
Organization Owner
-
Program Owner
-
Program Properties
-
Health Indicators
-
Visible Areas
Note: These details can be changed on Programs at any time, including during Program creation.
This page covers the following topics:
Additionally, you should see Program Template Configuration for additional information on editing the functional details of a Program Template.
Creating a New Program Template
Program Templates can be easily created from the Administration page. During creation, administrators will set the initial details that will be passed on to the Programs that use the template.
Before You Start: Administrators will require the "Manage Program Templates" Application policy permission to create new Program Templates.
To create a new Program Template:
-
Select Administration from the Navigation Menu:

-
Select Programfrom the "Templates" menu:

-
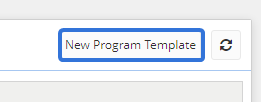
Select the New Program Template button in the top right-hand corner of the screen:

-
Choose a source template from the "Source Template" drop-down menu.
Note: Your new template will inherit the Classification, Properties, and Status/Health details of the source template. However, these can be edited at any time after the Program Template is created.
-
Enter a unique name for your new template in the "Name" field.
Note: The "Create Template" window will NOT warn you if you choose a duplicate name. Ensure that you are using a unique name to avoid confusion.
-
(Optional) Select the "Shared" checkbox if you would like the Program Template to be available to other users.
-
(Optional) Select the "Enable Autonumbering" checkbox to automatically number each Program created from this template.
-
(Optional) Type in an "Autonumbering Prefix" that will accompany the automatically-generated numbers on Projects created from this template.
Note: This textbox will only appear if the "Enable Autonumbering" checkbox is selected.
-
Select the Save button:

After selecting Save, your new Program Template will be saved in Eclipse PPM. You can use it to create new Programs (and so can others if you selected the "Shared" checkbox in Step 6).
Before using the new template to create new Programs, you should edit some of the details.
Editing a Program Template
Editing a Program Template's details should always be done before using the Program Template to create new Programs. This will determine the details and values that new Programs will automatically inherit upon being created by the template.
Note: A Program Template can be edited at any time, but any edits made to a Program Template will not be made to the Programs that have already been created using the template. However, users can apply a Program Template Configuration to update their Program(s) with some of the new template details.
Before You Start: Administrators will require the "Manage Program Templates" Application policy permission to edit Program Templates.
To edit a Program Template:
-
Select Administration from the Navigation Menu:

-
Select Programfrom the "Templates" menu:

-
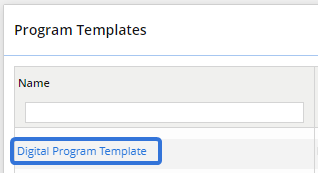
Select a Program Template from the table:

Tip: Users can filter results by typing values into any of the textboxes in the column headers. Also, they can sort the results alphabetically by any of the columns by simply clicking on the column header.
-
Select the Edit Program Template button:

-
Edit the Program Template's details:
-
Name: Change the name of your Program Template.
-
Status: Change the status of your Program Template. This status will be inherited by Programs created using the Program Template.
-
Share this Program Template: Select the checkbox if you would like this template to be available to other Eclipse PPM users, not just yourself.
-
Enable Auto-Numbering: Select this checkbox to automatically assign a number to Programs created using the template.
-
Description: Enter a description that will be inherited by Programs created using the template.
-
Portfolio: Use the drop-down menu to select a Portfolio that Programs created using the template will automatically belong to.
-
Organization Owner: Use the drop-down menu to select an Organization that will serve as the Organization Owner for Programs created using the template.
-
Program Owner: Enter the name of a Resource that will serve as the Program Owner for Programs created using the template.
-
Properties: Edit the values of any of the Program Properties attached to the template. The values will be inherited by Programs created using the template.
Note: Program Properties can be added and removed using Program Template Configuration.
-
-
Select the Save button:

After selecting Save, your Program Template details will be confirmed. To configure some of the functional details of the Program Template, see Program Template Configuration.