Managed Groups
This page describes the functions of the Managed Groups page in the Admin App.
You must assign users to a managed group in the Admin App to give them access to InGenius. All users in a specific managed group will then use the same telephony provider, intelligent dialing profile, workflow integration, and license when using InGenius.
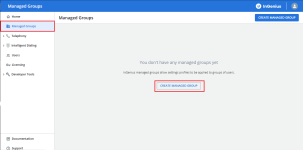
You can view existing managed groups and create or delete a managed group from within the Admin App.
To create a new managed group:
-
Select CREATE MANAGED GROUP.
-
You are then prompted to enter the following information:
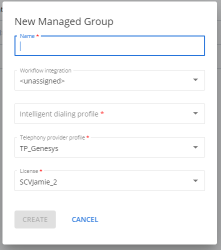
- Name: The name of the managed group which appears in the InGenius Admin App.
- Intelligent dialing profile: A default intelligent dialing profile is selected for you.
- Telephony provider profile: Select an available telephony provider profile from the dropdown list.
- License: Select an appropriate license from the dropdown.
- Workflow Integration: Select a workflow integration to assign to the managed group. This field is optional and may remain unassigned.
Note: If no license appears in the dropdown, your InGenius org has not been properly licensed. If only one license is available, it will be chosen as the default option.
-
Click Create to save.


To delete a managed group:
- Select the More Options icon
 corresponding to the managed group you want to delete.
 - Select Delete. Confirm deletion when prompted.
Note: The More Options dropdown also allows you to Clone a managed group (duplicate it) or Rename the group.
You can assign an intelligent dialing profile, a telephony provider profile, and an active license to your managed groups.
Use the More Options icon to choose the intelligent dialing profile, telephony provider, workflow integration, and active license for each of your managed groups:

Select the following links to learn more about each of the managed group fields:
Once a managed group has been created, users can be assigned to that group. All users inside a managed group will be granted a license, if that managed group has been assigned to a license pool and there are still licenses available.
Note: Users must still be added to a contact center to appear in the Admin App users page. If a user is removed from a contact center, they will also be removed from any assigned managed groups.
To assign a user to a managed group:
- Ensure you have created at least one managed group in the Admin App.
- Navigate to the Users page from the left sidebar.
- Check the boxes to the left of the users you want to assign to a group.
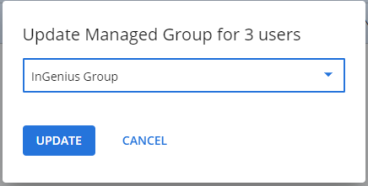
- Click the UPDATE MANAGED GROUP button in the top right.
- Select a managed group from the dropdown list to assign the users to that managed group.
- Click Update to complete the action and assign users to that group.