Setting up Salesforce Lightning
Mobile Commons offers an enhanced Salesforce integration that supports Salesforce Lightning. This integration matches the core functionality of the existing Classic integration, while introducing support for the Lightning interface.
Note: The new Salesforce Lightning integration is backward compatible and continues to support Mobile Commons customers using Salesforce Classic.
This integration ensures Mobile Commons customers can continue using their Salesforce CRM—regardless of version—without compromising on data accuracy or functionality.
You must have Administrator access to work with data syncs in Mobile Commons. To initially enable the sync, please contact your Customer Success Manager (CSM) or reach out to Technical Support.
The Mobile Commons and Salesforce Lightning integration includes:
-
Bi-directional syncing for user records (profiles). Daily syncing of new profiles daily between Mobile Commons and Salesforce Lightning to keep data updated in both systems.
-
Syncing donation data twice a day.

Note: Donation data syncs one-way from Salesforce Lightning to Mobile Commons.
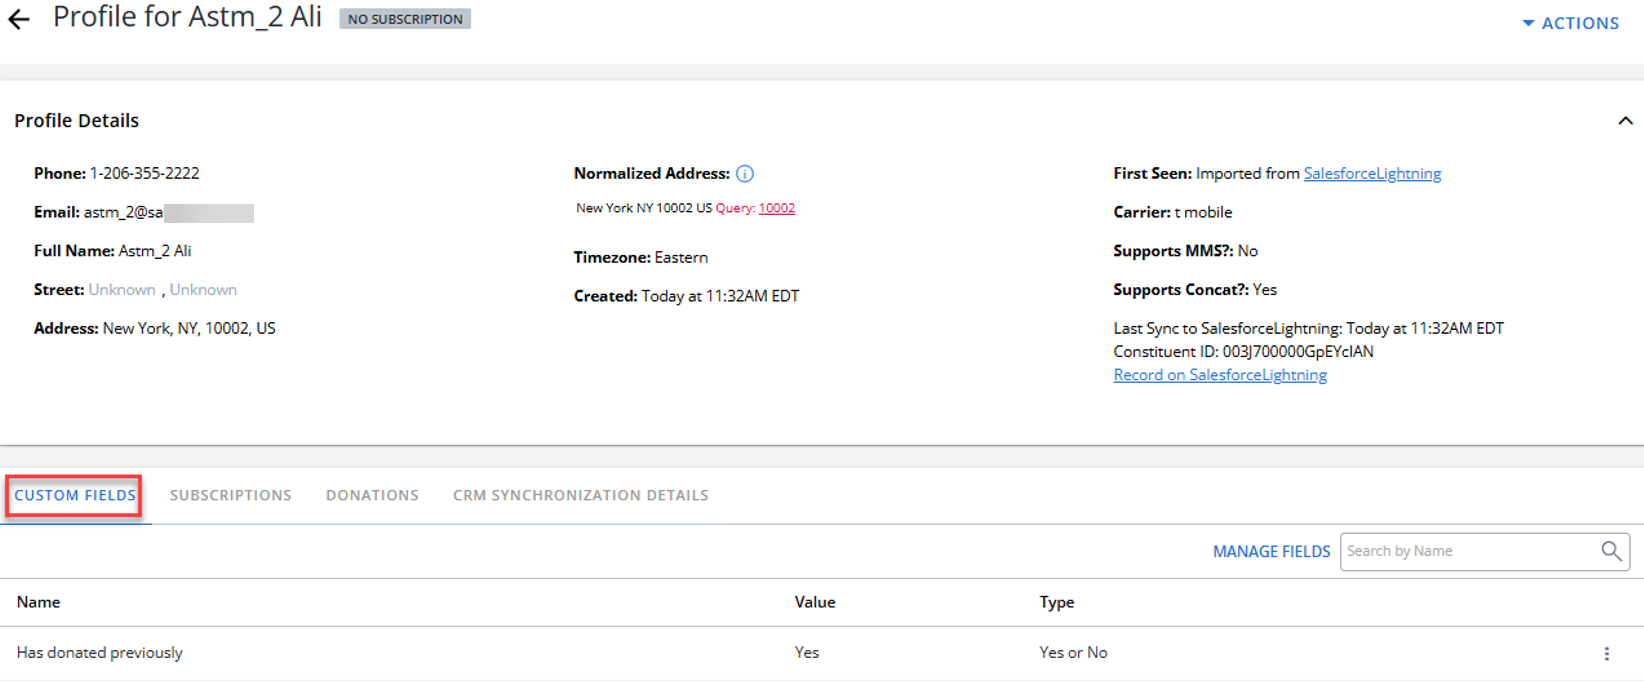
If a profile includes donation records, a custom field named "has_donated_previously" is created in Mobile Commons with the value “true”.
The user records must include a mobile number. To set up the Salesforce Lightning data sync:
Preparing for setup
Before you begin, gather the log-in credentials and set up any other key connection settings for your Salesforce Lightning CRM system.
-
In Mobile Commons, create or designate a web opt-in path, which will serve as the default opt-in path for any new users pulled from the Salesforce Lightning data set. For more information, see Adding a new web opt-in path.
New subscribers will receive the Welcome message associated with the selected opt-in path. For more information, see Data sync paths.
Tip: Work with your mobile strategist to organize your synced subscribers by mapping specific Salesforce groups to different opt-in paths.
-
In Salesforce, set up a custom Boolean (true/false) mobile opt-in field named Mobile_Subscriber_c (case sensitive) for use with a custom export. For more information, see Setting up a custom export section below.
-
Make a note of the following credentials from your Salesforce system:
-
Existing Salesforce login or API username and password.
-
Tip: Create a new set of credentials exclusively for use with Mobile Commons (recommended).
API security token. To generate a security token, go to salesforce.com.
API host name, which is usually the URL of your Salesforce account. Be sure to leave off the http:// or https:// at the beginning of the URL. It is automatically added in the API call and may cause sync errors.
Full URL for the Salesforce custom export, which should end in "=CSV". For more information, see “Setting up a custom export” section below.
Setting up a custom export
In order to sync user opt-ins and out-outs, set up a custom export URL in Salesforce. Without it, Mobile Commons cannot sync updated records with a mobile phone field.
When setting up your custom export:
-
Add a Contact ID column containing the Salesforce ID for the contact.
-
Confirm that the export URL is set up to export as a CSV from Salesforce. The URL should end in "=CSV".
-
Make a note of the custom export URL, so you can add it to the Salesforce configuration.
-
(Recommended) Set up a custom report in Salesforce that provides the Constituent ID, which identifies synced reports across both systems. This report also helps to minimize the number of API calls, so you are less likely to exceed the daily API quota limit.
Configuring the Salesforce Lightning integration
To sync data between your Salesforce Lightning database and Mobile Commons:
-
Select Home in the left pane, and then select Data Sync.
-
Select Salesforce Lightning.
The home page for Salesforce Lightning sync opens.
-
In the Integration Actions panel on the right, select Configure Integration.

The Salesforce Lightning configuration form opens.
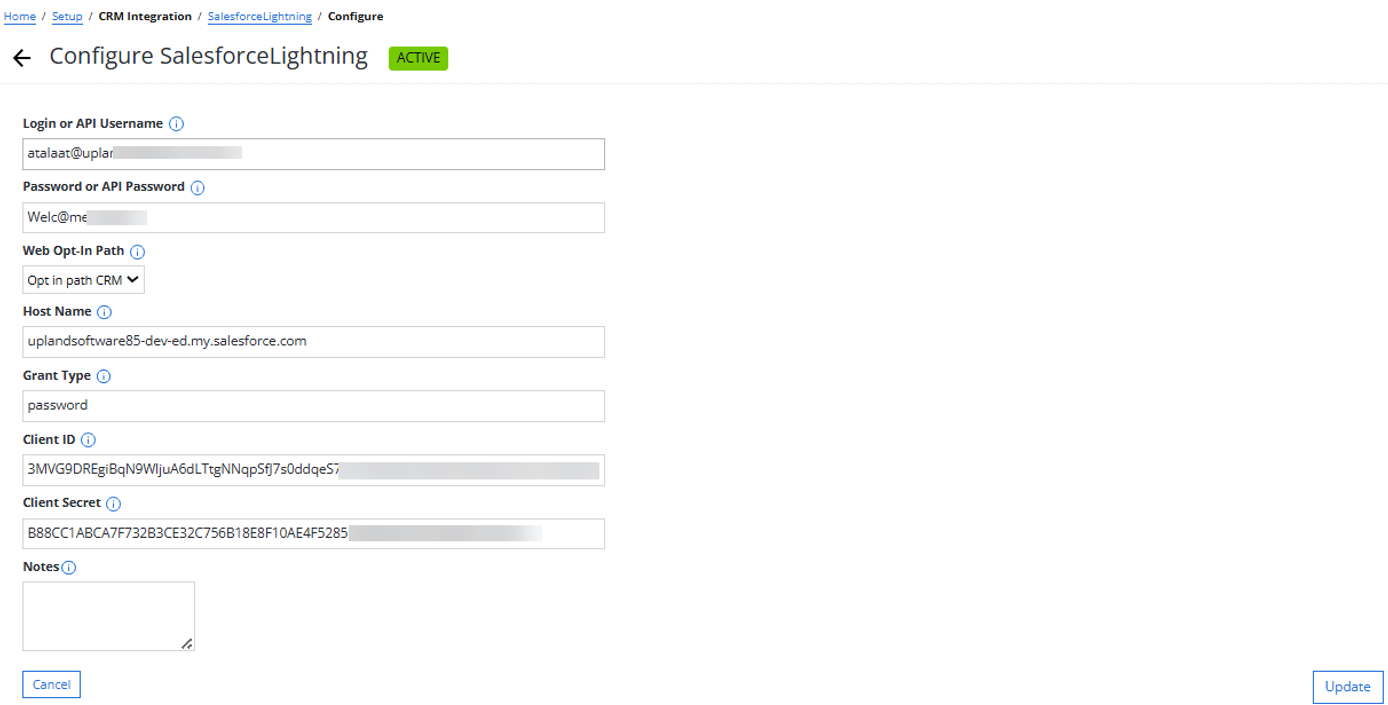
For assistance, select tooltip available next to the field label.
-
In the Login or API Username field, enter your username for your Salesforce Lightning system, and then enter your password in the Password or API Password field.
-
(Optional) If users from Salesforce Lightning will opt-in to your campaign via a web path opt-in, select the Mobile Commons web opt-in path from the drop-down list. All mobile users from Salesforce Lightning will receive opt-in messages from the opt-in path you specify.
-
Enter the host name for API requests.
-
Enter the grant type. Salesforce grant type to generate security token for the salesforce account. This can be generated through salesforce.com.
-
Enter the client ID and client secret.
-
(Optional) Enter your notes for internal use only.
-
When you are done, select Update.
Reviewing required and supported fields
The Salesforce Lightning data sync supports all standard and custom profile fields. After you configure your Salesforce Lightning integration with Mobile Commons, review your Salesforce Lightning system and Mobile Commons user records (profiles) to ensure required and supported fields are available in both data sets.
The following fields are required:
-
Phone number
-
Email
Note: To update default attribute values from Mobile Commons to Salesforce Lightning, the email field in Mobile Commons must be updated as part of the sync. If the email is not updated, attribute values will not update in Salesforce Lightning. Be sure to include the email field in your sync to ensure changes are properly applied.
-
Opt-in status (for Conservative syncs)
Supported Fields
| Category | Field | Default field name |
|---|---|---|
| Subscription status |
Opt-in (required for Conservative syncs) |
"opt_in_status" |
| Demographic |
Phone number (required) |
"phone_number" |
| First name | "profile_first_name" | |
| Last name | "profile_last_name" | |
| Email (required) | "profile_email" | |
| Address/Location | Street address | "address_street_1" |
| Street address 2 | "address_street_2" | |
| City | "address_city" | |
| State | "state" | |
| Zip Code | "address_postal_code" | |
| Country | "address_country" | |
| Other | Constituent ID | The field names differ by data set: • "constituent id" (Mobile Commons) • "id" (Salesforce) |
Note: To update default attribute values from Salesforce Lightning to Mobile Commons, the corresponding fields must be empty in Mobile Commons.
If you are not using the default field names, use custom field mappings to specify field names in Salesforce Lightning.
To set up custom field mappings:
-
Select
 Home in the left pane, and then select Data Sync.
The home page for Salesforce Lightning sync opens.
-
In the Integration Actions panel on the right, select Edit Field Mappings. This form lets you map from Mobile Commons fields to Salesforce Lightning fields. These fields MUST match the variable names in the API/data export.

-
Review the field names to ensure that they are correct.
-
The Field column contains the Mobile Commons field name.
-
The API Field Name column contains the API field name in Salesforce Lightning.
-
The CSV Heading column contains the heading in the CSV export file.
-
-
To limit the sync to records that contain data in specific fields, select the Required? checkbox next to the field name. When a field is required, it must contain a value in order to be synced. Empty fields are not synced.
Caution: Do not select Required for Phone number, Email, or Opt-in status fields, which must by default exist in both databases in order to sync data. Use caution if you change the field name for any of these three fields; if the custom field name is incorrect, the data sync will fail.
Caution: Do not select Required for Constituent as this ID is provided by Salesforce Lightning. If it is set to Required, Mobile Commons profiles will not have this ID, causing the sync from Mobile Commons to Salesforce Lightning to fail.
-
When you are done, select Save.
Activating the Salesforce Lightning sync
Before you begin, review the configuration settings for your sync:
-
Select
 Home in the left pane, and then select Data Sync.
The home page for your Salesforce Lightning sync opens.
-
In the Integration Actions panel on the right, select Configure Integration.

-
Review the configuration settings, making adjustments as needed.
-
When you are done, select Update.
-
To activate the integration sync, in the Integration Actions panel on the right, select Activate Integration.
The indicator in the upper-right corner is Active. The first data sync will run the following morning.
Data sync updates
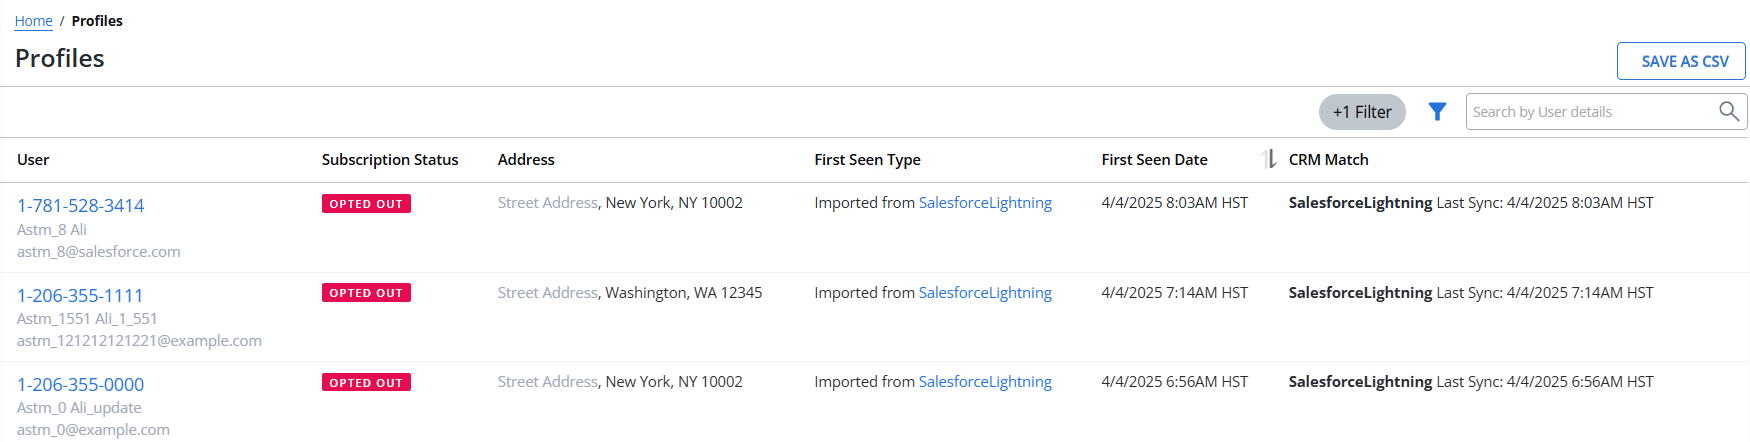
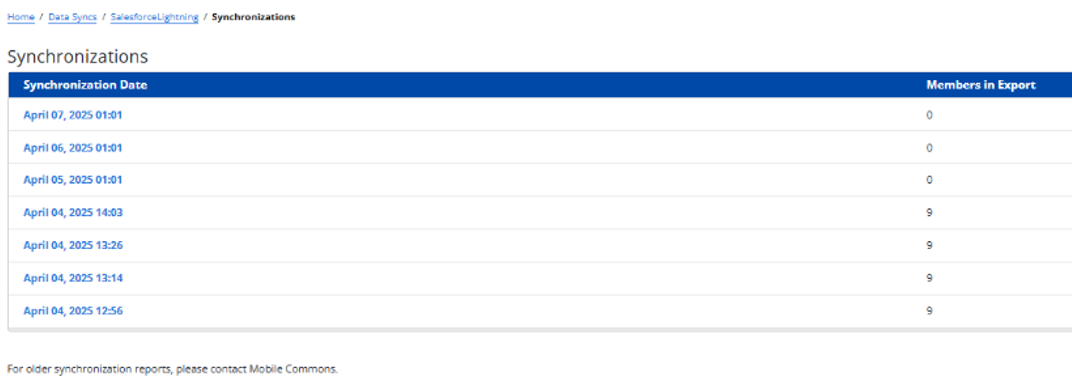
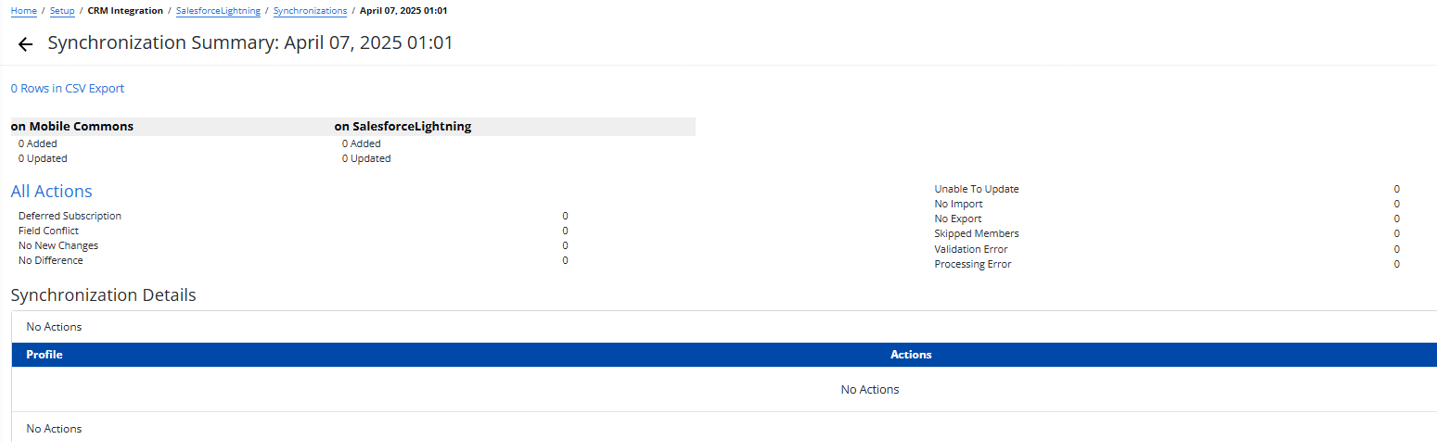
View a detailed synchronization report of each overnight sync, including the number of profiles synced and direct links to the corresponding profiles in Mobile Commons. After activation, the Mobile Commons data set and your Salesforce Lightning database are both updated on a regular basis:
-
Mobile Commons checks for updates nightly, processing all recent updates from Salesforce Lightning during overnight hours.
-
Any new opt-ins or opt-outs from Mobile Commons are synced to Salesforce Lightning every five minutes during the day.
-
For users whose profile records contain an email address, new opt-ins are added to Salesforce Lightning as a new record with an opt-in status of true.
-
For users with a matching record in Salesforce Lightning, new opt-outs update their opt-in status to false.
-
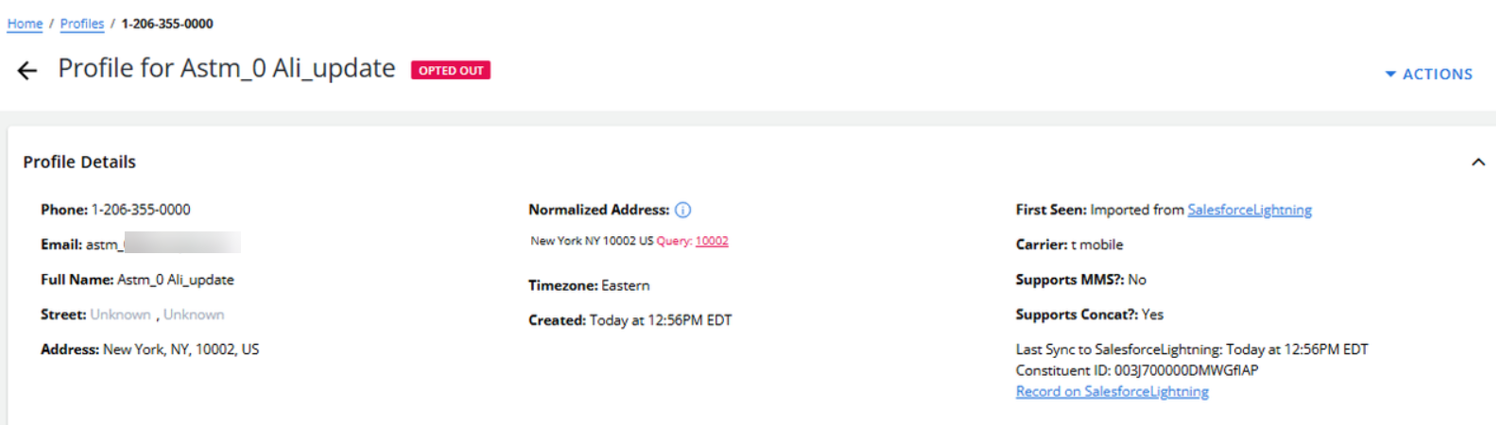
Note: Once user records are synced, the record number from the Salesforce Lightning system is added to the Constituent ID field in Mobile Commons user profile and serves to identify records across both of your systems.
After your data sync runs, you can open the Synchronization report. For more information, see Working with the Synchronization report.
Deactivating the Salesforce Lightning sync
If you need to shut off the data sync with your Salesforce Lightning CRM system, whether temporarily or permanently, you can deactivate it. For more information, see Deactivating the integration.
