Trigger flow with a folder capture node
Before starting, ensure you’re familiar with the essential concepts of OL Connect Automate and Node-RED, including editor features and flow design. See Documentation, Training, and Support for links to getting started topics and information about using samples and tutorials. Nodes shown in flow example images may display their entered names, set in the node Properties panel, instead of their default names.
Folder Capture, also knows as folder watching, monitoring, or creating a hot folder, allows you to watch a folder for incoming files and trigger automation workflows in OL Connect Automate. Here's how to configure the folder capture node to create a watched folder, and work with incoming files.
Folder Capture node overview
When a new file appears in the target folder, the folder capture node sends information about the file to the flow using a message object, referred to as the msg object. This is a standard JavaScript object used to carry data from one node to the next during flow execution.
Rather than passing the file content, the node provides the full file path in msg.filename, along with structured metadata in msg.file. This metadata includes the file name, extension, and folder path. For convenience, the full file path is also available in msg.payload, one of the standard properties commonly used in Node-RED to carry primary data.
Once deployed, the folder capture node triggers the flow once for each file it detects, enabling downstream nodes to process files independently. New files can trigger the flow even while previous invocations are still in progress.
Many OL Connect Automate nodes work with file paths. For example, in the flow below, the folder capture node is followed by the all in one node, which uses the file path to upload and process the data file on the OL Connect server.

Other nodes that work in a similar way include data mapping, document mapping, and file store upload, all of which accept a file path as input for processing.
Set up a watched folder
-
To begin watching a folder for incoming files, add the folder capture node to your flow.
-
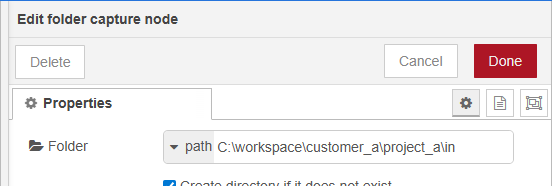
Double-click the node to open its Properties panel and configure the watched folder.
-
By default, the folder field accepts a static path.
-
You can enter a full directory path using Windows notation, for example:
C:\workspace\customer_a\project_a\in -
Alternatively, use Linux-style notation, such as:
/workspace/customer_a/project_a/in
A full or absolute path works well for simple setups but tightly couples the flow to a specific machine and file system. Since the path is hard coded in the flow, deploying it to another system may require manual adjustments, making migration or promotion across environments more error prone.
Use environment variables in flows for a more flexible alternative. Environment variables decouple parameters, like a path, from the flow itself, making it much easier to move or replicate the project across different machines.
Select watch method
When OL Connect Automate starts, or when a flow is deployed, the folder capture node will process existing files in the selected folder. It then starts watching the folder for new or updated files. This is based on the selected Watch method.
There are two options for Watch method:
File System Events
This method uses operating system notifications to detect changes in the folder. It triggers the node when a file is created, modified, or overwritten, even if the content hasn’t changed. It is the preferred option for most scenarios due to its low CPU usage and real-time responsiveness. This is the recommended Watch method.
Polling
This method periodically scans the folder for changes and picks up files that are new or have been modified. Polling is required when monitoring network drives, as these do not generate file system events. Polling is used in environments where file system events are unavailable or inconsistent. This method generally incurs higher CPU usage compared to the event-driven approach.
Click Done to close the Properties panel.
With the folder capture node starting the flow, and configured, you can add additional nodes by dragging them onto the canvas, connecting them to the folder capture node output, and double-clicking to set their properties.
Use Cases
Select a Use Case from the left menu to see various examples of flows starting with the folder capture node. Most use cases build on the previous case, so you can start with Debug current file and view them in sequence.
Tip: You can easily test folder capture with multiple scenarios using inject nodes. See Copy sample data files.