Pre-Advance Conditions
Pre-Advance Conditions are terms that must be met before advancing a Gated Project to the next Gate. PowerSteering administrators can directly attach them to Gates to ensure that certain Gated Projects do not advance to the next phase without meeting certain criteria.
If a Condition is not met for a Gate, the approval of that Gate cannot be requested. If the Gate does not require approval, the Gate cannot be advanced until all Conditions are met.
Note: Administrators can define terms for skipping Gates without fulfilling the Pre-Advance Conditions. See Phase Advance Configuration for more information.

Once created, Pre-Advance Conditions have to be attached to existing Gates using the Associations tab.
To create a Pre-Advance Condition:
Before You Start: Only PowerSteering administrators can create and edit Conditions.
-
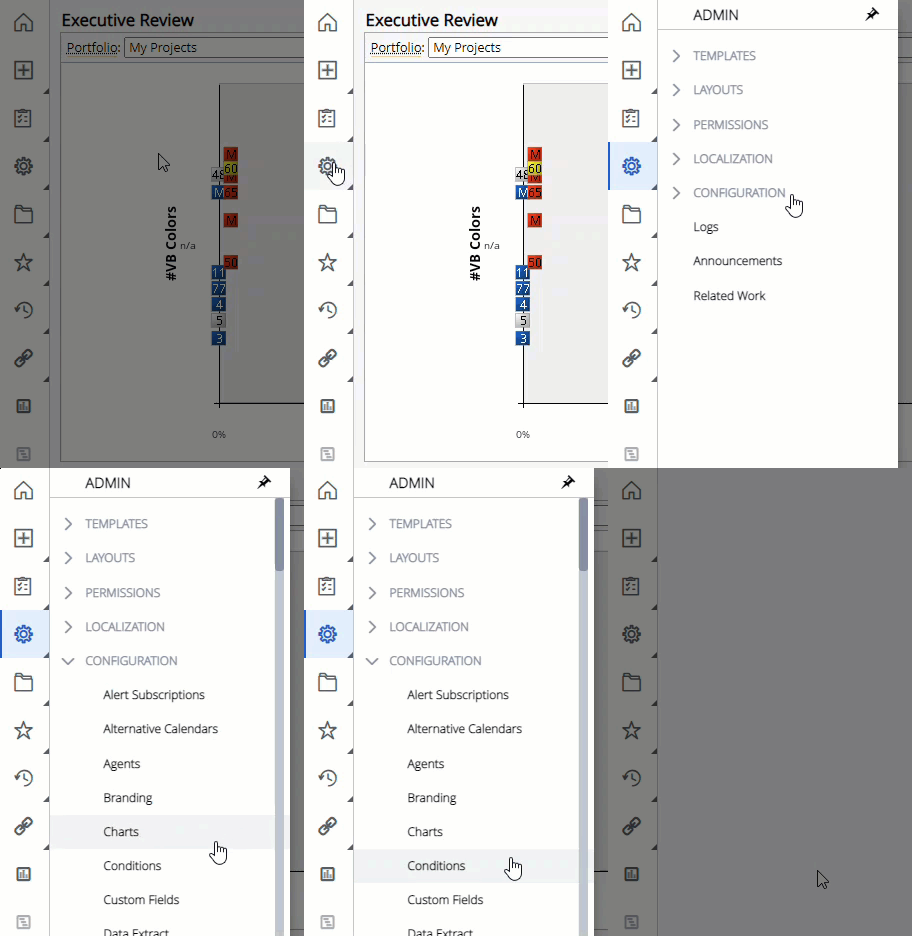
Select Admin
 → Configuration → Conditions from the Navigation Menu:
-
Select the Create button:

Note: Ensure that the "Pre-Advance" tab is selected.
-
Enter the rules for your new Condition:

-
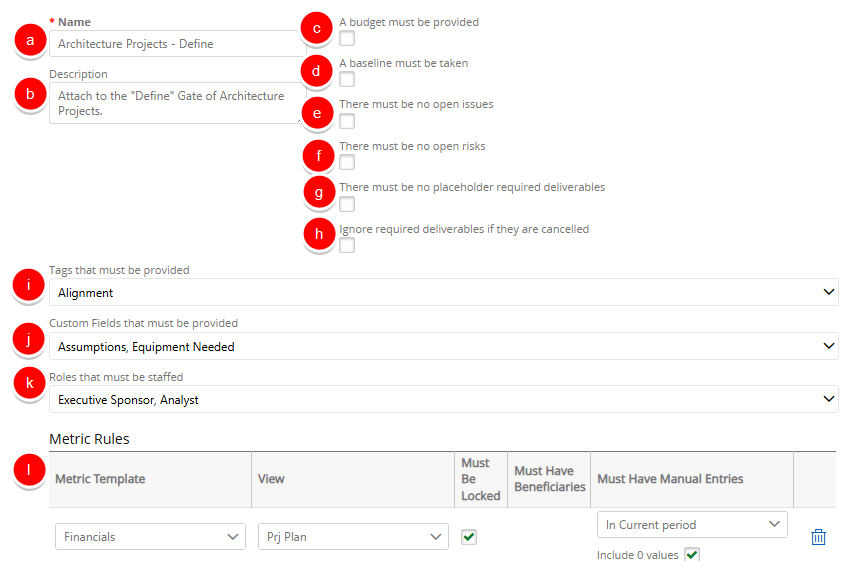
Name (required): Enter a name for the new Condition.
-
Description: Enter a description for your new Condition.
Tip: Conditions can be associated with multiple Gates. Try to be as descriptive as possible in case you ever want to add the new Condition to another Gate.
-
A budget must be provided: If selected, a Budget must be set before advancing the Gate.
-
A baseline must be taken: If selected, a Baseline must be captured before advancing the Gate.
-
There must be no open issues: If selected, no Issues can be open on the Gate before advancing.
-
There must be no open risks: If selected, no Risks can be open on the Gate before advancing.
-
There must be no placeholder required deliverables: If selected, none of the Gate's required Documents can be placeholders.
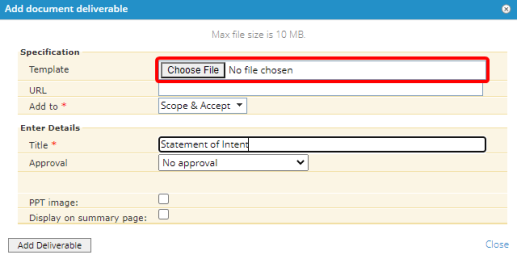
Note: A placeholder document (indicated by the
 icon) occurs when a PowerSteering user adds a Document as a Deliverable without actually uploading a file:
By selecting this checkbox, each required document must consist of an uploaded file. -
Ignore required deliverables if they are canceled: If selected, any required Deliverables with a "Canceled" status will not have to be completed in order to advance the Gate.
Note: Although canceled Deliverables are not required to advance the Gate, they are also not considered "Complete" if this checkbox is selected.
-
Tags that must be provided: Specify which Tags need to be filled out before the Gate can be advanced. If the specified Tags do not exist on the Gate, this rule will not apply.
-
Custom Fields that must be provided: Specify which Custom Fields need to be filled out before the Gate can be advanced. If the specified Custom Fields do not exist on the Gate, this rule will not apply.
-
Roles that must be staffed: Specify which roles must be filled before the Gate can be advanced. If the specified Roles do not exist on the Project Type, this rule will not apply.
-
Metric Rules: Define which Metric Rules must be fulfilled before the Gate can be advanced. For more information, see Metric Rules below.
-
-
Select the OK button.
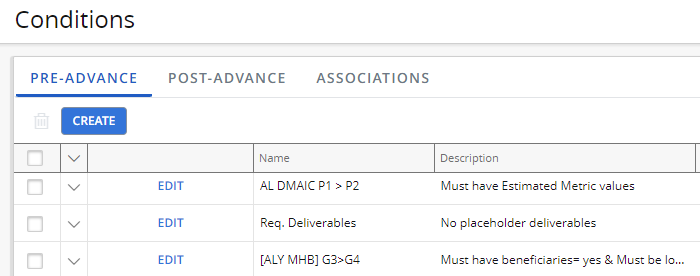
After clicking OK, the new Condition can be found in the table under the "Pre-Advance" tab. After associating it with a Gate, the Condition's criteria can be seen after expanding the Gate on the Gated Work Summary page:

Tip: Through Post-Advance Actions, administrators can configure Metrics to either lock or unlock automatically after a Gate is advanced.
Note: Pre-Advance Conditions can be edited at any time by selecting the Edit button. Also, Pre-Advance Conditions can be deleted by selecting the Condition's checkbox and then selecting the "Trash" icon  .
.
Metric Rules
The "Metric Rules" portion of a Pre-Advance Condition allows PowerSteering administrators to require users to take action on the Metric(s) of a Gated Project before advancing to a new Gate.
At the bottom of the "Create Pre-Advance Condition" window, administrators will find the "Metric Rules" table:

The table consists of the following components:
- Metric Template: Define which Metric Template the rule will apply to.
-
View: Define which Metric View the rule will apply to.
-
Must Be Locked: Selecting this checkbox will require the Metric view to have a lock applied to it.
Note: Any lock applied to the Metric will suffice; the entire Metric view does not have to be locked.
-
Must Have Beneficiaries: Selecting this checkbox will require beneficiaries to be chosen for the Metric. If the Metric template does not have beneficiaries applied to it, this checkbox will not be visible (pictured above).
-
Must Have Manual Entries: The Metric view must have at least one numeric data entry within the chosen time period (In Any Period, In Previous Period, In Current Year, etc.). If "Include 0 values" is selected, entering a "0" as an entry will be accepted.
-
Delete: Select this icon to delete the rule.
-
Add Metric Rule: Add another Metric Rule to the condition.
After clicking OK on the window, the Metric Rule(s) will be part of the Pre-Advance Condition. The Condition will have to be associated to a Gate in order to be applied.