Edit Work Details
After new work is created, as the actual work in your company progresses, you may be able to edit the work's settings directly on the Project Summary. Permissions define which work details a user is able to edit.
1. Navigate to a Work Item
Tip: You can easily navigate to the last work item you visited by selecting Project → Most Recent Project from the Navigation Menu: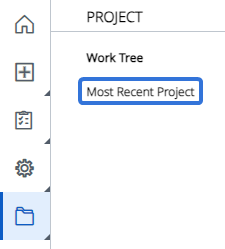
Caution: The Edit Details menu has been deprecated as of v19.1. Users will be required to use the pencil icon or Edit All Details to make edits.
2. Changing Project Name
- To change the project name, hover your cursor over the name until the pencil icon appears.

- Click the icon, and enter the new name for the project. Once complete, press Enter.

3. Changing Project Owner
- To change the project owner, hover your cursor over the name until the pencil icon appears.
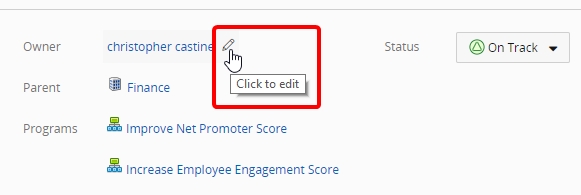
- Click the icon to open the Edit Owner window.
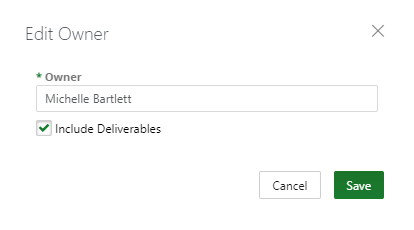
- As you enter a name, the drop-down list will attempt to provide auto-complete options.
- Click the checkbox to determine if deliverables should be included or excluded.
Note: The Include Deliverables checkbox is only available for gated projects.
- After the new owner has been selected, click Save to keep the changes or Cancel to discard them.
4. Associating Program(s)
- To associate additional program(s) to the listed program(s) hover over the top program listed.

- Click the pencil icon at the end of the line. The Edit Program Associations window will open.
- Select the program(s) to associate, and click the top arrow. To select all, click the box next to Name in the header; click the box a second time to deselect all.
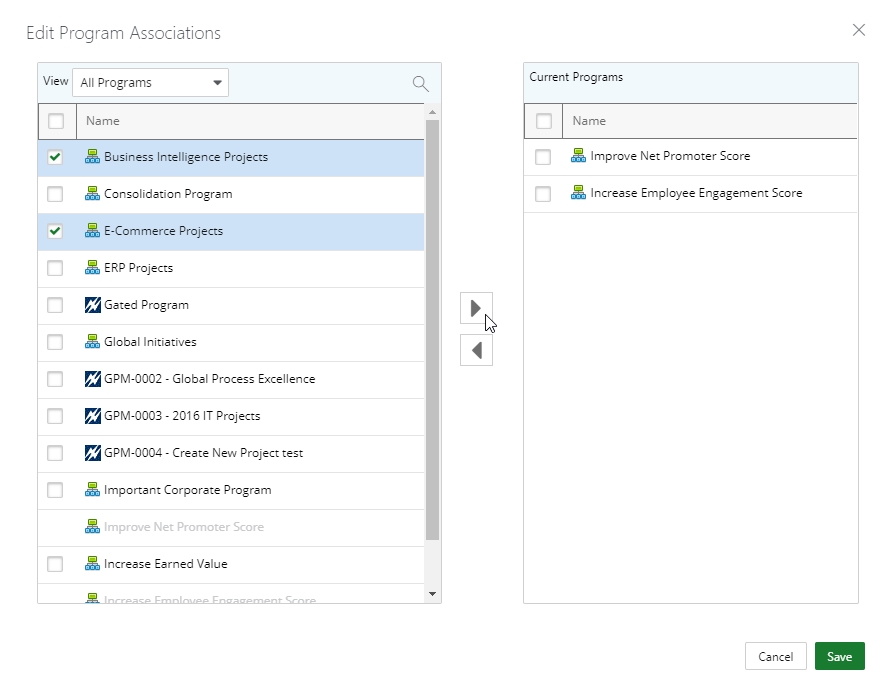
- The program(s) will move from the All Programs to the Current Programs.
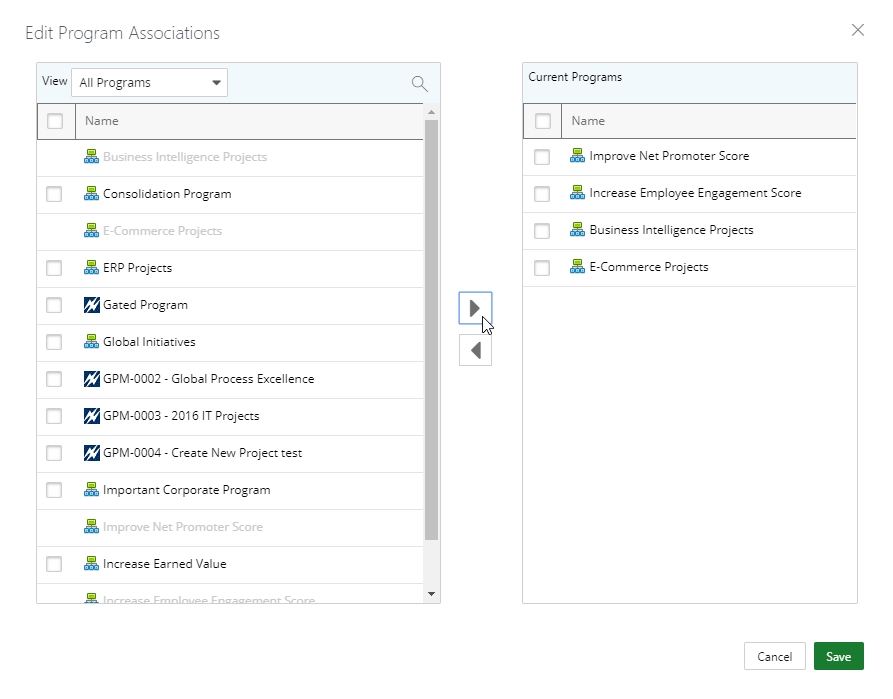
- To remove an association, select the program(s) on the right, and click the bottom arrow. The program(s) will no longer be associated.
- After all changes have been made, click Save to keep the changes or Cancel to discard them.
5. Editing Details
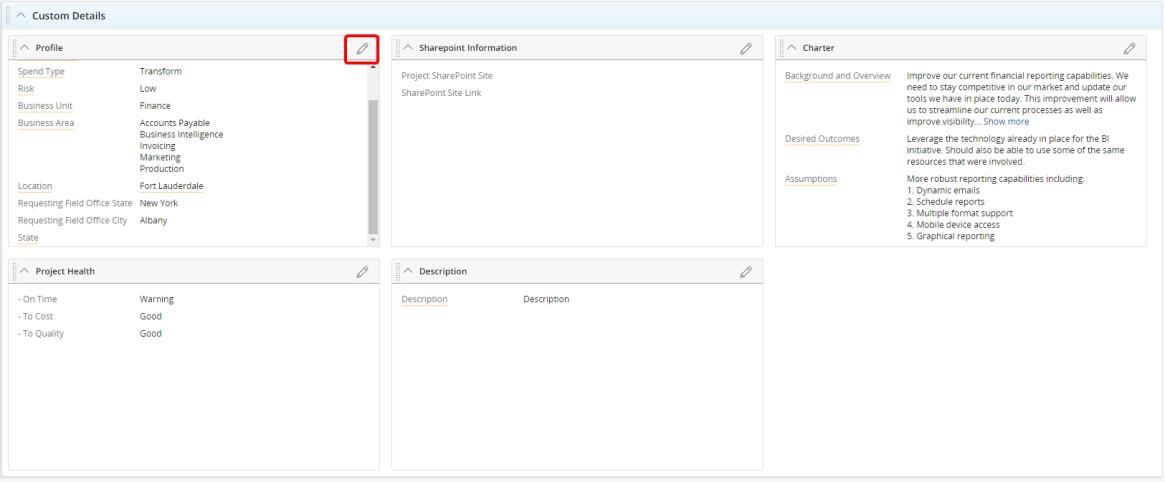
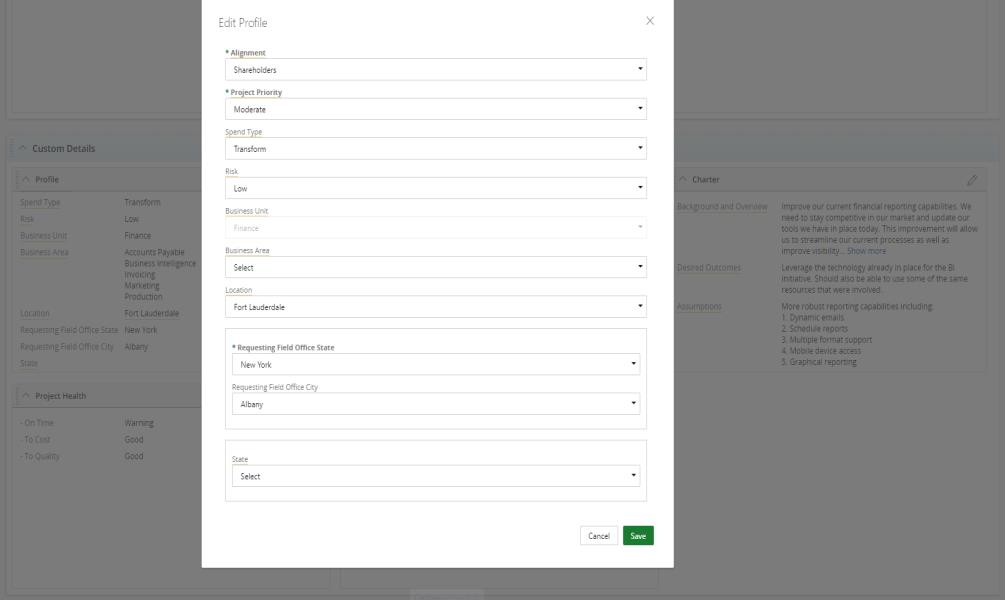
- On each widget in the Standard and Custom Details, click the pencil icon to open the Edit window.
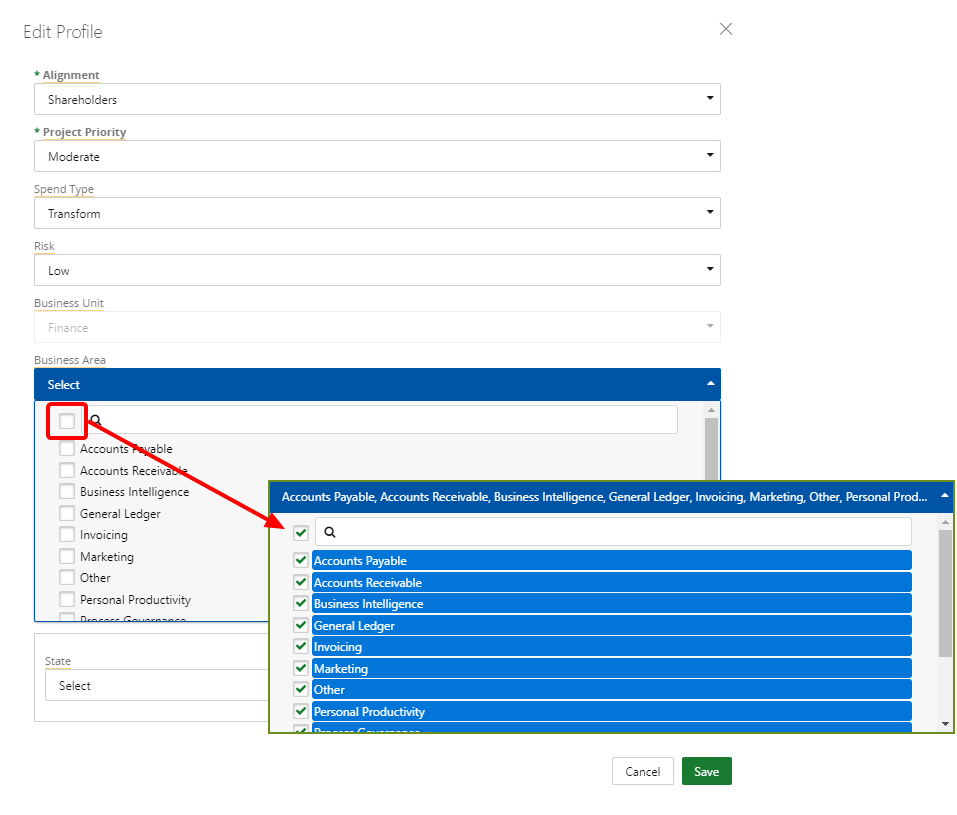
- Tags that allow multiple selections display checkboxes next to each entry. Selecting the checkbox next to the search box in the header will select all; clicking it a second time will deselect all.
- After all changes have been made, click Save to keep the changes or Cancel to discard them.
Note: Standard Detail and Custom Detail section names may differ and/or may not be visible based on changes made by your Administrators.
5.1 Edit All Details
To make changes to multiple widgets, click the Edit All Details button.
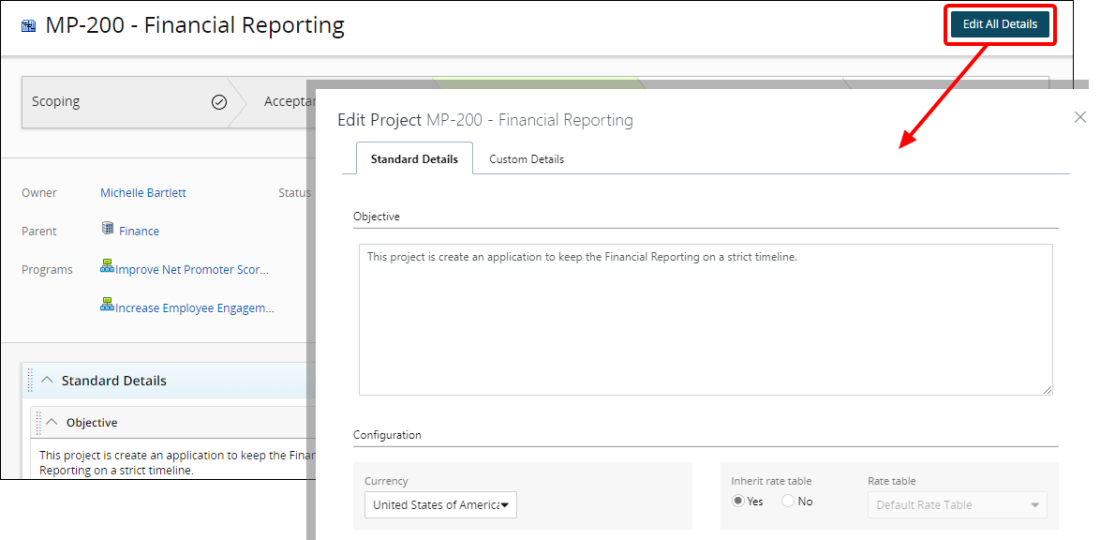
The Edit Project window includes tabs for the editable sections from the Standard Details and Custom Details.
Layout order is based on the order of the widgets as displayed on the Project Summary page: left to right and top to bottom.
6. Field Details
6.1 Project Header
Name: The name of the work.
Owner: The assigned user in charge of the work.
Programs: Any programs the work is associated with.
Project ID: The project ID for the work.
% Complete: Applies only to projects and milestones. This field will not be editable if a work object has a status of Proposed, Not Started, or Completed. If the status is set to Completed, the % Complete will automatically be set to 100. For gated projects, your PowerSteering Administrator can define the process so this field is automatically updated as gates are approved.
Status: Each work has a status setting that helps users evaluate a work's progress and flags potential problems or concerns. Each status setting is associated with a colored icon. Changes to the Status can be done from the drop-down menu.
Note: Statuses are not applicable for organizations or folders.
6.2 Standard Details
6.2.1 Objective
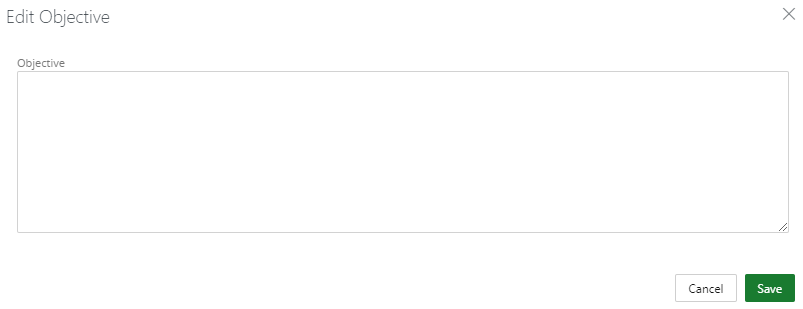
Objective: The objective is a brief description of the work's purpose (optional). This widget will always be visible even if empty.
6.2.2 Configuration
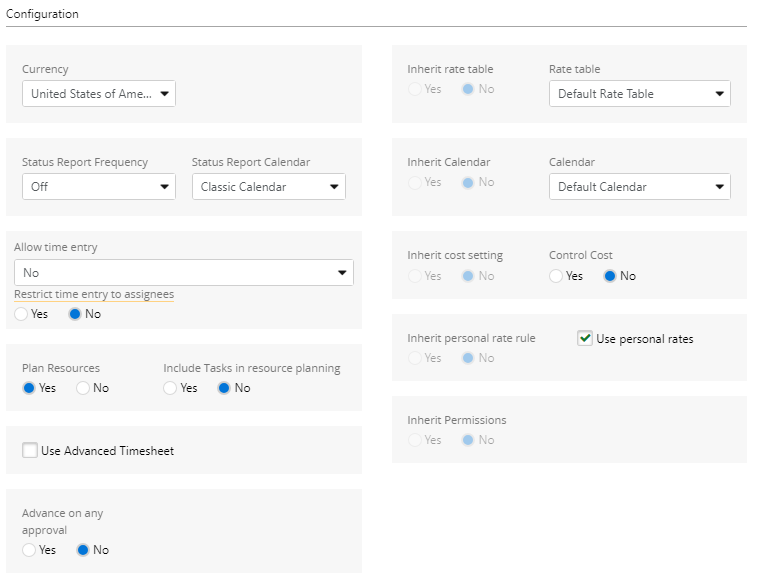
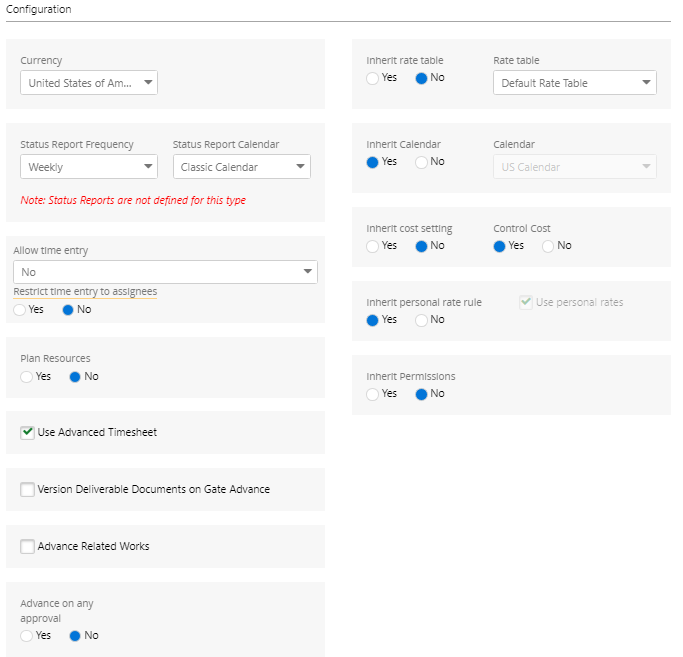
Currency: The currency for the work's locale.
Note: By default, the project's currency type is the same as the parent work's currency; the parent work currency type takes precedence over the template (or root) work currency.
Status Report Frequency: The status reporting frequency for a work object. If set to anything other than Status Reporting Off, the Status Report section will display on the Summary page.
Note: Status Reports can only be added to a work item if a Status Report Template has been associated with the work item's Object Type. If you see this message, the work item's Object Type has not been associated with a Status Report Template.
Contact a PowerSteering administrator to enable Status Reports for your work item.
- Off: Users cannot submit status reports for this work.
- Unscheduled: Status reports are not required for the work, but users with the appropriate permissions can submit them.
- Weekly: A status report is required for each 7-day period.
- Bi-Weekly: A status report is required for each 14-day period.
- Monthly: A status report is required for each calendar month.
- Quarterly: A status report is required for each fiscal quarter.
Status Report Calendar: The reporting calendar for the status report.
Allow time entry: Determines when users are allowed to enter time for the work item:
Note: By default, this configuration only applies to the work item being edited. It will not affect any time entry settings of the work item's Descendants (i.e. any Tasks created for the work item). If you would like this option to apply to a work item's Descendants as well, contact your PowerSteering representative.
- No: Time entries cannot be made toward the work item at any time.
-
Yes: Time entries can be made toward the work item at any time.
-
When the work item is Active: Time entries can be made to the work item as long as the work item currently has an "Active" status type.
Note: See the Work Status Names page to see which statuses are considered "Active".
-
When the work item is Active (+1 Week): Time entries can be made to the work item if the work item has an "Active" status type or had an "Active" status type less than a week ago.
Note: See the Work Status Names page to see which statuses are considered "Active".
-
When the work item is NOT Completed /Canceled: Time entries can be made to the work item as long as the work item does not have a "Completed" or "Canceled" status.
Note: Status names can be changed in PowerSteering. Check the Work Status Names page to see if any new names have been entered for "Completed" or "Canceled".
-
When the work item is NOT Completed /Canceled (+1 Week): Time entries can be made to the work item if the work item does not have a "Completed" or "Canceled" status or if it has only had one of these statuses for less than a week.
Note: Status names can be changed in PowerSteering. Check the Work Status Names page to see if any new names have been entered for "Completed" or "Canceled".
-
When the work item is NOT Completed /Canceled /Deferred: Time entries can be made to the work item as long as the work item does not have a "Completed", "Canceled", or "Deferred" status.
Note: Status names can be changed in PowerSteering. Check the Work Status Names page to see if any new names have been entered for "Completed", "Canceled", or "Deferred".
-
When the work item is NOT Completed /Canceled /Deferred (+1 Week): Time entries can be made to the work item if the work item does not have a "Completed", "Canceled", or "Deferred" status or if it has only had one of these statuses for less than a week.
Note: Status names can be changed in PowerSteering. Check the Work Status Names page to see if any new names have been entered for "Completed" or "Canceled".
Restrict time entry to assignees: Determines who can enter time against the work. If set to Yes, only users that are assigned to the work will be able to enter time.
Plan Resources: When Plan Resources control is set to Yes, the assigned users in project assignments/needs in Project Central will be copied with the assigned roles to any new generated work, even if these assignments are on the project parent or project templates.
For example, create a gated project template with Plan Resource enabled and assign a user to a gate that is not currently part of the Team Members. If you generate new gated work using the template, the assigned user will be included in the Team Members.
Note: Auto-populated resources can be replaced or removed, if necessary.
Include Action Items in Resource Plan: Select Yes to include action items in Resource planning.
Use Advanced Timesheet: Select the checkbox to turn on the use of Advanced Timesheets.
Note: Your instance of PowerSteering may not have this function enabled.
Advance Related Works: Applies to Gated Projects only. Select this checkbox to enable Advance Related Works on the Gated Project. When users advance a gate, they will be given the option to simultaneously advance the same gate on the Gated Project's Related Work. See Step 4 in Advance a Gate for more information.
Note: This option will only be available if "Advance Related Works" has been enabled while updating the Object Type's settings.
Version Deliverable Documents on Gate Advance: Applies to Gated Projects only. When selected, new versions of Documents attached to gates will be automatically generated after a gate is advanced to another gate that the Document is also attached to. If the Document requires completion or approval on the gate, the new version will need to be completed or approved before the gate can be advanced.
Example: Imagine a "Communications Plan" Document that was attached to the "Define" and "Measure" gates on a Gated Project.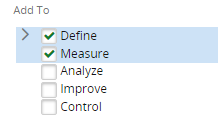
During the "Define" gate, the Document is marked as "Completed". Its "Deliverable Status" will also be automatically set to "Completed" when this occurs.
Once the gate is advanced to "Measure", a new version of the "Communications Plan" Document is automatically generated.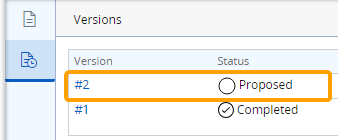
Because of this, the Document's "Status" and "Deliverable Status" are both set to "Proposed" on this new gate.
Notice that the "Deliverable Status" of the Document on the "Define" gate is still set to "Completed" because the Document was completed on that gate.
Tip: This is especially helpful for Documents that are required in order for the gate to be advanced. For example, adding a required "Gate Summary" Document to every gate will cause a new version of the Document to be generated when the gate is advanced. This will require the Document to be completed and / or approved before each gate is advanced to the next.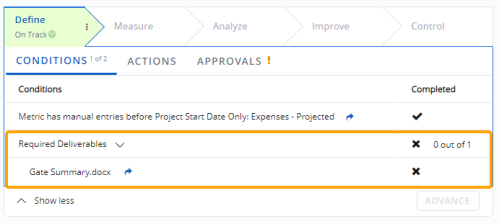
When the "Version Deliverable Documents on Gate Advance" checkbox is not selected, completing or approving the Document on the first gate will satisfy the "Required Deliverable" Condition on every other gate. When the checkbox is selected, however, a new version is created whenever the Gated Project is advanced to one of the gates that the Document is attached to (in this case, all of them). This will force users to address the Document on every gate it is attached to, not just the first one.
Note: This only applies to Documents that were added as Deliverables to gates. Documents that are added to the work item itself and none of its gates will not have new versions created. If the Gated Project is advanced to a gate that the Document is not attached to, a new version will not be created.
Advance on any approval: Applies only to Gated Projects and gates with more than one user assigned to roles mapped as approvers. If Yes is selected, approval from any one of the users assigned to an approval role will approve the gate and advance the project. If No is selected, all users assigned to an approval role need to approve a gate before the project can advance.
Inherit Rate Table: When enabled, the work should will the rate table setting from its parent work item.
Rate Table: If Inherit Rate Table is set to No, use this drop-down to determine the rate table from which the work should retrieve hourly rates.
Inherit Calendar: When enabled, the work will inherit the calendar from the parent work (if applicable).
Calendar: The resource calendar for the work. You will not be able to edit this option if Inherit Calendar in the Controls section is set to Yes.
Inherit Cost Setting: When enabled, the work will inherit the cost setting from the parent work (if applicable).
Control Cost: When enabled, the Costs menu option will appear under the Project button on the Icon Bar.
Note: This option is only available if Inherit cost setting is set to "No".
Inherit Personal Rate Rule: When enabled, the work will inherit the personal rate setting from its parent work.
Use Personal Rates: When enabled, the work will consider the personal rates of the assigned users. Select No to ignore personal rates.
Inherit Permissions: When enabled, the work will inherit all permissions from the parent work (if applicable).
6.2.3 Team Members
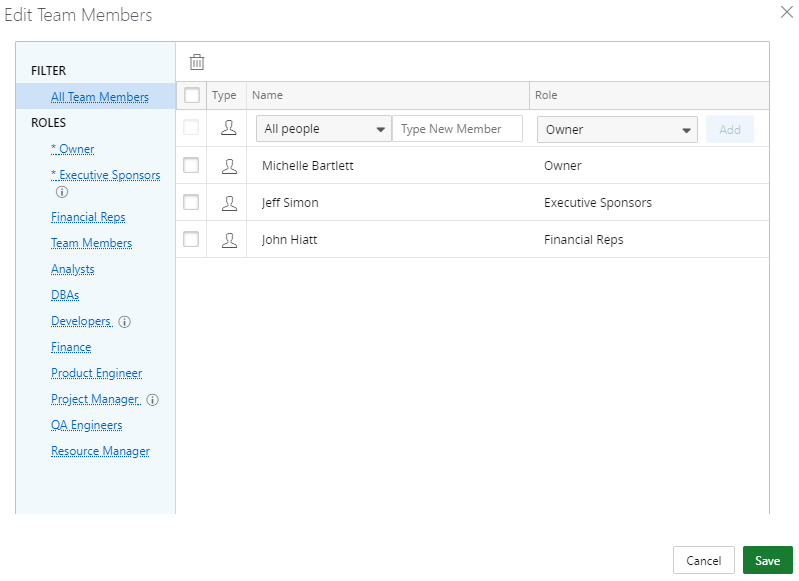
- See Assign People to Roles for information about assigning users to roles.
6.2.4 Edit Schedule
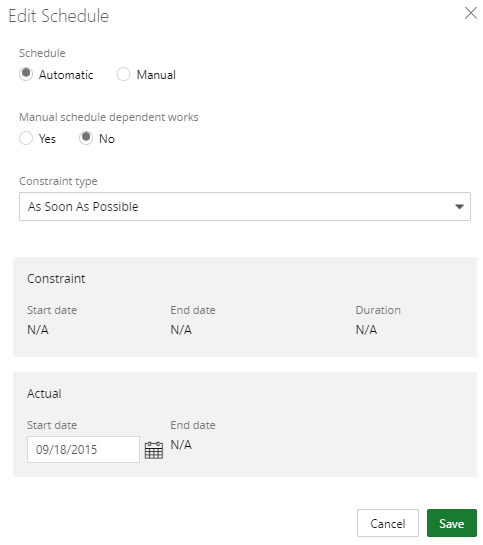
Note: The Project Header at the top of the Summary page will only display one schedule date. Based on availability, the priority that determines the displayed date is as follows: Actual End date, Planned/Constraint End date, Actual Start date, Planned/Constraint Start date, System Start date.
Schedule Type: Determines whether the work schedule will be manually entered, or automatically scheduled.
Note: The maximum number of days that PowerSteering allows for a work schedule is 10,000 days.
- Manual: Manually scheduled work is work that has its actual dates (if there are any) or constraint/planned dates as its scheduled/system dates. Manually scheduled items have no scheduling factors other than their status, constraint/planned dates, and actual dates. Manually scheduled items are not affected by dates on parent items, dates on children items, or dependencies.
- Automatic: Automatically scheduled work is work that has scheduled/system dates that depend on a number of factors including constraint type, constraint/planned dates, parent/child dates, dependencies, and status.
Manual schedule dependent works: For projects only, select Yes to have all lower work inherit the manual scheduling.
Note: This setting does not apply to Action Items.
Constraint type: Selecting a schedule constraint type will dictate what dates you can enter as planned dates. If a work item’s start and end dates are constrained by a preceding or succeeding work item, you may not see all of these constraint options. See Constraint Types Overview for more information.
6.2.5 Images
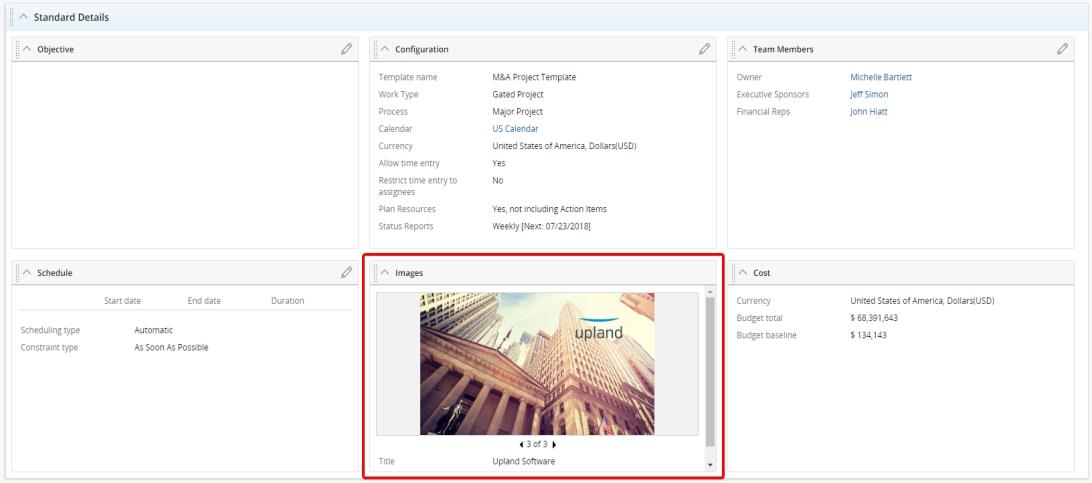
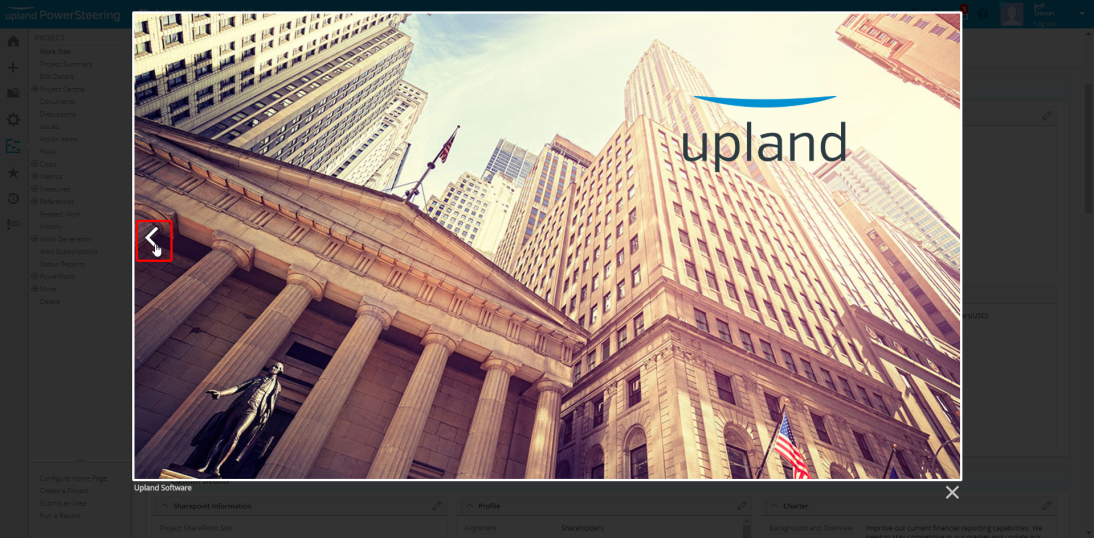
- Click the thumbnail to open a full-size version. Arrows are located on the edges to provide a carousel function.
- See Add a New Document to a Work Item for information about adding new images to the widget.
6.2.6 Edit Cost
- See Set a Budget for information about creating and editing the project budget.
6.3 Custom Details
Custom detail names and information are reflected in groups created in Field Management.
- See Field Management Overview for information about adding custom details.