Unlock Metrics in Bulk
The Metric Bulk Actions page allows users to unlock the Metrics of multiple work items in a Portfolio at once. This saves users from having to manually unlock the same Metric one-by-one on a large number of work items, which is unnecessarily tedious and time-consuming.
Note: Metric data can be locked and unlocked at any time by PowerSteering users with the "Lock Metrics" Project Task permission.
Example: Imagine you have a Metric template named "Expenses" that is attached to a number of your Projects. Within this Metric, you have a "Projected" view that displays all of the costs you are planning to spend. All of these costs have been approved, so you used Metric bulk lock to ensure that no more data gets inserted into the view. Once the approval process is complete, these Metrics need to be unlocked again so new projected costs can be inserted. Instead of unlocking each Metric one by one, you can use the Metric bulk unlock to reopen the "Projected" view, once again allowing users to enter new data.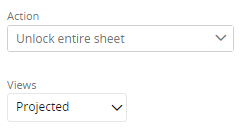
Tip: After unlocking Metrics in bulk, they can always be relocked in bulk through the Metric Bulk Actions page.
PowerSteering currently features two Metric Bulk Actions interfaces that can be used to lock Metric values:
-
Note: The legacy Metric Bulk Actions page is still temporary available for users who are unfamiliar with the new page, but it will soon be deprecated in a future PowerSteering release. The new Metric Bulk Actions wizard is the recommended option, but reach out to your PowerSteering representative if you would like to use the legacy page in the meantime.
Locking Metrics in bulk using the updated wizard
A new Metric Bulk Actions interface has recently been introduced to PowerSteering. Along with a cleaner and fresher look, the new interface breaks down the process of creating new Metric Bulk Actions into separate steps, alleviating the informational overload that comes with lengthy webpages.
Additionally, the new wizard offers additional functionality that is not available on the legacy page. Users can save their Metric Bulk Actions to the "Metric Bulk Action Jobs" page and schedule them to run automatically. This saves users from having to tediously create identical Metric Bulk Action jobs whenever they need these jobs to repeat themselves. This will also prevent any issues that occur due to forgetting to run a Metric Bulk Action.
In the context of bulk unlock, the new wizard allows users to specify which Metric components they would like to unlock. The new interface can be used to unlock specific Metric views, line items, columns, Custom Fields and Tags. The legacy interface only allows users to unlock entire Metrics at once; they cannot specify which parts of the Metrics should be unlocked.
Note: After bulk lock jobs are created, you can use the "Metric Bulk Action Jobs" page to edit them. Simply navigate to the page (Review → Metric Bulk Actions from the Navigation Menu), select one of the listed jobs, and follow the steps below starting from Step 3.
To unlock Metric values in bulk using the updated wizard:
Before You Start: Metric Bulk Actions are open to all PowerSteering users by default, but users will only be able to change Metrics that they have permission to change. For instance, if you are planning to unlock data on a group of Metrics using a bulk action but you do not have the "Lock Metrics" permission on all of the work items in the Portfolio, only the Metrics you have permission to unlock will be affected.
Tip: Consider designating a specific PowerSteering administrator to create and schedule Metric Bulk Actions Jobs. Users who belong to the Admin Group have permission to edit Metrics on all work items, so this will ensure that all Metrics in the chosen Portfolio will be affected when the job runs.
-
Select Review → Metric Bulk Actions from the Navigation Menu:
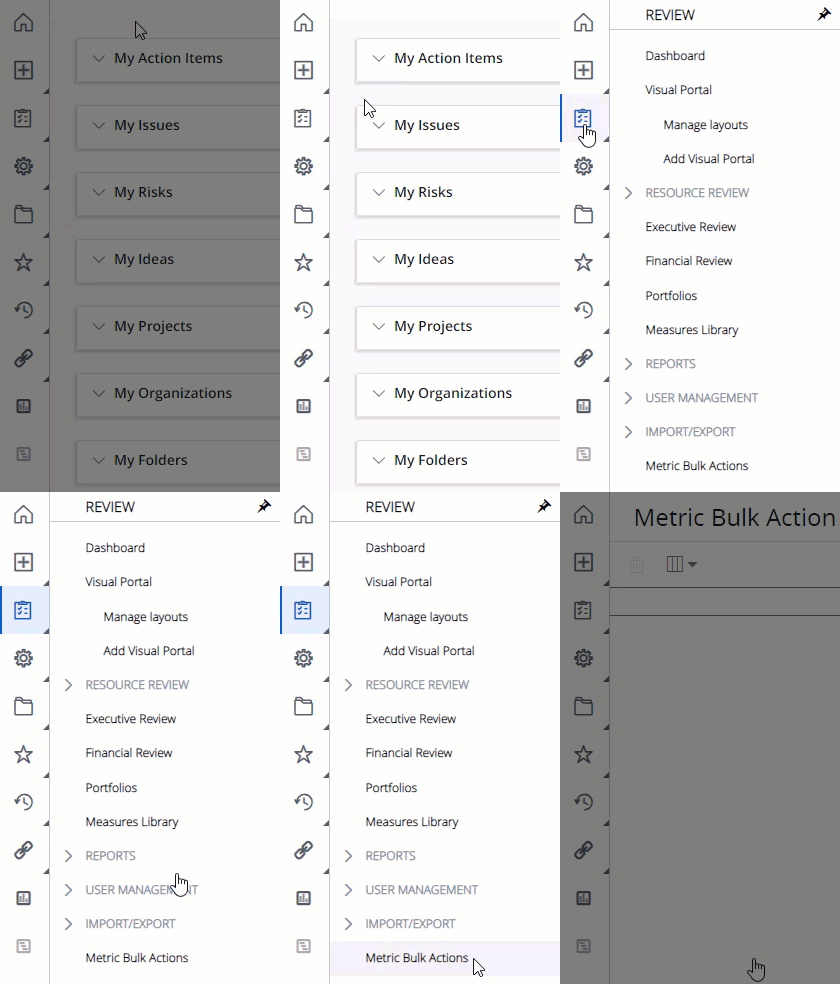
Note: If you do not see the Metric Bulk Actions option, it may be limited to select users in your organization. Reach out to a PowerSteering administrator for more information.
-
Select the Create button in the top right-hand corner of the page.
-
Select which Portfolio of work items you will conduct the Metric Bulk Action on.
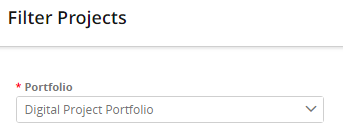
Note: Apart from your "My Projects" Portfolio, you will only be able to select Portfolios that have been shared with you. Administrators can select any Portfolio, regardless of its sharing settings.
-
Decide which Portfolio Tags should be used to filter the work items that will be included in the Metric unlock:

Note: The Portfolio Tags will consist of Tags that have been associated with work items that belong to the Portfolio.
Note: Work Tag filters from the Portfolio will be set on the Metric Bulk Action by default. For example, this Portfolio has set a filter that requires work items to have a "Marketing" value on the "Business Area" Tag to be included.

This value will already be applied to the Tag while creating a new Metric Bulk Action.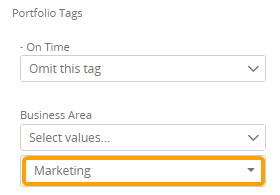
However, if a Work Tag filter is saved to a Portfolio after a Metric Bulk Action Job is saved, it will not be applied to the Metric Bulk Action Job. If you create a Metric Bulk Action Job with a Portfolio and then add a Tag filter to the Portfolio afterward, the Tag filter will not be applied to the Metric Bulk Action Job.The following options are available for each Tag:
-
Omit this tag (default): The value of this Tag will have no impact on which work items are included in the Metric unlock.
-
Any value for this tag: Work items will only be included in the Metric unlock if a value has been chosen for the Tag.
-
No value for this tag: Work items will only be included in the Metric unlock if no value has been chosen for the Tag.
-
Select values: Work items will only be included in the Metric unlock if they contain the chosen value(s) for the Tag.
Tip: To make sure that the correct work items get included in the Metric unlock, it might be wise for PowerSteering administrators to create a specific Tag for it. For example, a Tag called "Ready for Metric Unlock" can be used to indicate whether or not a work item is ready to have it's Metrics unlocked:

Contact your PowerSteering administrator if you think this would be helpful.
-
-
Select the Next button in the bottom right-hand corner of the page.

-
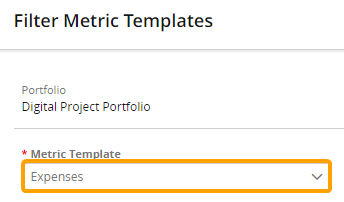
Select the Metric Template that will be affected by the Metric unlock.
-
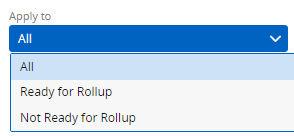
Use the "Apply to" drop-down menu to determine whether to include or exclude Metric instances marked "Ready for Rollup".
Note: "Ready for Rollup" is a replaceable term. It may be represented by another term in your PowerSteering environment. Contact a PowerSteering administrator if you are unsure.
-
All: Each Metric instance will be affected by the unlock regardless of its "Ready for Rollup" status.
-
Ready for Rollup: Only Metric instances marked "Ready for Rollup" will be included in the unlock.
-
Not Ready for Rollup: Only Metric instances that are not marked "Ready for Rollup" will be included in the unlock.
-
-
Select the Next button in the bottom right-hand corner of the page.

-
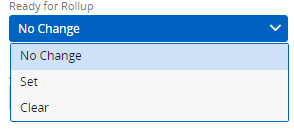
Use the "Ready for Rollup" drop-down menu to determine how each Metric's "Ready for Rollup" status will be affected by the Metric lock.
Note: "Ready for Rollup" is a replaceable term. It may be represented by another term in your PowerSteering environment. Contact a PowerSteering administrator if you are unsure.
-
No Change: The Metric unlock will have no effect on the "Ready for Rollup" status of the Metrics.
-
Set: Each Metric affected by the unlock will automatically be set to "Ready for Rollup".
-
Clear: Each Metric affected by the unlock will automatically not be set to "Ready for Rollup".
-
-
Continue the procedure with one of the following unlock actions:
Unlock Metric columns
Follow this procedure to unlock Metrics by their numeric columns up to a specific period whenever the job runs.
Note: This option will only unlock numeric data on the Metric. It will not affect Custom Fields or Tags.
To unlock Metrics by columns:
-
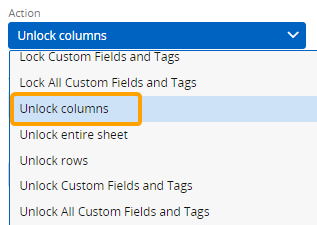
Select Unlock columns from the "Actions" menu.
-
Select which of the Metric views should be included in the unlock.
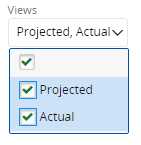
Tip: Selecting the top checkbox will automatically select every Metric view.
-
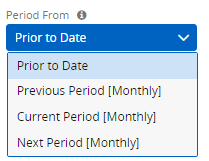
Use the "Period From" drop-down menu to determine which Metric columns will be included in the lock.
-
Prior to Date: A "Date" field will appear. The selected Metric view(s) will be unlocked after the specified date.

Note: The Metric period that contains the date will not be unlocked, but every period that comes after it will be unlocked. For example, if the selected date is July 30th and the Metric uses monthly periods, the month of July will be not be included in the unlock. The month of August and every month after it will be unlocked.
-
Previous Period: The selected Metric view(s) will be unlocked from the previous period.
Note: "From" does not include the previous period itself. Every column to the right of the previous period will be unlocked.
Example: If the Metric uses monthly periods, the selected view(s) will be unlocked from the previous month. This means that every month to the right of the previous month will be unlocked.
-
Current Period: The selected Metric view(s) will be unlocked from the current period.
Note: "From" does not include the current period itself. Every column to the right of the current period will be unlocked.
Example: If the Metric uses monthly periods, the selected view(s) will be unlocked from the current month. This means that every month to the right of the current month will be unlocked.
-
Next Period: The selected Metric view(s) will be locked from the next period.
Note: "From" does not include the next period itself. Every column to the right of the next period will be unlocked.
Example: If the Metric uses monthly periods, the selected view(s) will be unlocked from the next month. This means that every month to the right of the next month will be unlocked.
-
-
Determine how you would like the Metric Bulk Action job to run.

-
Run: The Metric Bulk Action job will run immediately. It will not be saved to the "Metric Bulk Action Jobs" page and it will never run again.
Note: Selecting this will end the procedure; your bulk unlock will be complete. You may skip the remaining steps.
-
Next: You will be navigated to the "Save & Schedule" page. From here, you will be able to create a schedule for your bulk unlock to automatically run. It will be saved to the "Metric Bulk Action Jobs" page.
Note: If you select this option, continue through the rest of the procedure.
-
-
Enter a name for your saved Metric Bulk Action job.

-
Enter an informative description for your saved Metric Bulk Action job.

-
Use the "Shared With" field to determine which users will be able to view, edit, and run the Metric Bulk Action job.

 Click here for additional information on the "Search Entities" window.
Type the name of a user or User Group into the "Search" textbox and select it from the suggestions that appear.
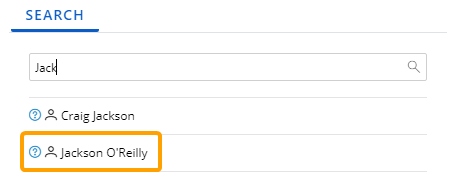
Note: When a User Group is selected, every member of the user group will be able to access the Portfolio.
Repeat this until all of your desired users and User Groups are added. The selected users and User Groups will appear in the "Selected Entities" box.
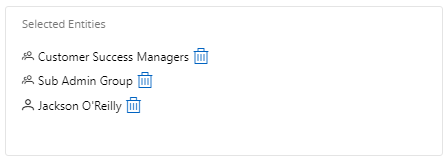
Note: The single-person icon
 indicates a user and a multi-person icon
  indicates a User Group.
From here, you can select the Trash icon
 next to a user or User Group to remove it from the share list.
Select the OK button once you are done editing the share list.

-
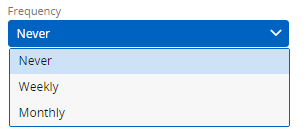
Use the "Frequency" drop-down menu to determine the job's run schedule.
-
Never: The Metric Bulk Action job will be saved, but it will not have any scheduled run times in the future.
Tip: This option should only be selected if a run schedule has not been determined yet or if a temporary pause should be placed on the job.
-
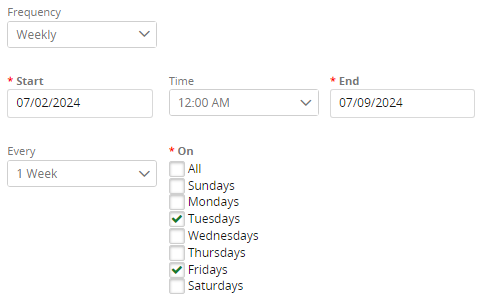
Weekly: The Metric Bulk Action job will run on a weekly basis. The fields that appear can be used to specify the run schedule.
-
Start: Select a start date for the Metric Bulk Action job.
Note: The job will not necessarily run on this day. This date determines when the job becomes active. It will run based on the "Every" and "On" selections below.
-
Time: Select the time of day the Metric Bulk Action job will run.
Tip: It is best to schedule jobs to run outside of working hours. This will reduce the likelihood of users editing their Metrics during a Metric Bulk Actions job.
-
End: Select an end date for the Metric Bulk Action job.
Note: The job will not necessarily run on this day. This date determines when the job becomes inactive. It will run based on the "Every" and "On" selections below.
-
Every: Determine the weekly interval for the Metric Bulk Action job.
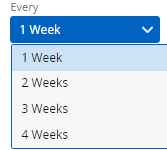
Example: If "2 Weeks" is selected from the "Every" menu and "Tuesday" and "Friday" are selected from the "On" menu (below), the job will run on the Tuesday and Friday of every second week. During the first week, the job will run on Tuesday and Friday. During the second week, the job will not run. During the third week, the job will run on Tuesday and Friday again. This pattern will continue until the "End" date is reached.
-
On: Determine which days of the week the job will run on.
-
-
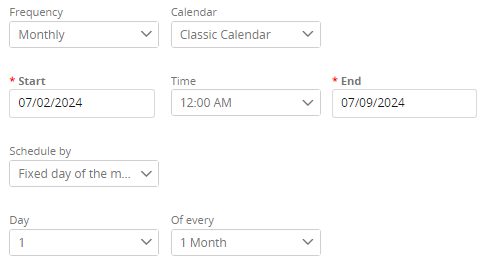
Monthly: The Metric Bulk Action job will run on a monthly basis. The fields that appear can be used to specify the run schedule.
-
Calendar: Determine which Calendar will be used to schedule the Metric Bulk Action job.
Note: Administrators can create Alternative Calendars in PowerSteering.
-
Start: Select a start date for the Metric Bulk Action job.
Note: The job will not necessarily run on this day. This date determines when the job becomes active. It will run based on the fields below.
-
Time: Select the time of day the Metric Bulk Action job will run.
Tip: It is best to schedule jobs to run outside of working hours. This will reduce the likelihood of users editing their Metrics during a Metric Bulk Actions job.
-
End: Select an end date for the Metric Bulk Action job.
Note: The job will not necessarily run on this day. This date determines when the job becomes inactive. It will run based on the fields below.
-
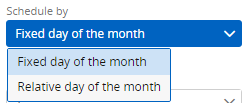
Schedule By: Determine how the schedule will search for the day to run the Metric Bulk Action job.
-
Fixed day of the month: A fixed date of the month will be used to identify when the job runs. This will open up drop-down menus that can be used to specify when the job will run.

Example: Selecting "5" from the "Day" menu and "2 months" from the "Of every" menu will cause the Metric Bulk Action job to run on the 5th of every second month.
-
Relative day of the month: A relative day of the week will be used to identify when the job runs. This will open up drop-down menus that can be used to specify when the job will run.

Example: In the image above, the Metric Bulk Action job will run on the third Thursday of every second month.
-
-
-
-
Select the Save button in the bottom right-hand corner of the page.

Note: If Run is selected instead, the Metric Bulk Action job will run immediately and the job will not be saved. All of the "Save & Schedule" settings will be discarded.
Note: When a Metric Bulk Action job is scheduled, there is no way to temporarily delay it without editing the schedule. If a user requests more time to edit a Metric before a Metric Bulk Action job occurs, it is best to wait for the job to complete and then manually edit the Metric afterward.
If Run was selected, the job will run immediately. A "Results" page will appear with a report on which Metrics were successfully affected by the bulk unlock.

Tip: Select any of the listed work items or Metrics to navigate to them.
If Save was selected, the new job will be saved to the "Metric Bulk Action Jobs" page.
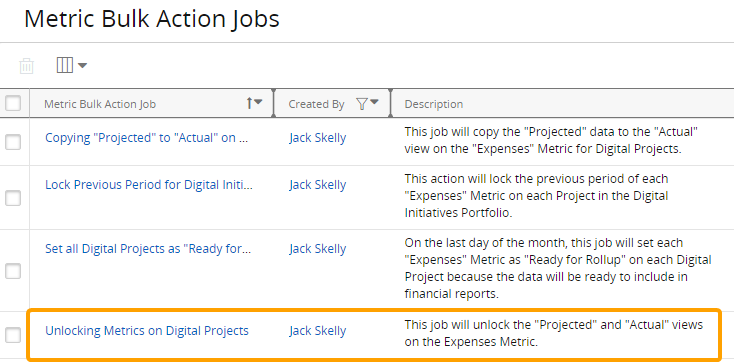
From here, it can be edited at any time. It will run based on its schedule.
Tip: Use the "Next Run" column to see when the job is scheduled to run again.
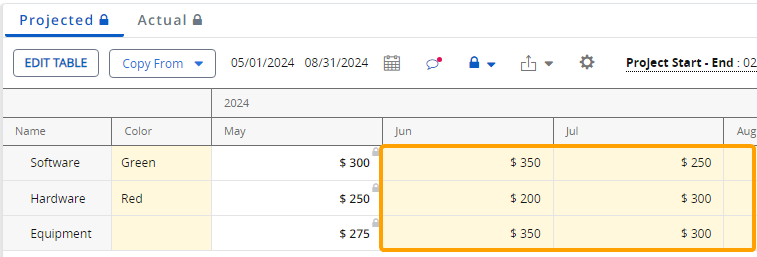
In either case, you can navigate to one of the Metrics and see that columns in the selected views have been unlocked from the designated period.
Unlock entire Metric views
Follow this procedure to totally unlock one or multiple views (sheets) on the included Metrics. Every column and line item on the indicated views will be unlocked when the Metric Bulk Action runs.
Note: This option will only unlock numeric data on the Metric. It will not affect Custom Fields or Tags.
To unlock entire Metric views:
-
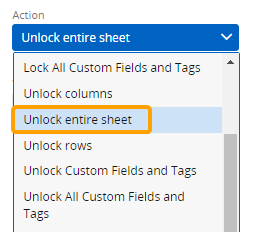
Select Unlock entire sheet from the "Actions" menu.
-
Select which of the Metric views should be included in the unlock.

Tip: Selecting the top checkbox will automatically select every Metric view.
-
Determine how you would like the Metric Bulk Action job to run.

-
Run: The Metric Bulk Action job will run immediately. It will not be saved to the "Metric Bulk Action Jobs" page and it will never run again.
Note: Selecting this will end the procedure; your bulk unlock will be complete. You may skip the remaining steps.
-
Next: You will be navigated to the "Save & Schedule" page. From here, you will be able to create a schedule for your bulk unlock to automatically run. It will be saved to the "Metric Bulk Action Jobs" page.
Note: If you select this option, continue through the rest of the procedure.
-
-
Enter a name for your saved Metric Bulk Action job.

-
Enter an informative description for your saved Metric Bulk Action job.

-
Use the "Shared With" field to determine which users will be able to view, edit, and run the Metric Bulk Action job.

 Click here for additional information on the "Search Entities" window.
Type the name of a user or User Group into the "Search" textbox and select it from the suggestions that appear.

Note: When a User Group is selected, every member of the user group will be able to access the Portfolio.
Repeat this until all of your desired users and User Groups are added. The selected users and User Groups will appear in the "Selected Entities" box.

Note: The single-person icon
 indicates a user and a multi-person icon
  indicates a User Group.
From here, you can select the Trash icon
 next to a user or User Group to remove it from the share list.
Select the OK button once you are done editing the share list.

-
Use the "Frequency" drop-down menu to determine the job's run schedule.

-
Never: The Metric Bulk Action job will be saved, but it will not have any scheduled run times in the future.
Tip: This option should only be selected if a run schedule has not been determined yet or if a temporary pause should be placed on the job.
-
Weekly: The Metric Bulk Action job will run on a weekly basis. The fields that appear can be used to specify the run schedule.

-
Start: Select a start date for the Metric Bulk Action job.
Note: The job will not necessarily run on this day. This date determines when the job becomes active. It will run based on the "Every" and "On" selections below.
-
Time: Select the time of day the Metric Bulk Action job will run.
Tip: It is best to schedule jobs to run outside of working hours. This will reduce the likelihood of users editing their Metrics during a Metric Bulk Actions job.
-
End: Select an end date for the Metric Bulk Action job.
Note: The job will not necessarily run on this day. This date determines when the job becomes inactive. It will run based on the "Every" and "On" selections below.
-
Every: Determine the weekly interval for the Metric Bulk Action job.

Example: If "2 Weeks" is selected from the "Every" menu and "Tuesday" and "Friday" are selected from the "On" menu (below), the job will run on the Tuesday and Friday of every second week. During the first week, the job will run on Tuesday and Friday. During the second week, the job will not run. During the third week, the job will run on Tuesday and Friday again. This pattern will continue until the "End" date is reached.
-
On: Determine which days of the week the job will run on.
-
-
Monthly: The Metric Bulk Action job will run on a monthly basis. The fields that appear can be used to specify the run schedule.

-
Calendar: Determine which Calendar will be used to schedule the Metric Bulk Action job.
Note: Administrators can create Alternative Calendars in PowerSteering.
-
Start: Select a start date for the Metric Bulk Action job.
Note: The job will not necessarily run on this day. This date determines when the job becomes active. It will run based on the fields below.
-
Time: Select the time of day the Metric Bulk Action job will run.
Tip: It is best to schedule jobs to run outside of working hours. This will reduce the likelihood of users editing their Metrics during a Metric Bulk Actions job.
-
End: Select an end date for the Metric Bulk Action job.
Note: The job will not necessarily run on this day. This date determines when the job becomes inactive. It will run based on the fields below.
-
Schedule By: Determine how the schedule will search for the day to run the Metric Bulk Action job.

-
Fixed day of the month: A fixed date of the month will be used to identify when the job runs. This will open up drop-down menus that can be used to specify when the job will run.

Example: Selecting "5" from the "Day" menu and "2 months" from the "Of every" menu will cause the Metric Bulk Action job to run on the 5th of every second month.
-
Relative day of the month: A relative day of the week will be used to identify when the job runs. This will open up drop-down menus that can be used to specify when the job will run.

Example: In the image above, the Metric Bulk Action job will run on the third Thursday of every second month.
-
-
-
-
Select the Save button in the bottom right-hand corner of the page.

Note: If Run is selected instead, the Metric Bulk Action job will run immediately and the job will not be saved. All of the "Save & Schedule" settings will be discarded.
Note: When a Metric Bulk Action job is scheduled, there is no way to temporarily delay it without editing the schedule. If a user requests more time to edit a Metric before a Metric Bulk Action job occurs, it is best to wait for the job to complete and then manually edit the Metric afterward.
If Run was selected, the job will run immediately. A "Results" page will appear with a report on which Metrics were successfully affected by the bulk unlock.

Tip: Select any of the listed work items or Metrics to navigate to them.
If Save was selected, the new job will be saved to the "Metric Bulk Action Jobs" page.

From here, it can be edited at any time. It will run based on its schedule.
Tip: Use the "Next Run" column to see when the job is scheduled to run again.
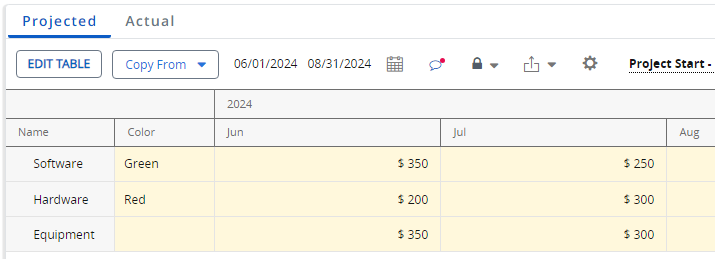
In either case, you can navigate to one of the Metrics and see that the selected views have been completely unlocked.
Unlock specific Metric line items
Follow this procedure to unlock line items (rows) on the selected Metrics.
Note: This option will only unlock numeric data on the Metric. It will not affect Custom Fields or Tags.
To unlock specific Metric line items:
-
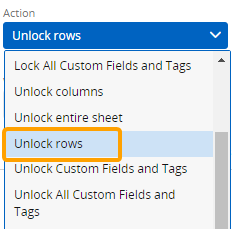
Select Unlock rows from the "Actions" menu.
-
Select which of the Metric views should be included in the unlock.

Tip: Selecting the top checkbox will automatically select every Metric view.
-
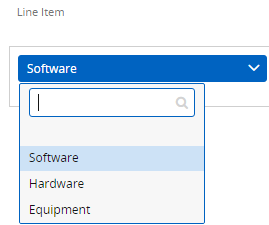
Use the "Line Item" drop-down menu to select which line item to unlock.
-
Use the "Filter by Tags" option to filter the line items by their Tags. Only line items that meet the criteria will be included in the unlock.
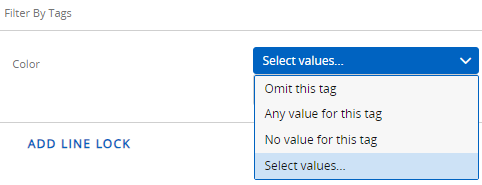
-
Omit this tag (default): The value of this Tag will have no impact on whether the line item is included in the Metric unlock.
-
Any value for this tag: Line items will only be included in the Metric unlock if a value has been chosen for the Tag on the line item.
-
No value for this tag: Line items will only be included in the Metric unlock if no value has been chosen for the Tag on the line item.
-
Select values: Line items will only be included in the Metric unlock if they contain the chosen value(s) for the Tag.
Example: Imagine Select values is chosen and "Blue" and "Green" are selected.
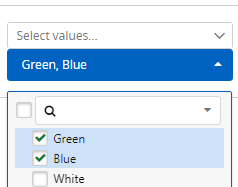
The line item unlock will only be applied to line items with "Green" or "Blue" selected for the Tag.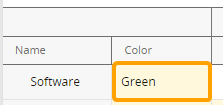
Note: Line item Tags will not be unlocked. Only the line item's numeric cells will be unlocked.
-
-
(Optional) Select Add Line Lock to include another line item in the Metric unlock. Repeat Steps 3-4 for the new line item.

-
Determine how you would like the Metric Bulk Action job to run.

-
Run: The Metric Bulk Action job will run immediately. It will not be saved to the "Metric Bulk Action Jobs" page and it will never run again.
Note: Selecting this will end the procedure; your bulk unlock will be complete. You may skip the remaining steps.
-
Next: You will be navigated to the "Save & Schedule" page. From here, you will be able to create a schedule for your bulk unlock to automatically run. It will be saved to the "Metric Bulk Action Jobs" page.
Note: If you select this option, continue through the rest of the procedure.
-
-
Enter a name for your saved Metric Bulk Action job.

-
Enter an informative description for your saved Metric Bulk Action job.

-
Use the "Shared With" field to determine which users will be able to view, edit, and run the Metric Bulk Action job.

 Click here for additional information on the "Search Entities" window.
Type the name of a user or User Group into the "Search" textbox and select it from the suggestions that appear.

Note: When a User Group is selected, every member of the user group will be able to access the Portfolio.
Repeat this until all of your desired users and User Groups are added. The selected users and User Groups will appear in the "Selected Entities" box.

Note: The single-person icon
 indicates a user and a multi-person icon
  indicates a User Group.
From here, you can select the Trash icon
 next to a user or User Group to remove it from the share list.
Select the OK button once you are done editing the share list.

-
Use the "Frequency" drop-down menu to determine the job's run schedule.

-
Never: The Metric Bulk Action job will be saved, but it will not have any scheduled run times in the future.
Tip: This option should only be selected if a run schedule has not been determined yet or if a temporary pause should be placed on the job.
-
Weekly: The Metric Bulk Action job will run on a weekly basis. The fields that appear can be used to specify the run schedule.

-
Start: Select a start date for the Metric Bulk Action job.
Note: The job will not necessarily run on this day. This date determines when the job becomes active. It will run based on the "Every" and "On" selections below.
-
Time: Select the time of day the Metric Bulk Action job will run.
Tip: It is best to schedule jobs to run outside of working hours. This will reduce the likelihood of users editing their Metrics during a Metric Bulk Actions job.
-
End: Select an end date for the Metric Bulk Action job.
Note: The job will not necessarily run on this day. This date determines when the job becomes inactive. It will run based on the "Every" and "On" selections below.
-
Every: Determine the weekly interval for the Metric Bulk Action job.

Example: If "2 Weeks" is selected from the "Every" menu and "Tuesday" and "Friday" are selected from the "On" menu (below), the job will run on the Tuesday and Friday of every second week. During the first week, the job will run on Tuesday and Friday. During the second week, the job will not run. During the third week, the job will run on Tuesday and Friday again. This pattern will continue until the "End" date is reached.
-
On: Determine which days of the week the job will run on.
-
-
Monthly: The Metric Bulk Action job will run on a monthly basis. The fields that appear can be used to specify the run schedule.

-
Calendar: Determine which Calendar will be used to schedule the Metric Bulk Action job.
Note: Administrators can create Alternative Calendars in PowerSteering.
-
Start: Select a start date for the Metric Bulk Action job.
Note: The job will not necessarily run on this day. This date determines when the job becomes active. It will run based on the fields below.
-
Time: Select the time of day the Metric Bulk Action job will run.
Tip: It is best to schedule jobs to run outside of working hours. This will reduce the likelihood of users editing their Metrics during a Metric Bulk Actions job.
-
End: Select an end date for the Metric Bulk Action job.
Note: The job will not necessarily run on this day. This date determines when the job becomes inactive. It will run based on the fields below.
-
Schedule By: Determine how the schedule will search for the day to run the Metric Bulk Action job.

-
Fixed day of the month: A fixed date of the month will be used to identify when the job runs. This will open up drop-down menus that can be used to specify when the job will run.

Example: Selecting "5" from the "Day" menu and "2 months" from the "Of every" menu will cause the Metric Bulk Action job to run on the 5th of every second month.
-
Relative day of the month: A relative day of the week will be used to identify when the job runs. This will open up drop-down menus that can be used to specify when the job will run.

Example: In the image above, the Metric Bulk Action job will run on the third Thursday of every second month.
-
-
-
-
Select the Save button in the bottom right-hand corner of the page.

Note: If Run is selected instead, the Metric Bulk Action job will run immediately and the job will not be saved. All of the "Save & Schedule" settings will be discarded.
Note: When a Metric Bulk Action job is scheduled, there is no way to temporarily delay it without editing the schedule. If a user requests more time to edit a Metric before a Metric Bulk Action job occurs, it is best to wait for the job to complete and then manually edit the Metric afterward.
If Run was selected, the job will run immediately. A "Results" page will appear with a report on which Metrics were successfully affected by the bulk unlock.

Tip: Select any of the listed work items or Metrics to navigate to them.
If Save was selected, the new job will be saved to the "Metric Bulk Action Jobs" page.

From here, it can be edited at any time. It will run based on its schedule.
Tip: Use the "Next Run" column to see when the job is scheduled to run again.
In either case, you can navigate to one of the Metrics and see that the selected line items have been completely unlocked.
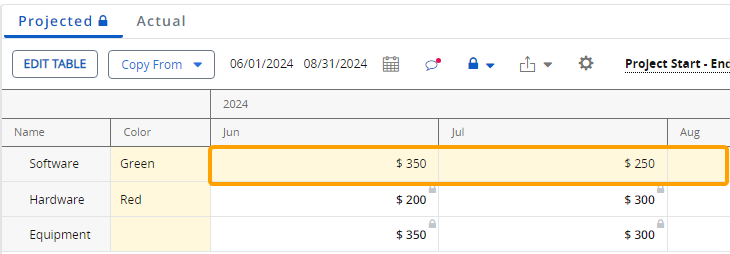
Unlock specific Custom Fields and Tags
Follow this procedure to unlock Custom Fields and / or Tags on specific line items (rows) for the selected Metrics.
To lock specific Custom Fields and Tags
-
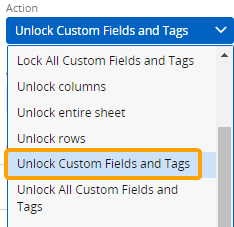
Select Unlock Custom Fields and Tags from the "Actions" menu.
-
Select which of the Metric views should be included in the unlock.

Tip: Selecting the top checkbox will automatically select every Metric view.
-
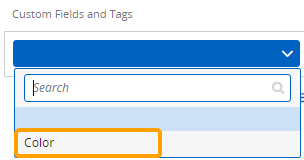
Use the "Custom Fields and Tags" drop-down menu to select a Custom Field or Tag to unlock.
-
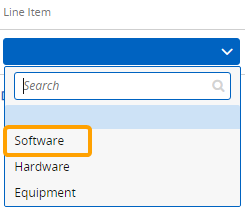
Use the "Line Item" drop-down menu to select which line item (row) the Custom Field or Tag will be unlocked on.
-
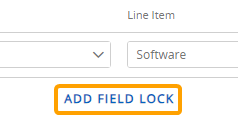
(Optional) Select Add Field Lock to unlock a Custom Field or Tag on another line item. Repeat Steps 3-4 for the new Custom Field or Tag.
-
Determine how you would like the Metric Bulk Action job to run.

-
Run: The Metric Bulk Action job will run immediately. It will not be saved to the "Metric Bulk Action Jobs" page and it will never run again.
Note: Selecting this will end the procedure; your bulk unlock will be complete. You may skip the remaining steps.
-
Next: You will be navigated to the "Save & Schedule" page. From here, you will be able to create a schedule for your bulk unlock to automatically run. It will be saved to the "Metric Bulk Action Jobs" page.
Note: If you select this option, continue through the rest of the procedure.
-
-
Enter a name for your saved Metric Bulk Action job.

-
Enter an informative description for your saved Metric Bulk Action job.

-
Use the "Shared With" field to determine which users will be able to view, edit, and run the Metric Bulk Action job.

 Click here for additional information on the "Search Entities" window.
Type the name of a user or User Group into the "Search" textbox and select it from the suggestions that appear.

Note: When a User Group is selected, every member of the user group will be able to access the Portfolio.
Repeat this until all of your desired users and User Groups are added. The selected users and User Groups will appear in the "Selected Entities" box.

Note: The single-person icon
 indicates a user and a multi-person icon
  indicates a User Group.
From here, you can select the Trash icon
 next to a user or User Group to remove it from the share list.
Select the OK button once you are done editing the share list.

-
Use the "Frequency" drop-down menu to determine the job's run schedule.

-
Never: The Metric Bulk Action job will be saved, but it will not have any scheduled run times in the future.
Tip: This option should only be selected if a run schedule has not been determined yet or if a temporary pause should be placed on the job.
-
Weekly: The Metric Bulk Action job will run on a weekly basis. The fields that appear can be used to specify the run schedule.

-
Start: Select a start date for the Metric Bulk Action job.
Note: The job will not necessarily run on this day. This date determines when the job becomes active. It will run based on the "Every" and "On" selections below.
-
Time: Select the time of day the Metric Bulk Action job will run.
Tip: It is best to schedule jobs to run outside of working hours. This will reduce the likelihood of users editing their Metrics during a Metric Bulk Actions job.
-
End: Select an end date for the Metric Bulk Action job.
Note: The job will not necessarily run on this day. This date determines when the job becomes inactive. It will run based on the "Every" and "On" selections below.
-
Every: Determine the weekly interval for the Metric Bulk Action job.

Example: If "2 Weeks" is selected from the "Every" menu and "Tuesday" and "Friday" are selected from the "On" menu (below), the job will run on the Tuesday and Friday of every second week. During the first week, the job will run on Tuesday and Friday. During the second week, the job will not run. During the third week, the job will run on Tuesday and Friday again. This pattern will continue until the "End" date is reached.
-
On: Determine which days of the week the job will run on.
-
-
Monthly: The Metric Bulk Action job will run on a monthly basis. The fields that appear can be used to specify the run schedule.

-
Calendar: Determine which Calendar will be used to schedule the Metric Bulk Action job.
Note: Administrators can create Alternative Calendars in PowerSteering.
-
Start: Select a start date for the Metric Bulk Action job.
Note: The job will not necessarily run on this day. This date determines when the job becomes active. It will run based on the fields below.
-
Time: Select the time of day the Metric Bulk Action job will run.
Tip: It is best to schedule jobs to run outside of working hours. This will reduce the likelihood of users editing their Metrics during a Metric Bulk Actions job.
-
End: Select an end date for the Metric Bulk Action job.
Note: The job will not necessarily run on this day. This date determines when the job becomes inactive. It will run based on the fields below.
-
Schedule By: Determine how the schedule will search for the day to run the Metric Bulk Action job.

-
Fixed day of the month: A fixed date of the month will be used to identify when the job runs. This will open up drop-down menus that can be used to specify when the job will run.

Example: Selecting "5" from the "Day" menu and "2 months" from the "Of every" menu will cause the Metric Bulk Action job to run on the 5th of every second month.
-
Relative day of the month: A relative day of the week will be used to identify when the job runs. This will open up drop-down menus that can be used to specify when the job will run.

Example: In the image above, the Metric Bulk Action job will run on the third Thursday of every second month.
-
-
-
-
Select the Save button in the bottom right-hand corner of the page.

Note: If Run is selected instead, the Metric Bulk Action job will run immediately and the job will not be saved. All of the "Save & Schedule" settings will be discarded.
Note: When a Metric Bulk Action job is scheduled, there is no way to temporarily delay it without editing the schedule. If a user requests more time to edit a Metric before a Metric Bulk Action job occurs, it is best to wait for the job to complete and then manually edit the Metric afterward.
If Run was selected, the job will run immediately. A "Results" page will appear with a report on which Metrics were successfully affected by the bulk unlock.

Tip: Select any of the listed work items or Metrics to navigate to them.
If Save was selected, the new job will be saved to the "Metric Bulk Action Jobs" page.

From here, it can be edited at any time. It will run based on its schedule.
Tip: Use the "Next Run" column to see when the job is scheduled to run again.
In either case, you can navigate to one of the Metrics and see that the Custom Fields and Tags have been unlocked on the specified line item(s).
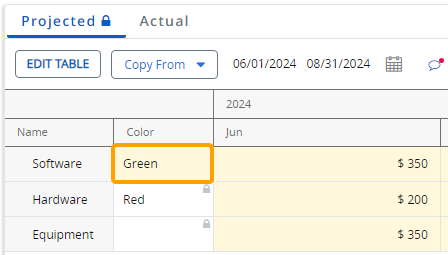
Unlock all Custom Fields and Tags
Follow this procedure to unlock all Custom Fields and Tags on specific views of the selected Metrics.
To unlock all Custom Fields and Tags:
-
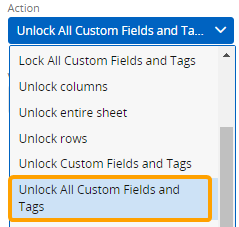
Select Unlock All Custom Fields and Tags from the "Actions" menu.
-
Select which of the Metric views should be included in the unlock.

Tip: Selecting the top checkbox will automatically select every Metric view.
-
Determine how you would like the Metric Bulk Action job to run.

-
Run: The Metric Bulk Action job will run immediately. It will not be saved to the "Metric Bulk Action Jobs" page and it will never run again.
Note: Selecting this will end the procedure; your bulk unlock will be complete. You may skip the remaining steps.
-
Next: You will be navigated to the "Save & Schedule" page. From here, you will be able to create a schedule for your bulk unlock to automatically run. It will be saved to the "Metric Bulk Action Jobs" page.
Note: If you select this option, continue through the rest of the procedure.
-
-
Enter a name for your saved Metric Bulk Action job.

-
Enter an informative description for your saved Metric Bulk Action job.

-
Use the "Shared With" field to determine which users will be able to view, edit, and run the Metric Bulk Action job.

 Click here for additional information on the "Search Entities" window.
Type the name of a user or User Group into the "Search" textbox and select it from the suggestions that appear.

Note: When a User Group is selected, every member of the user group will be able to access the Portfolio.
Repeat this until all of your desired users and User Groups are added. The selected users and User Groups will appear in the "Selected Entities" box.

Note: The single-person icon
 indicates a user and a multi-person icon
  indicates a User Group.
From here, you can select the Trash icon
 next to a user or User Group to remove it from the share list.
Select the OK button once you are done editing the share list.

-
Use the "Frequency" drop-down menu to determine the job's run schedule.

-
Never: The Metric Bulk Action job will be saved, but it will not have any scheduled run times in the future.
Tip: This option should only be selected if a run schedule has not been determined yet or if a temporary pause should be placed on the job.
-
Weekly: The Metric Bulk Action job will run on a weekly basis. The fields that appear can be used to specify the run schedule.

-
Start: Select a start date for the Metric Bulk Action job.
Note: The job will not necessarily run on this day. This date determines when the job becomes active. It will run based on the "Every" and "On" selections below.
-
Time: Select the time of day the Metric Bulk Action job will run.
Tip: It is best to schedule jobs to run outside of working hours. This will reduce the likelihood of users editing their Metrics during a Metric Bulk Actions job.
-
End: Select an end date for the Metric Bulk Action job.
Note: The job will not necessarily run on this day. This date determines when the job becomes inactive. It will run based on the "Every" and "On" selections below.
-
Every: Determine the weekly interval for the Metric Bulk Action job.

Example: If "2 Weeks" is selected from the "Every" menu and "Tuesday" and "Friday" are selected from the "On" menu (below), the job will run on the Tuesday and Friday of every second week. During the first week, the job will run on Tuesday and Friday. During the second week, the job will not run. During the third week, the job will run on Tuesday and Friday again. This pattern will continue until the "End" date is reached.
-
On: Determine which days of the week the job will run on.
-
-
Monthly: The Metric Bulk Action job will run on a monthly basis. The fields that appear can be used to specify the run schedule.

-
Calendar: Determine which Calendar will be used to schedule the Metric Bulk Action job.
Note: Administrators can create Alternative Calendars in PowerSteering.
-
Start: Select a start date for the Metric Bulk Action job.
Note: The job will not necessarily run on this day. This date determines when the job becomes active. It will run based on the fields below.
-
Time: Select the time of day the Metric Bulk Action job will run.
Tip: It is best to schedule jobs to run outside of working hours. This will reduce the likelihood of users editing their Metrics during a Metric Bulk Actions job.
-
End: Select an end date for the Metric Bulk Action job.
Note: The job will not necessarily run on this day. This date determines when the job becomes inactive. It will run based on the fields below.
-
Schedule By: Determine how the schedule will search for the day to run the Metric Bulk Action job.

-
Fixed day of the month: A fixed date of the month will be used to identify when the job runs. This will open up drop-down menus that can be used to specify when the job will run.

Example: Selecting "5" from the "Day" menu and "2 months" from the "Of every" menu will cause the Metric Bulk Action job to run on the 5th of every second month.
-
Relative day of the month: A relative day of the week will be used to identify when the job runs. This will open up drop-down menus that can be used to specify when the job will run.

Example: In the image above, the Metric Bulk Action job will run on the third Thursday of every second month.
-
-
-
-
Select the Save button in the bottom right-hand corner of the page.

Note: If Run is selected instead, the Metric Bulk Action job will run immediately and the job will not be saved. All of the "Save & Schedule" settings will be discarded.
Note: When a Metric Bulk Action job is scheduled, there is no way to temporarily delay it without editing the schedule. If a user requests more time to edit a Metric before a Metric Bulk Action job occurs, it is best to wait for the job to complete and then manually edit the Metric afterward.
If Run was selected, the job will run immediately. A "Results" page will appear with a report on which Metrics were successfully affected by the bulk unlock.

Tip: Select any of the listed work items or Metrics to navigate to them.
If Save was selected, the new job will be saved to the "Metric Bulk Action Jobs" page.

From here, it can be edited at any time. It will run based on its schedule.
Tip: Use the "Next Run" column to see when the job is scheduled to run again.
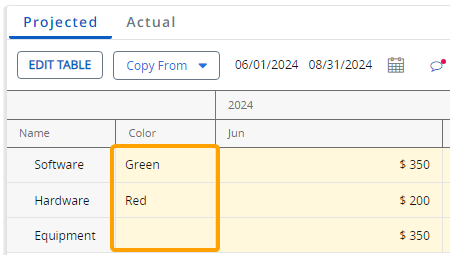
In either case, you can navigate to one of the Metrics and see that the Custom Fields and Tags have been unlocked on the specified Metric view(s).
Locking Metrics in bulk using the legacy interface
The legacy Metric Bulk Actions interface is still available for users who are not yet familiar with the new Metric Bulk Actions wizard. However, these users should learn how to use the new interface as soon as possible because the legacy page will soon be made unavailable in a future release.
Additionally, the new wizard offers new functionality that is not available on the legacy page. Users can save their Metric Bulk Actions to the "Metric Bulk Action Jobs" page and schedule them to run automatically. This saves users from having to tediously create identical Metric Bulk Action jobs whenever they need these jobs to repeat themselves. This will also prevent any issues that occur due to forgetting to run a Metric Bulk Action.
In the context of bulk unlock, the new wizard allows users to specify which Metric components they would like to unlock. The new interface can be used to unlock specific Metric views, line items, columns, Custom Fields and Tags. The legacy interface only allows users to unlock entire Metrics at once; they cannot specify which parts of the Metrics should be unlocked.
Note: If you would like to use this page, you will need to reach out to a PowerSteering representative. Please be aware that it will eventually be deprecated, so users should learn how to use the new Metric Bulk Actions page as soon as possible.
To lock Metric values in bulk using the Legacy interface:
Before You Start: Users will require the "Lock Metrics" Project permission to lock or unlock Metric data.
Tip: Consider designating a specific PowerSteering administrator to create and schedule Metric Bulk Actions Jobs. Users who belong to the Admin Group have permission to edit Metrics on all work items, so this will ensure that all Metrics in the chosen Portfolio will be affected when the job runs.
-
Select Review → Metric Bulk Actions from the Navigation Menu:

Note: If you do not see the Metric Bulk Actions option, it may be limited to select users in your organization. Reach out to a PowerSteering administrator for more information.
-
Select which Portfolio of work items you will conduct the Metric Bulk Action on.
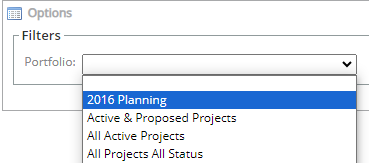
Note: Apart from your "My Projects" Portfolio, you will only be able to select Portfolios that have been shared with you. Administrators can select any Portfolio, regardless of its sharing settings.
-
Decide which Portfolio Tags should be used to filter the work items that will be included in the Metric unlock:
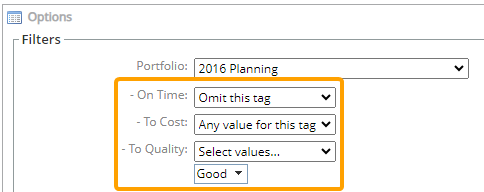
Note: The Portfolio Tags will consist of Tags that have been associated with work items that belong to the Portfolio.
The following options are available for each Tag:
-
Omit this tag (default): The value of this Tag will have no impact on which work items are included in the Metric unlock.
-
Any value for this tag: Work items will only be included in the Metric unlock if a value has been chosen for the Tag.
-
No value for this tag: Work items will only be included in the Metric unlock if no value has been chosen for the Tag.
-
Select values: Work items will only be included in the Metric unlock if they contain the chosen value(s) for the Tag.
Tip: To make sure that the correct work items get included in the Metric unlock, it might be wise for PowerSteering administrators to create a specific Tag for it. For example, a Tag called "Ready for Metric Unlock" can be used to indicate whether or not a work item is ready to have it's Metrics unlocked:

Contact your PowerSteering administrator if you think this would be helpful.
-
-
Select the Metric Template that will be affected by the Metric unlock.

-
Select Unlock from the "Action" drop-down menu.

-
Use the "Ready for Rollup" drop-down menu to determine how each Metric's "Ready for Rollup" status will be affected by the Metric lock.
Note: "Ready for Rollup" is a replaceable term. It may be represented by another term in your PowerSteering environment. Contact a PowerSteering administrator if you are unsure.

-
No Change: The Metric copy will have no effect on the "Ready for Rollup" status of the Metrics.
-
Set: Each Metric affected by the copy will automatically be set to "Ready for Rollup".
-
Clear: Each Metric affected by the copy will automatically not be set to "Ready for Rollup".
-
-
Select the Run button.

After selecting Run, a "Results" section will appear with a report on which Metrics were successfully affected by the bulk unlock.

Tip: Select any of the listed work items or Metrics to navigate to them.
Every view on the affected Metrics will be completely unlocked.
