Create a Project
PowerSteering Projects allow professionals to plan, track, and execute their organization's initiatives. They are a collaboration of Tasks, Discussions, Metrics, Documents, and much more. Project creators can create Basic Projects (which can include all of these entities), or they can create Gated Projects, which consist of multiple Project stages (Gates) that may require approval to advance from. Regardless of their type, PowerSteering Projects can be easily created with a step-by-step process.
Note: In order to be considered a "Project", a work item must be created from an Object Type with the "Is project" checkbox selected.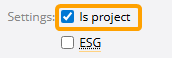
Only these Object Types (and Work Templates with one of these Object Types selected as the "Root Work Object") will be selectable from the "Work Type" menu. To create non-Project work items, see Create Other Work.
Note: "Project" is a replaceable term in PowerSteering. A different term might be used in your PowerSteering environment.
To create a Project in PowerSteering:
Before You Start: PowerSteering users will require the "Create Root Work" Context permission to create Projects.
-
Select Add
 → Project from the Navigation Menu:
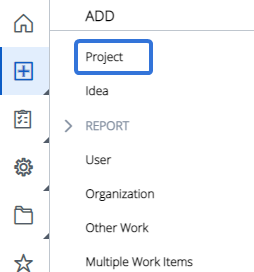
-
Select an Object Type or Work Template from the "Work Type" menu to serve as the foundation of your new Project.
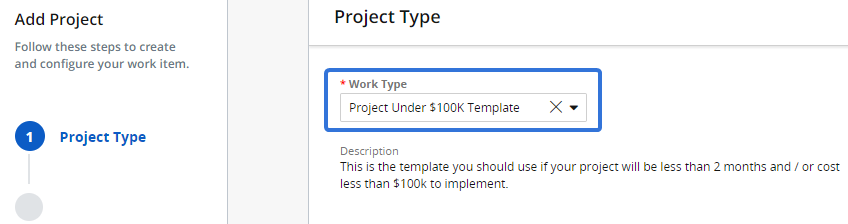
Note: The "Work Type" drop-down menu is split into two sections: Templates and Basic.
The Templates section contains Work Templates that have been created by PowerSteering administrators. In order for a Work Template to be included in this list, the template's "Root Work Object" must be an Object Type with the "Is project" checkbox selected.
Additionally, these templates must have their "Show on work creation" and "From Add menu" options set to "Yes" to be included in the Templates list.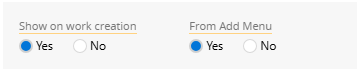
The Basic section contains Object Types with the "Is project" checkbox selected. These Object Types must NOT be set to "Is templates only" to be included in the Basic list.
Speak to a PowerSteering administrator if you are unsure of which Work Type to select. -
Select the Next button.

-
Enter in the Project Information for you new Project:
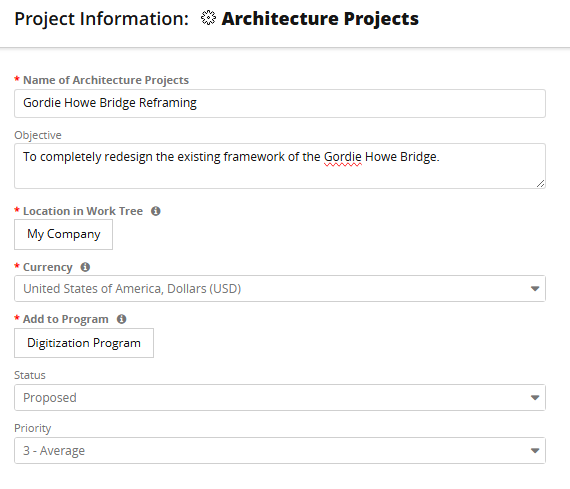
Note: Some of these fields may be hidden based on how your PowerSteering environment has been set up.
 Click here for more information on these fields
-
Name: Enter a name for your new Project.
-
Objective: Enter a quick description of your new Project's goals and/or objectives.
-
Location in Work Tree: Select the box to open up the "Location in Work Tree" window. Use this window to select where the Project will reside in the Work Tree:

-
Currency: Select a currency that will be associated with your new Project.
Note: The "Currency" drop-down menu is an optional feature that can be enabled by PowerSteering. If it is not enabled, the new Project will automatically inherit whichever currency is associated with its parent in the Work Tree. However, a Project's currency can be changed at any point after creation.
If you would like this option enabled for Project creation, speak to your PowerSteering representative. -
Add to Program: Select the box to add the Project to one or more Programs.
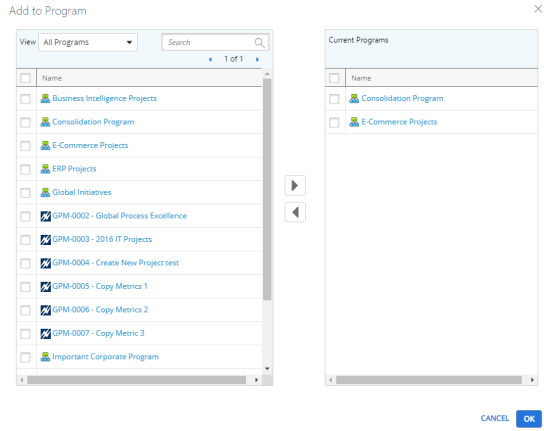
From the table on the left, select the checkboxes of the Programs you would like your new Project to be associated with and select the right arrow
 to send them to the "Current Programs" table on the right. Alternatively, you can select the checkboxes of any Programs you have added to the "Current Programs" window and select the left arrow
  to remove them from your Project's Programs.
-
-
Select the Next button.
-
Enter in the Custom Field & Tag values for your new Project:
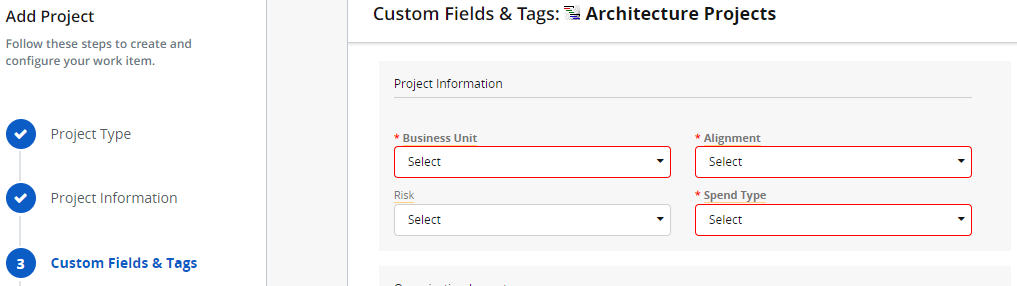
Note: Fields outlined in red with a red asterisk are required. These fields must have values inserted into them before advancing.
Note: These fields will differ based on how the Object Type is configured in Field Management. Reach out to a PowerSteering administrator if you are unsure how to address any of the fields.
-
Select the Next button
OR
Select the Finish & Create button if you would like to create your Project immediately and skip the "Team Members" section for now.

Note: If Finish & Create is selected, you may skip the rest of the procedure.
-
Choose your Project's Team Members and assign them to Roles:

Tip: For information on using this table, see Assign People to Roles.
Note: Roles with an asterisk (like "Owner" in the image above) are required. These Roles must be filled before advancing.
Note: The listed Roles are determined by the Role configuration of the Project's Object Type.
-
Select the Finish & Create button to save your new Project
OR
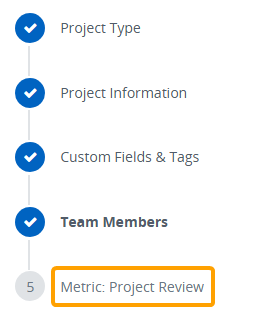
Select the Next button if you would like to enter data into a Scorecard Metric attached to the Project.
Note: The Next button will only be visible here if a Scorecard Metric Template has been attached to the Project's Object Type. Also, a fifth "Metric" step will be displayed in the side navigation.
Note: If Finish & Create is selected, you may skip the rest of the procedure.
-
Enter data into the Scorecard Metric view.
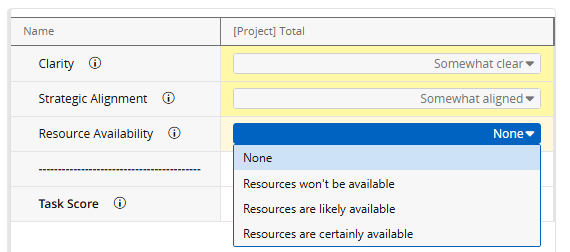
Tip: See Enter Data into a Scorecard Metric for more information.
-
Select the Finish button.
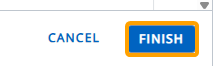
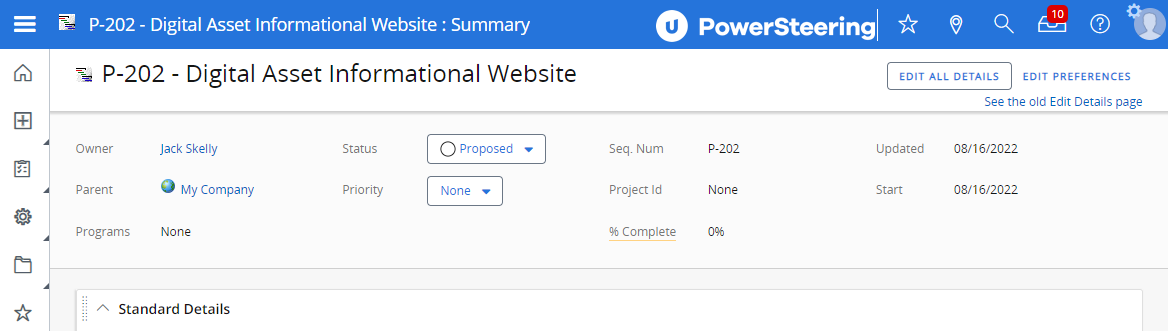
After selecting Finish, your new Project will be published to PowerSteering. The Project Summary page will be displayed immediately.