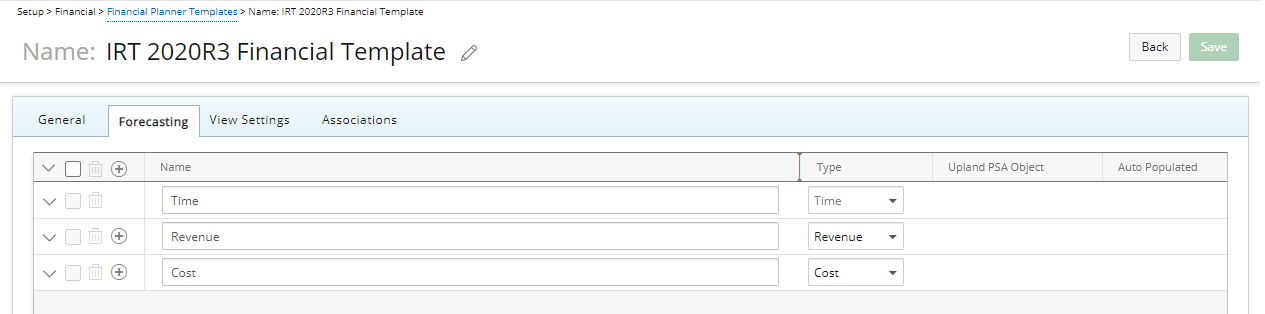
From the Forecasting tab you can choose the section(s), category(ies) and item(s) to show on the Financial Planner. Confirm the default and naming of the sections are as required. If the name must be changed, simply click on the respective box and make the appropriate changes.
This article details the options available in the Forecasting tab of a Financial Planner Template, including forecast period setup and calculation methods.
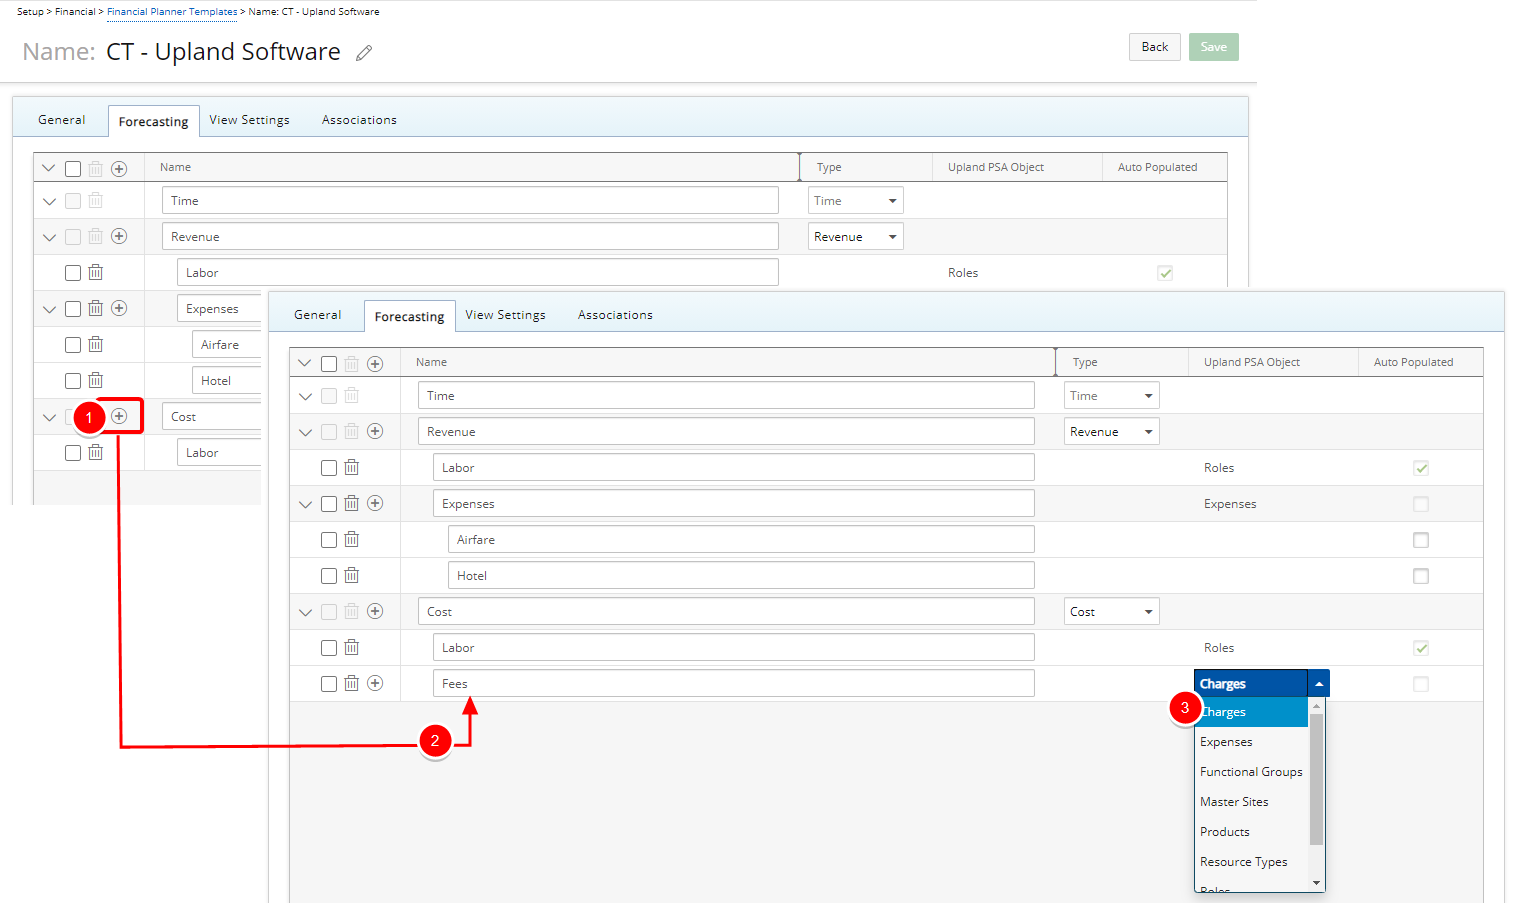
To add a new category under a section:
- Click the New button to the left of a Section Name to create a new category.
- Enter a Name in the text field for the new category.
- Click the Type list for the respective item and select an option.
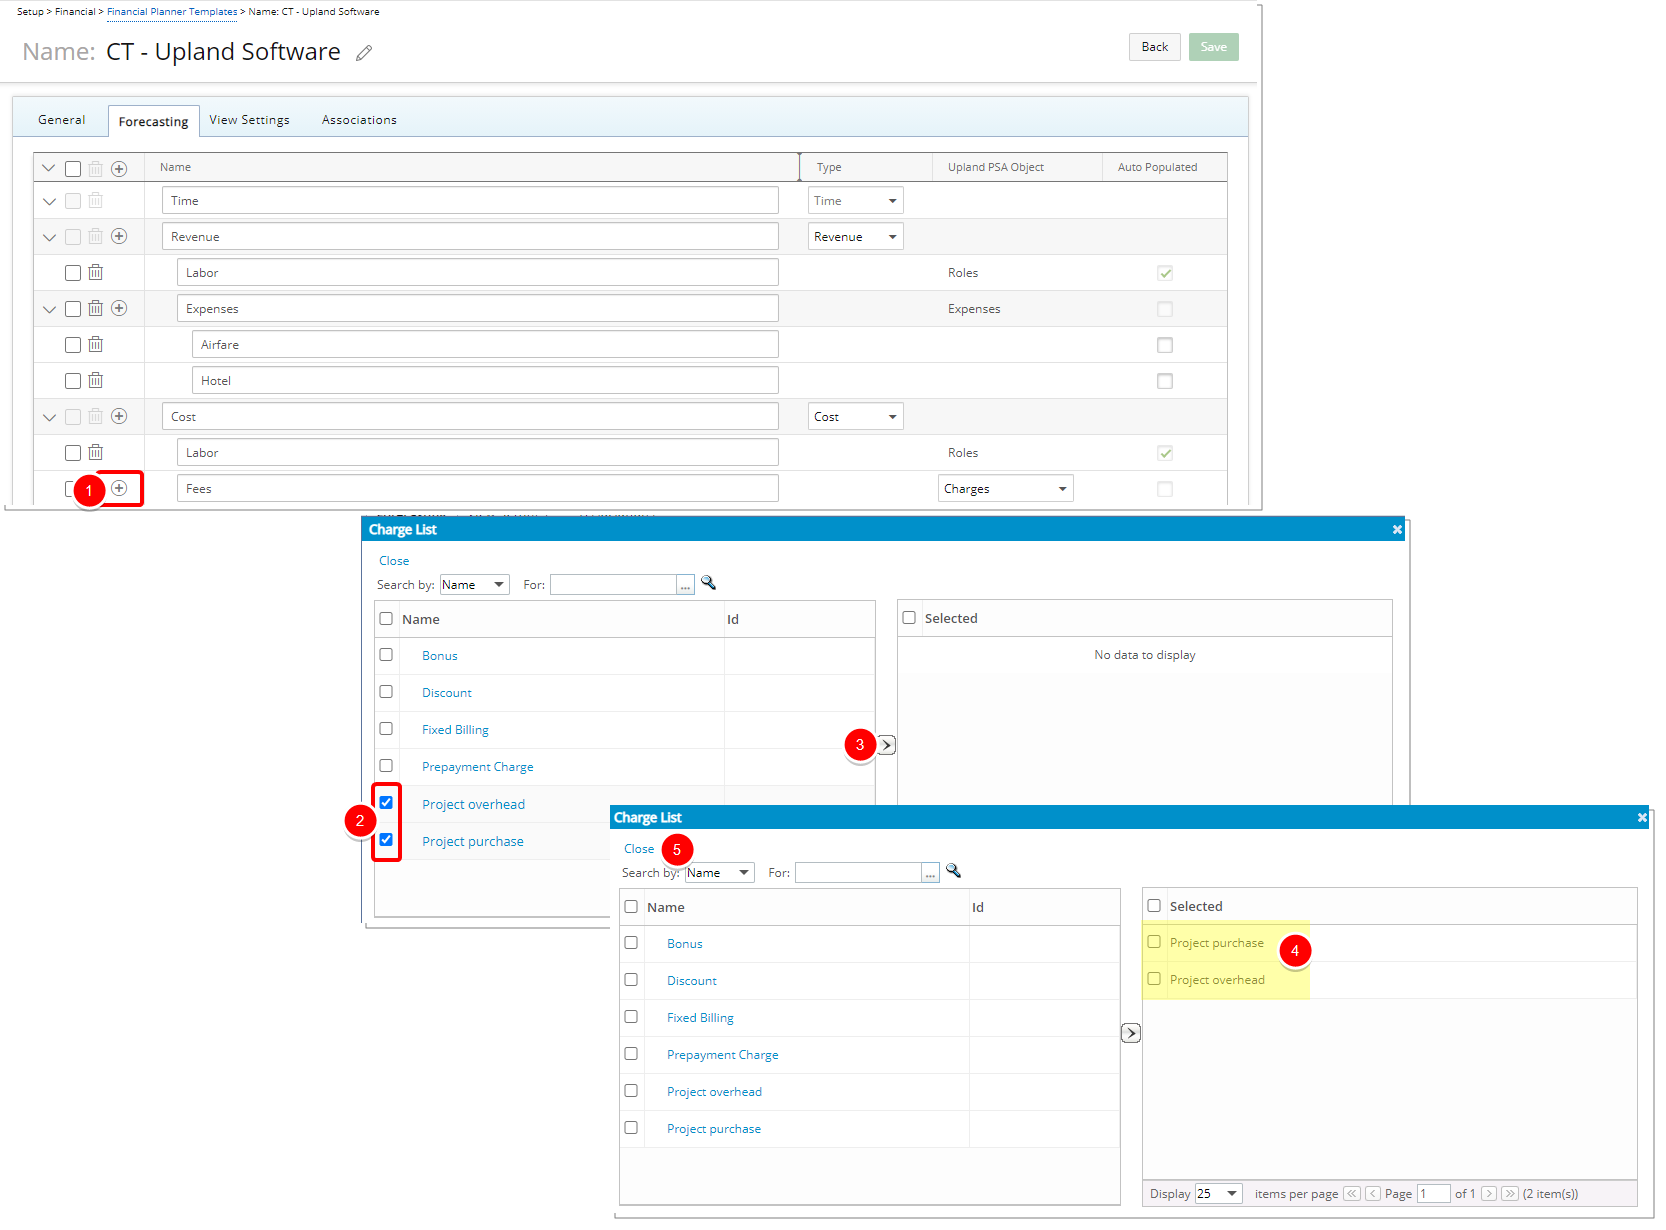
Add a new item under a category:
- Click the New button to the left of a category Name to create a new item.
- Based on the selected Category, the respective dialog box displays, such as this Charge List wherein you: Select the items from the left table, to be included.
- Click the Add (>) button in between the two tables.
- View the chosen item(s) in the Selected table.
- Click the Close link.
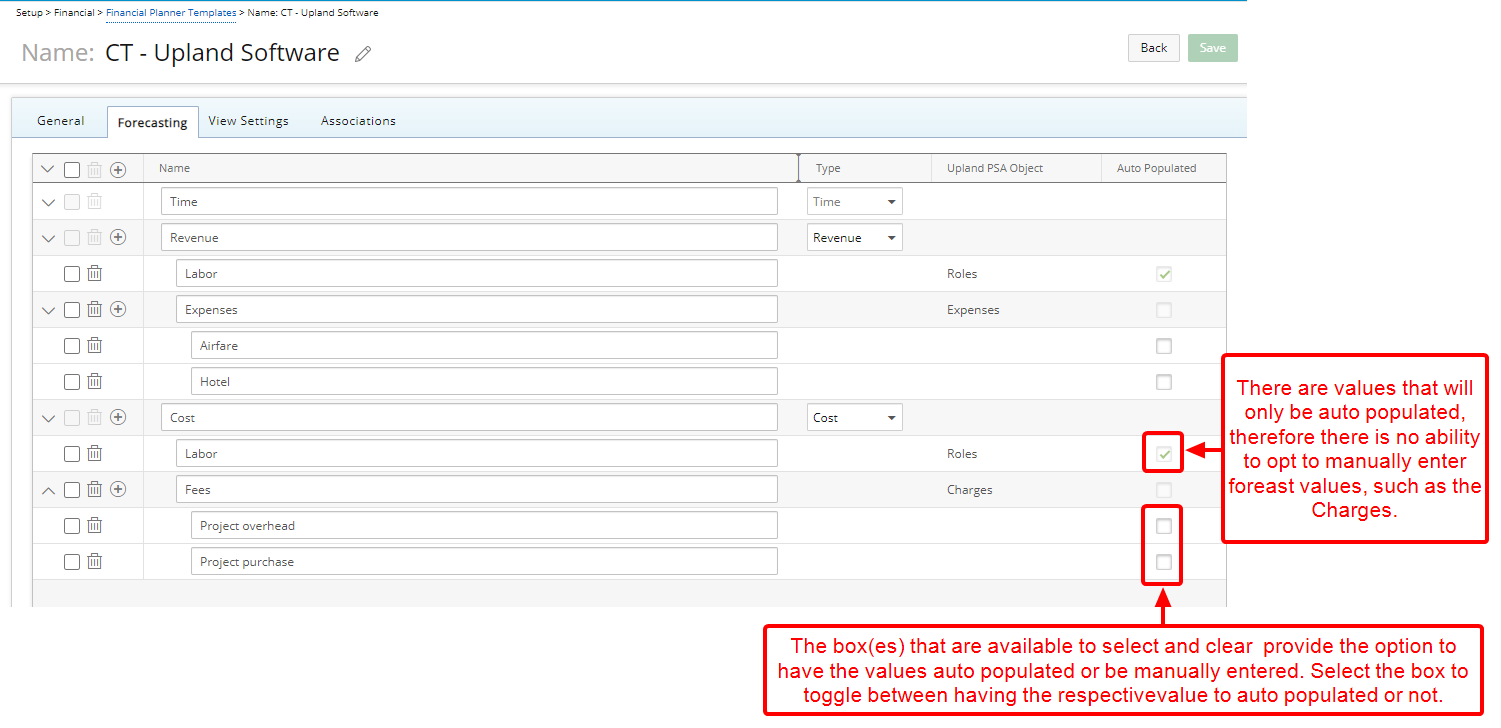
Auto Populated option
To have the values be automatically populated on the Financial Planner, click the Auto Populated check box for the respective item(s).
For more information refer to the following articles: