Blocking Non-working days within a calendar helps clearly define days when resources are unavailable for work, such as holidays or company-wide closures. This feature ensures that scheduling and workload planning correctly account for these periods, improving project timelines and resource allocation accuracy.
This article details how to block non working day(s) on a Calendar for organizational scheduling purposes.
- From the Icon Bar click Setup
 .
. - From the Navigation Menu click Workforce Planning to expand the corresponding menu.
- From the available menu items, click Calendars.
- From the Calendars list page, select the calendar for your users by clicking its name.
Note: If there are multiple Calendars being used across your organization for the given team members, you will have to repeat the steps for each Calendar.
- When the Calendar Edit page appears, navigate to the Calendar tab.
- Navigate to the required date by using the arrows or by selecting the month and year from the dropdown lists.
- Select the date(s).
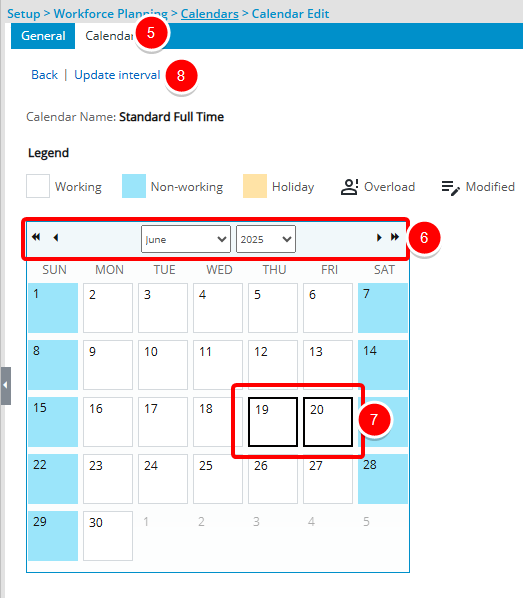
- Click Update interval.
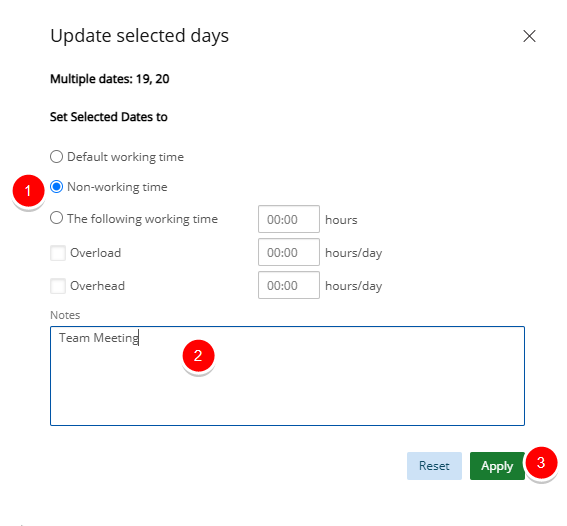
- From the Update selected days dialog box, select the Non-working time option.
- Make an entry in the Notes box.
- Click Apply to save your changes.
Note: A confirmation dialog box will appear if there are scheduled hours on some of the selected date(s). Click Yes to continue.
- Click the Close
 button to exit the dialog box.
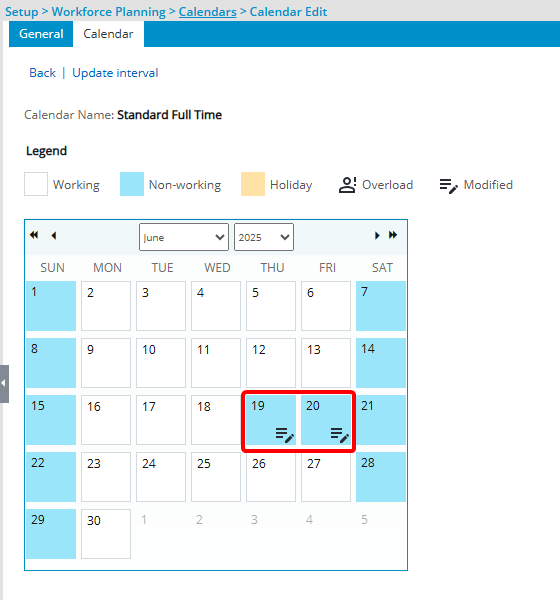
 - View your changes on the Calendar: The Calendar will be updated and the day(s) will be marked as non-working days.
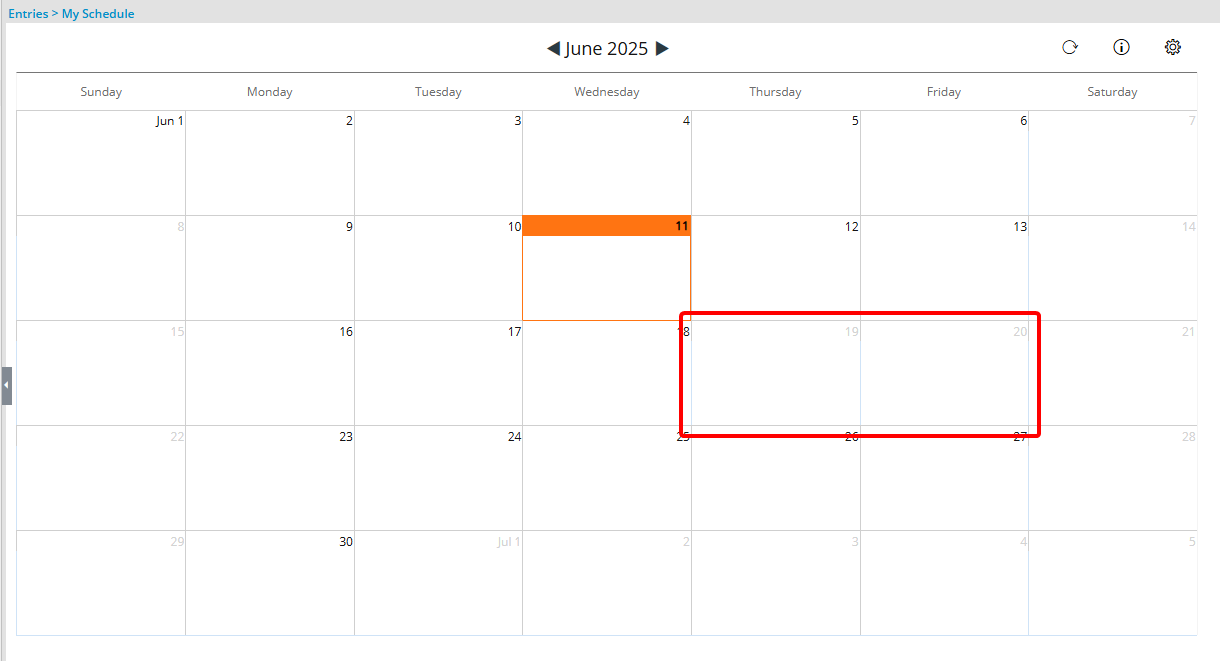
- View your changes as a user: View your changes as a team member assigned to this Calendar. Note that the dates are grayed out marking them as non-working days.