Creating a new calendar allows you to establish a customized schedule that specifies working and non-working days and hours for users. This process is essential to align resources’ availability with organizational requirements and project timelines. Follow the steps in this section to set up calendars that meet your business needs.
This article details how to create a new Calendar for organizational scheduling purposes.
- From the Icon Bar click Setup
 .
. - From the Navigation Menu click Workforce Planning to expand the corresponding menu.
- From the available menu items, click Calendars.
- From the Calendars list page, click the Create Calendar button.
-
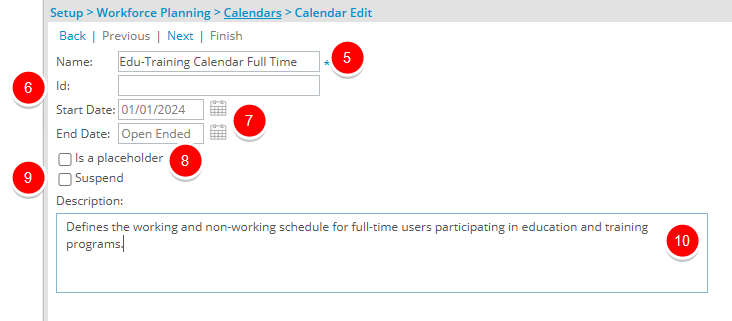
Upon the Calendar Edit page displacing, enter a name for the calendar in the Name box,
- If there is an ID for the calendar, enter it in the ID box.
- Start and End Dates:
- Click the Calendar button beside the Start Date to set the desired date on which the calendar begins.
- End Date: By default the date showing is open ended. If you wish to change the date, click the Calendar button beside the End Date and select the desired date.
- If the calendar is to act as a placeholder select the Is a placeholder option.
- If the calendar is to be suspended, select the Suspend option.
- Enter a brief description for the calendar.
- Click Next to continue.
- From the Set as Working Days section, select the boxes beside those days that are to be set as working days.
Note: Note that only the Set as Working Dayssection is taken into consideration when a calendar is chosen as the Default Calendar for Project Planning.
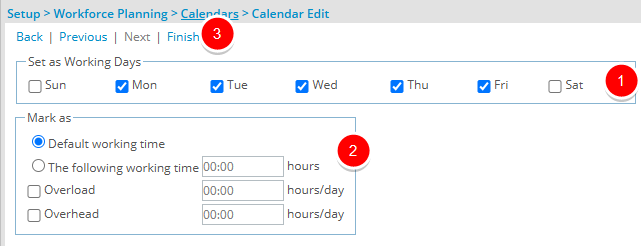
- In the Mark as section select the following options where applicable:
- Select the Default working time option if you to apply the system working time to the calendar, as set up under Setup > Workforce Planning > System.
- Select The following working time option if you do not want to apply the system working time, and then enter the number of working hours per day.
- Select the Overload option and enter the number of hours per day a user is considered available to work, in addition to the working hours, without the time being considered overtime.
Example: If the normal working hours are 8 hours/day, and you need the software developers to work 2 hours more on Monday during the software release period, then enter 2 hours as overload hours for Monday. As a result, the total available working time for the developers on Monday is 10 hours.
- Overhead: If required, select the Overhead option and enter the number of hours, per day, that a user is committed to a specific task.
Example: If the normal working hours are 8 hours/day, and you enter 2 hours as overhead hours for Monday, it means that you are only available for 6 hours on Monday. This feature is helpful for reserving yourself ahead of time for special events, meetings, etc.
- Click Finish.
-
Once you click Finish, two tabs appear on the Calendar Edit page. The General tab and the Calendar tab from where you can modify the details of the calendar.