The Leave Request Manager is the central place where you can request time off as well as Edit, Delete or Action on your Leave Requests
This article covers how to edit a Leave Request.
- Upon accessing the Leave Request Manager page, click the Create Leave Request button.
-
You can access the Leave Request expanded row either by:
- Clicking the expand arrow
 to expand the Leave request line item.
 - Or by clicking the Leave Request Tracking Number
- Clicking the expand arrow
-
 Edit the Details of Your Leave Request
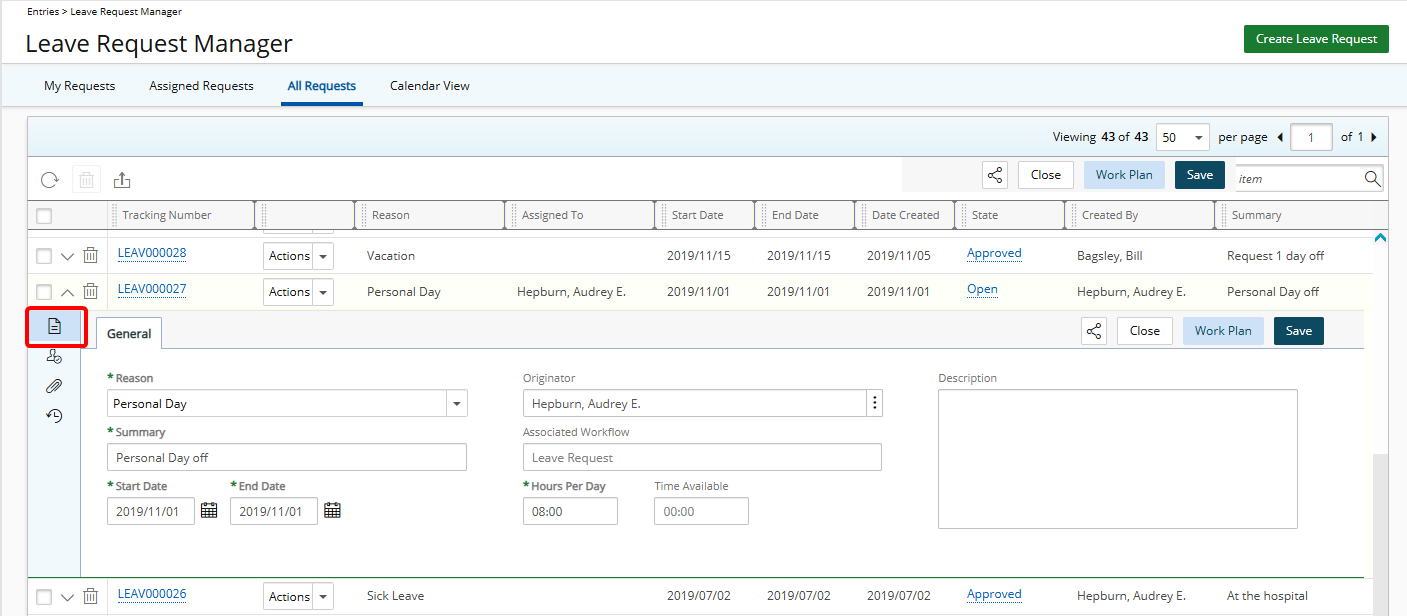
Edit the following information as required :
- Reason: Click to select a Reason from the list of available options.
- Summary: Enter a Summary for the Leave Request (maximum of 255 characters with spaces).
- Originator: Select the Originator of the Leave Request.
- Description: Enter a Description for the Leave Request (maximum of 255 characters with spaces).
- Start Date: Enter or select the Start Date of your Leave Request.
- End Date: Enter or select the End Date of your Leave Request.
- Hours Per Day: Enter the number of Hours Per Day if different from the Default value as set in the Timesheet Template.
- Time Available: Default value (Read only).
Note: By default, Details is displayed.
-
Edit/View the Leave Request Assignments
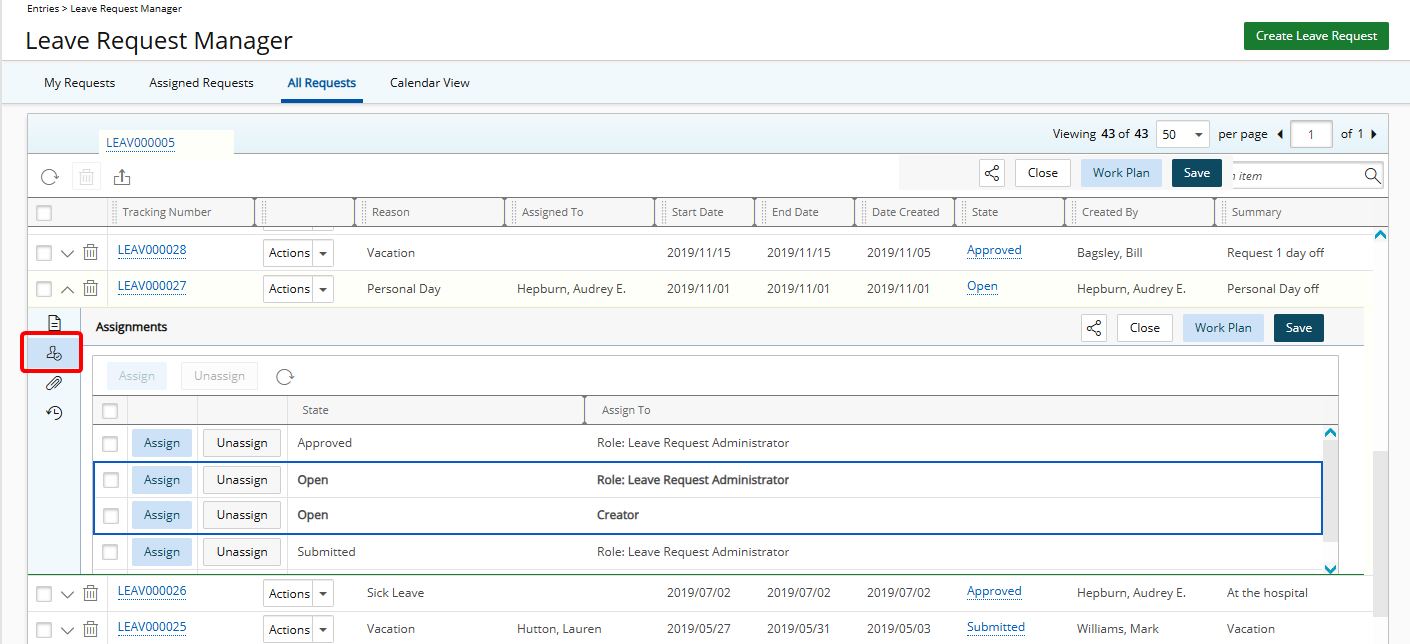
- Click Assignments to view a list of the workflow States as well as the Assigned to information.
- The current state is highlighted with a blue border.
Note: Assignments can be modified only if you have the required permissions.
-
Edit/View the Leave Request Attachments
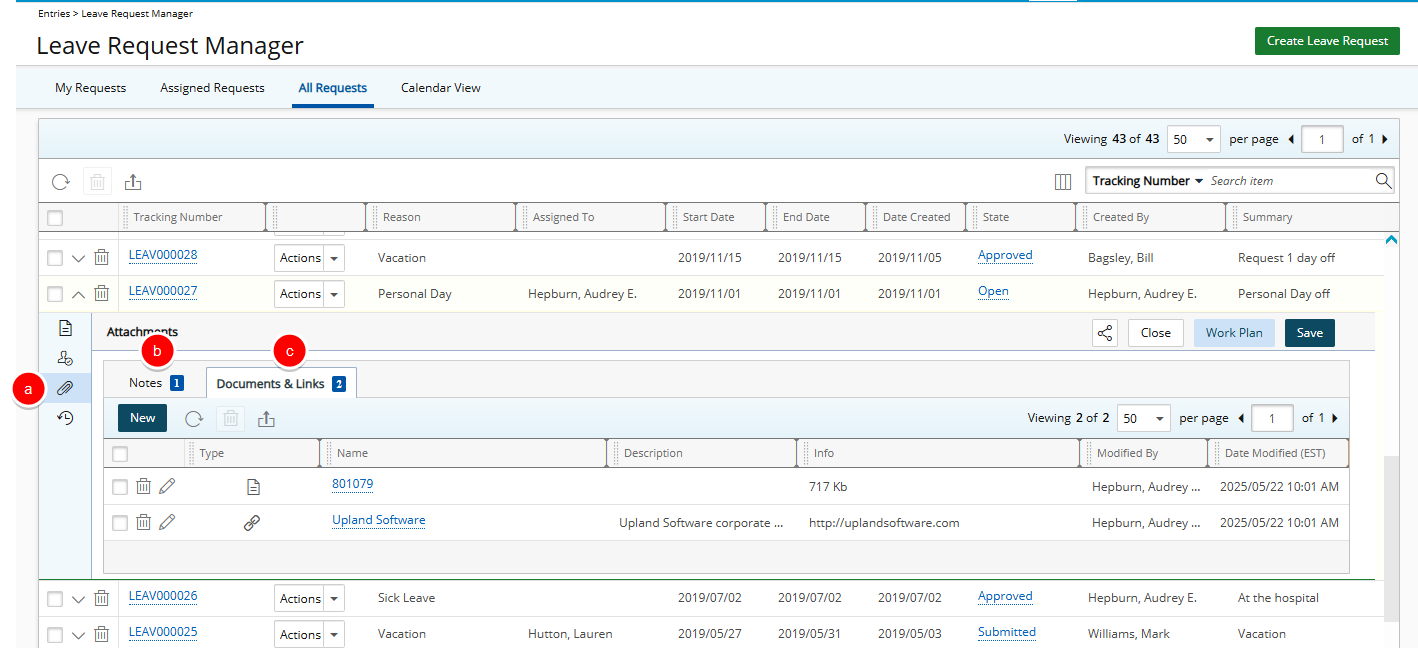
- Click Attachments
- Click the Notes tab to Edit, Delete or add New Notes.
- Click the Documents and Links tab to Edit, Delete or add New attachments or Links.
Note:
- You can add attachments and Notes, provided you have the proper permissions.
- When creating a new Note, You must save the Note to be able to access the Attachments tab.
- When Public is selected, any user with access to manage Leave Requests can view the Note, Link or Attachment.
For more details refer to Adding Note(s) & Note Attachment(s) to Leave Requests.
-
View the Leave Request History
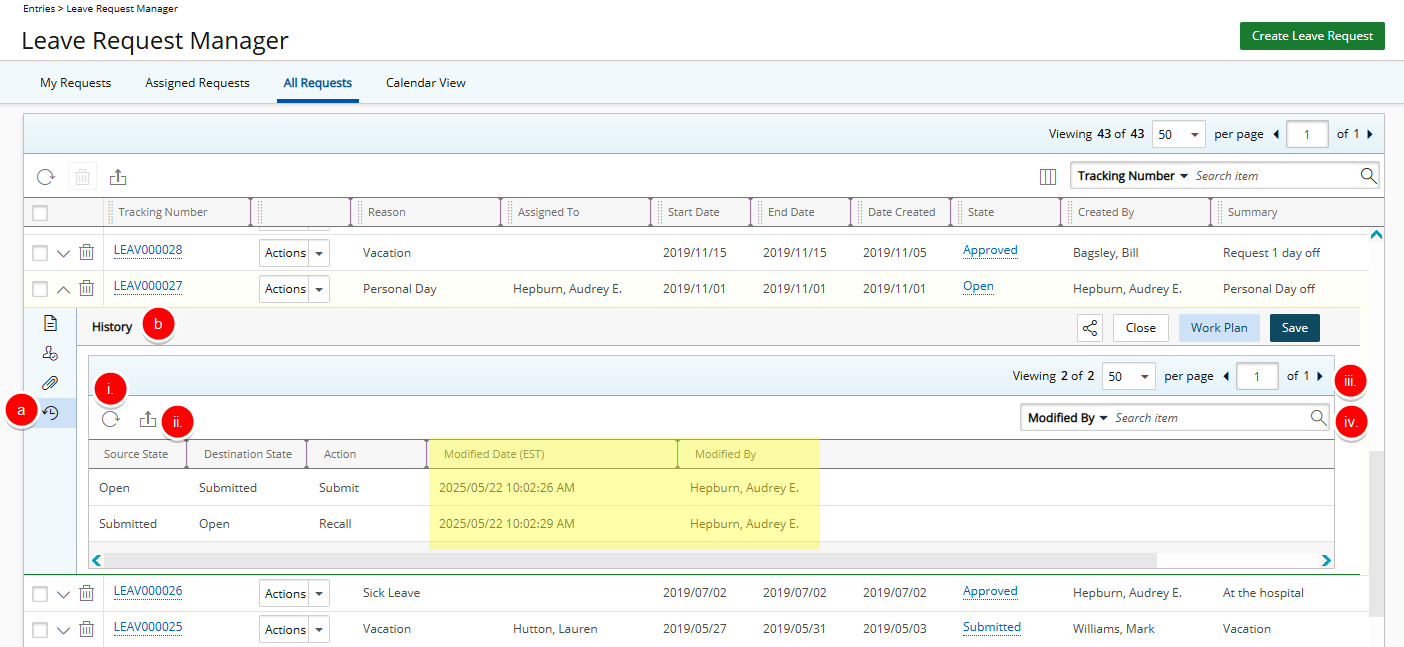
- Click History
- View the History list. The available options are:
- Refresh: Click to refresh the History list.
- Export: Click to Export the History list to Excel.
- Pagination: The Pagination facilitates moving to a new Notification List page and to view the number of Notification pages. For further details refer to Pagination.
- Search: Select a search criterion from the available anchored criteria filter. In the Search box type either the complete term you want to search for, or a just a part of it and click on the Search icon. For more information on how to preform a search click here.
Tip:
- Click on a column header to sort the list in ascending or descending order. Note that a small arrow is displayed in the column header.
- You can easily reorder the columns simply by dragging them into a new position within the table.
- Once changes are made, click Save or Cancel to discard.