You can seamlessly add, or update your Skills and Proficiency levels, ensuring that your profile accurately reflects your expertise by creating a User Skill Update Work Item Entry.
You can update multiple Skills within a single User Skill Update Work Item Entry. Instead of creating separate requests for each Skill, all updates are managed from the Skills tab. This allows you to add, modify, or remove multiple Skills at once — including changes to Proficiency, Interest, and Expiry Date. Each action is tracked with clear status indicators and can be easily reviewed before submission.
The process of creating a Work Item Entry is similar for all work items, but the User Skill Update Work Item Entry has some distinct differences which you can review under Submission and Approval Process heading.
This article details how to create a User Skill Update Entry through the Work Item Manager page, providing step-by-step instructions to ensure your profile stays current with your latest skills and proficiencies.
- From the Icon Bar click Entries
 .
. - From the Navigation Menu click Work Item Manager.
- Click Create Work Item and choose User Skill Update Workflow from the list of available Work Items Workflows
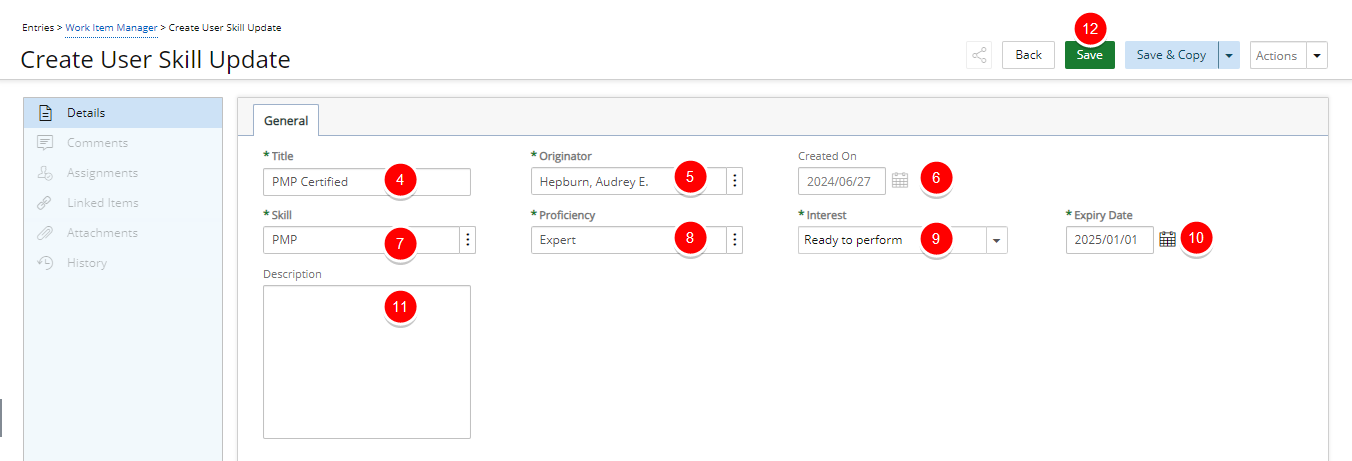
- Enter a short descriptive Title for your Entry.
- The Originator field defaults to creators' User Name.
Note: You can choose to create an Entry on behalf of another user provided you have the right to Can create Work Items on behalf of others permission (Setup > Organization > System > Security > Security Profile Edit > Entry > Work Item).
- The Created On field is read-only and defaults to current date.
- Enter a brief Description.
- Navigate to the Skills tab.
- Click New to access the Add New Skill(s) dialog box.
- Select the required Skills from the Available Skills table.
- Click the right arrow button
 to move the selected Skills to the Selected Skills table on the right.
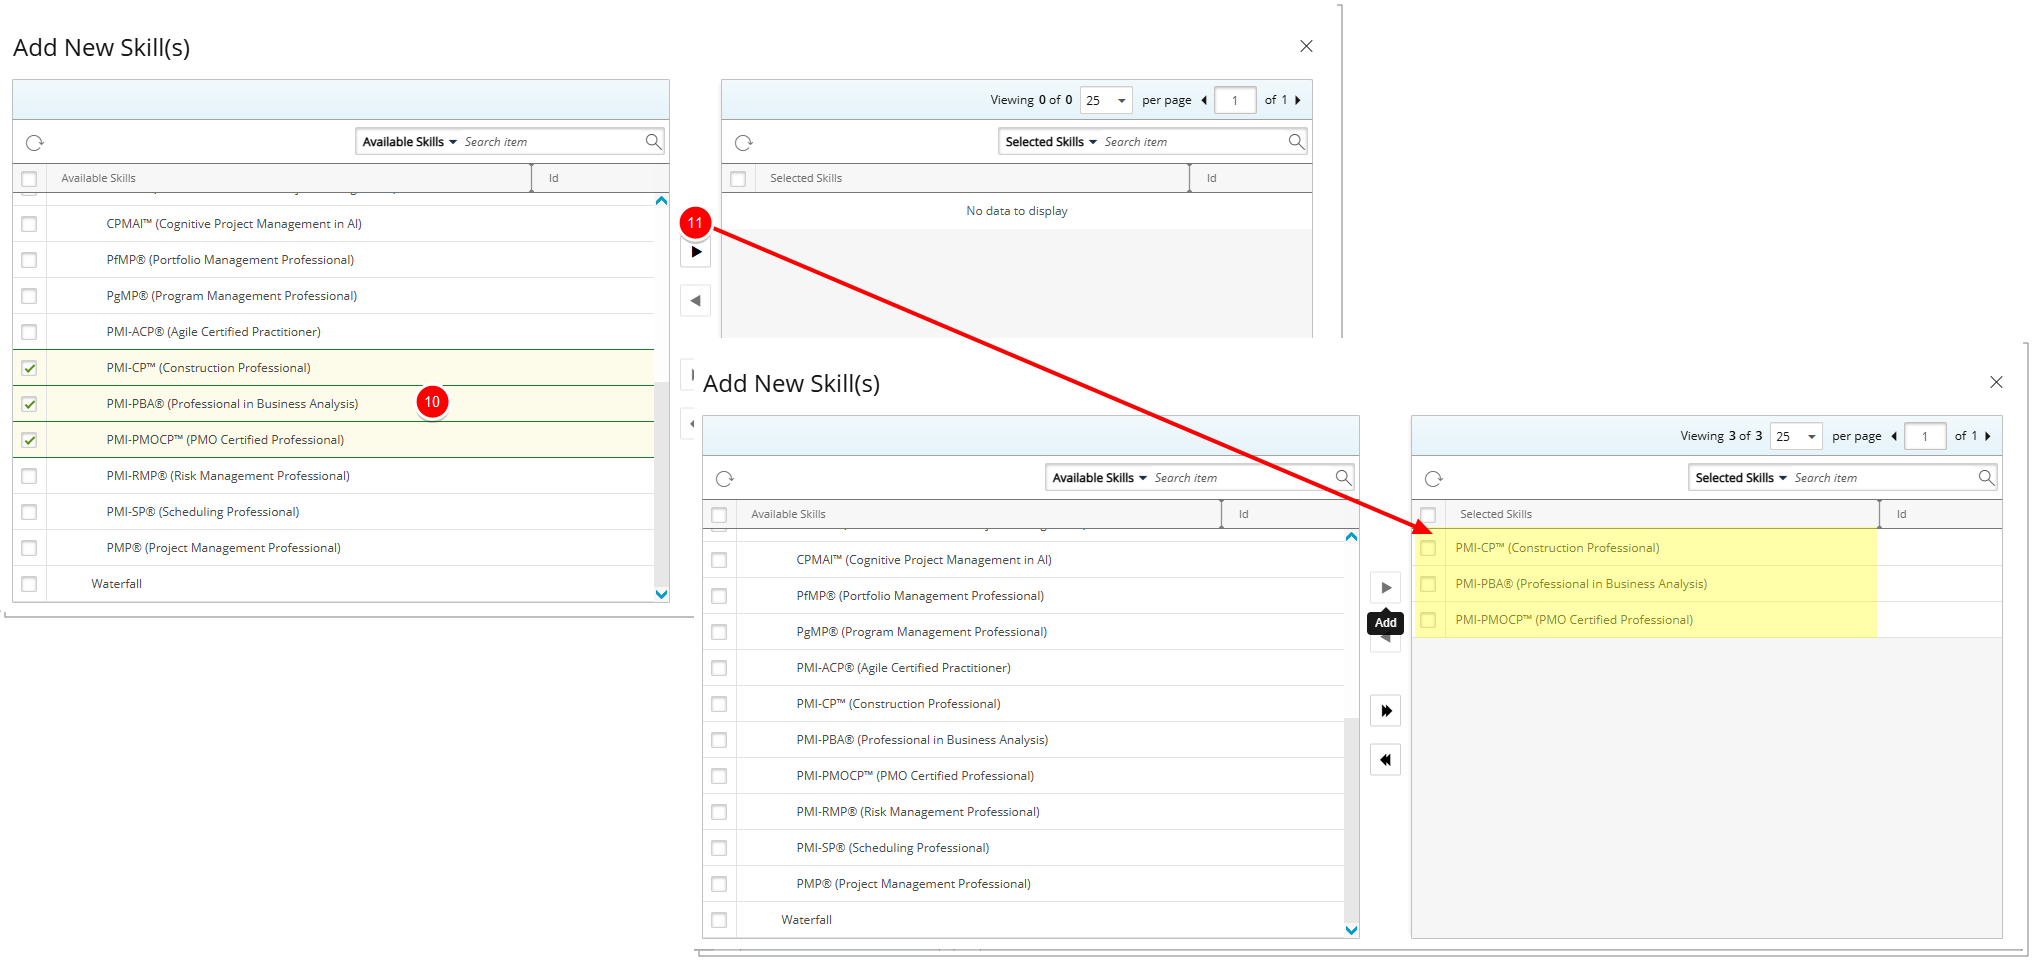
- Click the Close
 button to exit the dialog box.
 - Upon returning to the Create User Skill Update page note that your selected Skills are now listed.
- Select the following details for each Skill:
- Proficiency - Click to select the required Proficiency from the corresponding Proficiency List page. By default the available options are: Not applicable, Beginner, Basic, Intermediate, Informed and Expert,
- Interest - Click Interest and select one of the following default options: Not specified, Not interested, Ready to perform, Somewhat interested, Interested, Very Interested and Career goal.
- Expiry Date - If applicable, click the Calendar
 button and choose an Expiry Date.
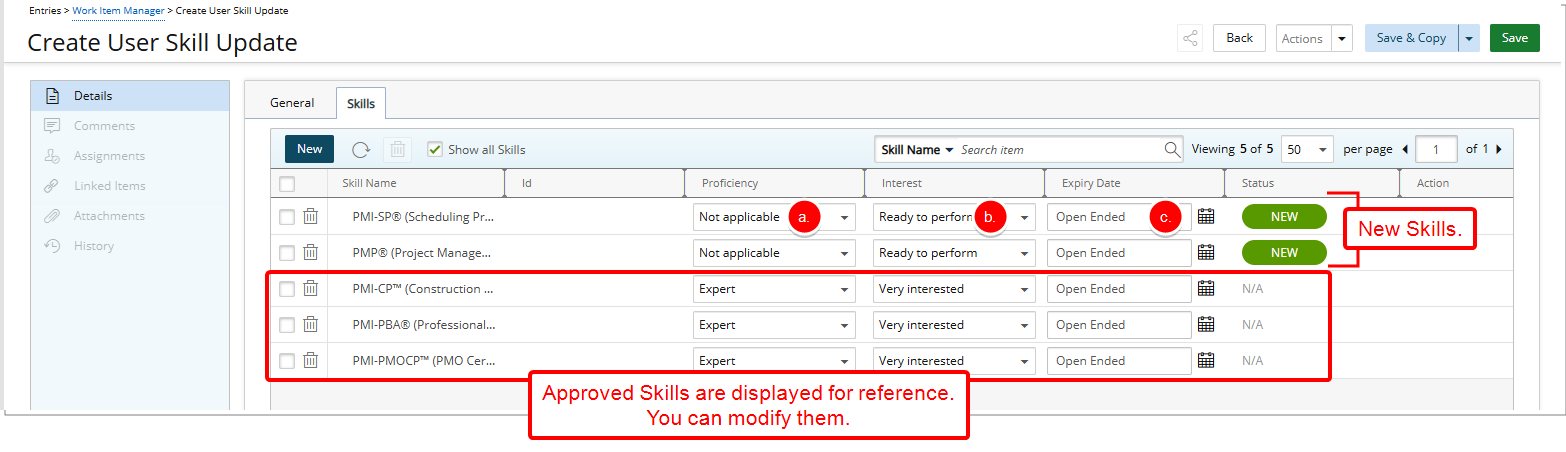
Note: Approved Skills are listed for reference. You can modify them. For more details see Modifying an Approved User Skill Update Work Item Entry.
- Click Save. The page will refresh allowing you to access and modify the Entry. Continue to Step 16 for further details. You may wish to Save and immediately create a copy of this entry. Please refer to Save & Copy section.
- Note that:
- The Comments, Assignments, Linked Items, Attachments and History tabs are now available to you.
- The State and Tracking# of the Entry are now visible in the header area.
- You can choose to Share it with colleagues. For further details refer to Sharing Pages.
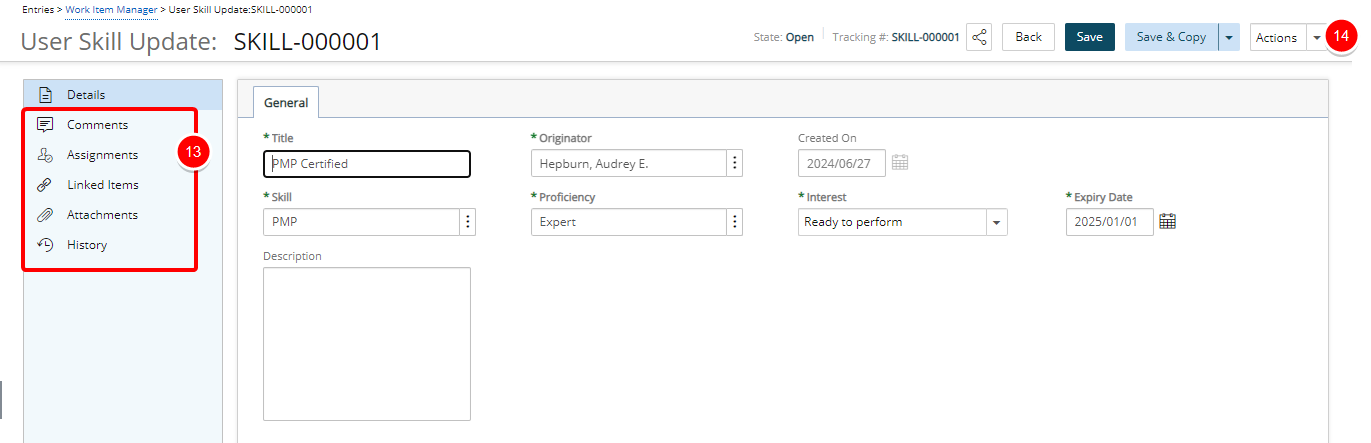
- When finished click Actions and then choose Submit.
- Click Back to return to the corresponding Work Item Entry list page.
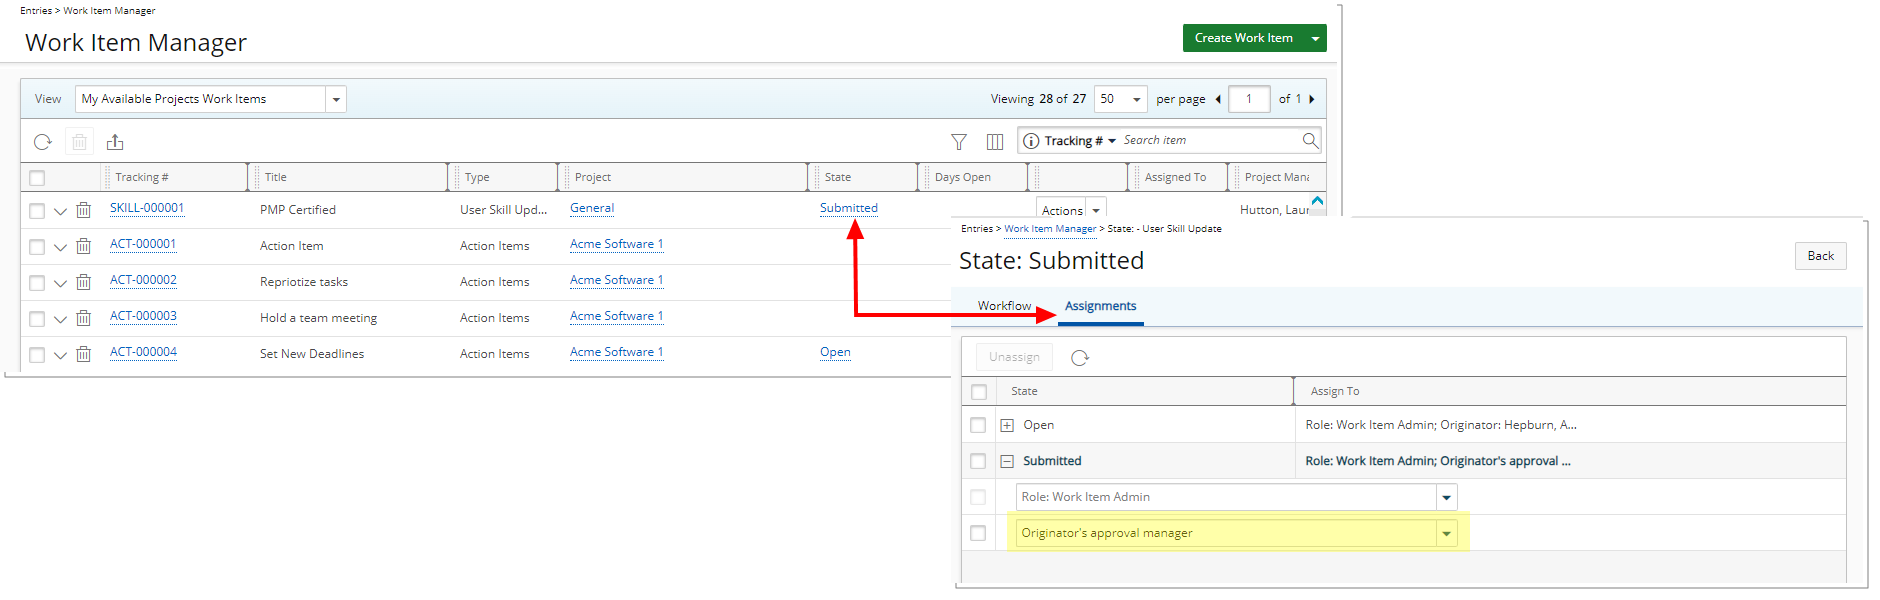
Submission and Approval Process
Upon saving and submitting the Entry, it will be assigned to your Approval Manager who will receive an automatic notification whenever you submit changes to your skills. The Approval Manager can either approve or reject these skill changes, ensuring they align with team objectives and resource requirements.
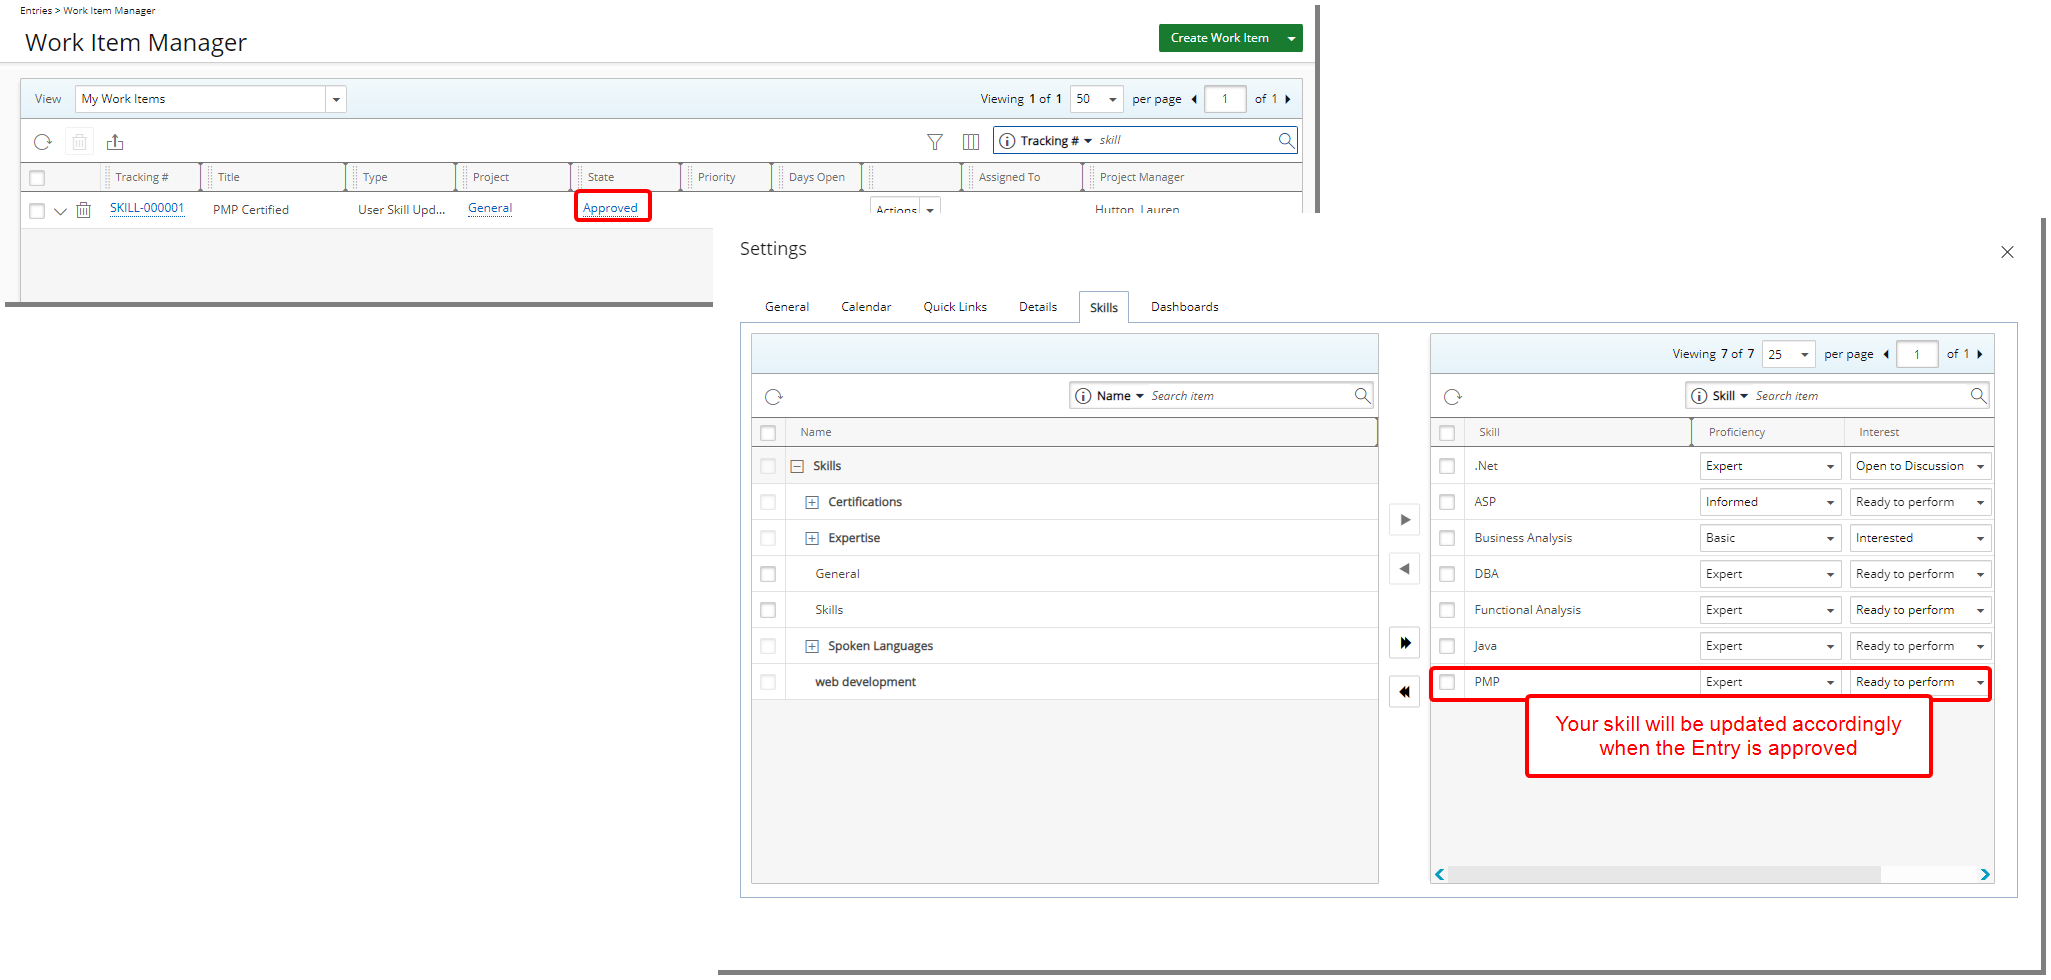
When the entry is approved, your skill will be updated accordingly. You can verify the updated or new skill by navigating to the Skills tab on your Settings page.
Save & Copy
At any time you can click Save & Copy which will save your current Entry and create a copy of it. The copied Entry is saved immediately and will remain open for editing:
- The Title of the copied Entry will read Copy of [Copied Title]
- Originator, Expiry Date, Skill, Proficiency, Interest and Description are copied from the source Entry.
- Created On date is set to current date.
Or click the down arrow located against the Save & Copy button to copy all settings outlined above and:
- Linked Items: Choose this option to also copy all Linked Items from the source Work Item Entry.
- Attachments: Choose this option to also copy all Attachments from the source Work Item Entry.
- Notes: Choose this option to also copy all Notes from the source Work Item Entry.
- Notes With Attachments: Choose this option to also copy all Notes With Attachments from the source Work Item Entry.