The Multi Client Invoice Manager feature allows users to create a single invoice for multiple clients and projects that can then be reviewed and approved as a collection, as well as posted and exported to an accounting system in a single operation.
This article covers creating a Multi Client (Batch) Invoice.
- From the Icon Bar click Financial
 .
. - From the Navigation Menu click Invoice Manager.
Note: You must have the appropriate rights to access the Invoice Manager.
- From the Batches tab of the Invoice Manager, select Create Batch button to open the Multi Client Invoice Manager Edit page.
- Enter a descriptive name for the batch invoice in the Batch Name box.
- Click the Workflow browse button (...) to open the Invoice Workflow List dialog box and then associate an invoice workflow to the Invoice Batch.
Note: The Invoices attached to the Invoice Batch pass through all states of the selected workflow before being approved and posted.
- Select a Payment Termfrom the available options.
- Click the Company browse button (...) to open the Company List page and then select the company that is associated with the invoices being processed.
Note: After a company is selected, only projects associated with the company are displayed during the invoice generation process. If the selected company is not associated with a project, then the system validates the client. If the companies match, then all projects associated with that client are processed. The Company is associated with Clients from the Client Edit page (Setup > Work > Clients > Client Edit > Invoice Options tab) and with Projects from the Project Edit page (Project List > Project Edit > Settings > Options tab). Note that if a Company is associated both at Project and Client levels, Project association takes precedence.
- Select an Invoice Batch template from the list of available Invoice Batch templates.
- Batch Status: This status for the Invoice Batch is set after the multi-client invoice is generated.
- Select the Override Document date box and then click the Document date calendar icon to change the document date for the invoices in the batch.
Note: By default, the Override Document date box is cleared and the document date for all invoices in the batch is set to the current date. All Invoices in a batch have their document dates updated when a new invoice is generated or attached.
- Choose Use database start date or select the Start and End dates of the Multi Client Invoice.
Note: The Start Date is set by either selecting the Use database start date box to specify the start date of the database or by clicking the Start Date calendar icon to select a date from the calendar.
- Select the Email a copy of the Invoice to the Client box to send a copy of the Multi Client invoice as an email attachment to the client.
Note: The Name of this file is generated based on the selection made for Invoice File Name located within the General Invoice tab of Financial Settings page (Setup > Financial > System). For further details refer to Invoice Setup.
- Under Invoice Generation Options, define how the multi-client invoice will be generated
- One Invoice per Client
- One Invoice per Project you can then select to Use Project Contact.
- One Invoice per User
- Under Actuals to Include, select the boxes for the billable entry types included in the multi-client invoice. If the Use Client settings boxes instead of the billable entry options are selected, the multi-client invoice inherits the settings defined on the Client Edit page (Setup > Work > Clients > Client Edit > Invoice Options > Default Settings).
- Enter any necessary comments in the Comments box.
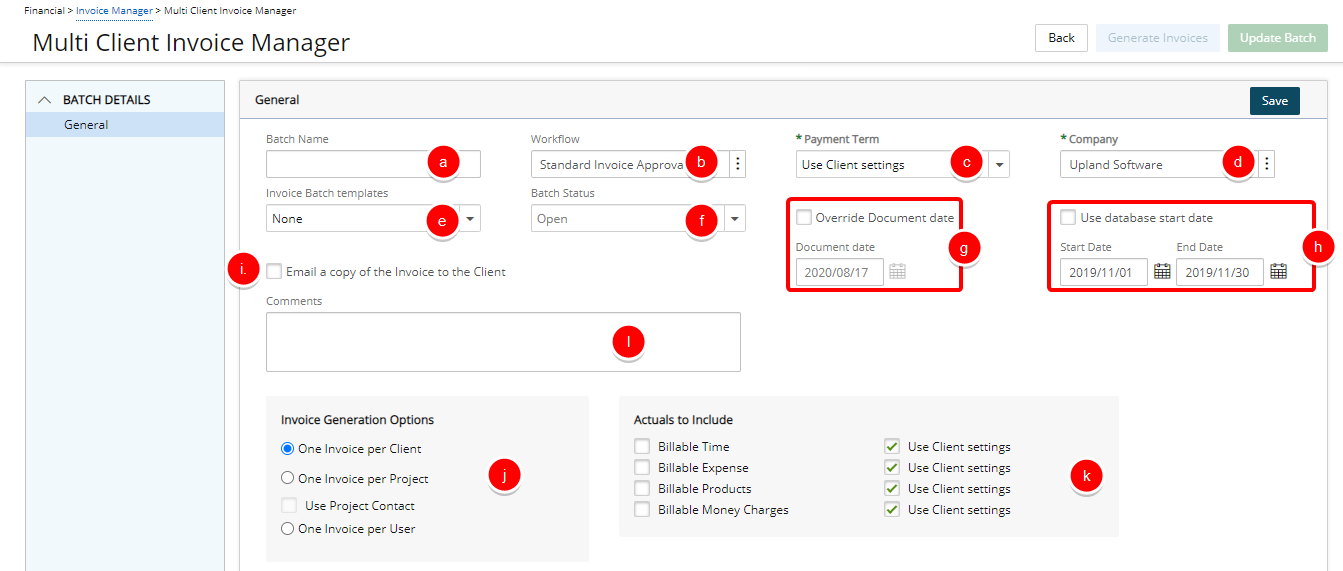
- Click Save.
-
When the Invoice Batch is saved:
- From the navigation you now have the option to access to view or associate Clients, Projects, Tasks, Users and view the associated Invoices or to Preview All Documents.
- The State of the Invoice Batch is now clearly visible on the top.
- A Batch Number is automatically generated for the invoice and visible next to the State.
- The Generate Invoices and Update Batch buttons are only available after the Multi Client invoice is generated.
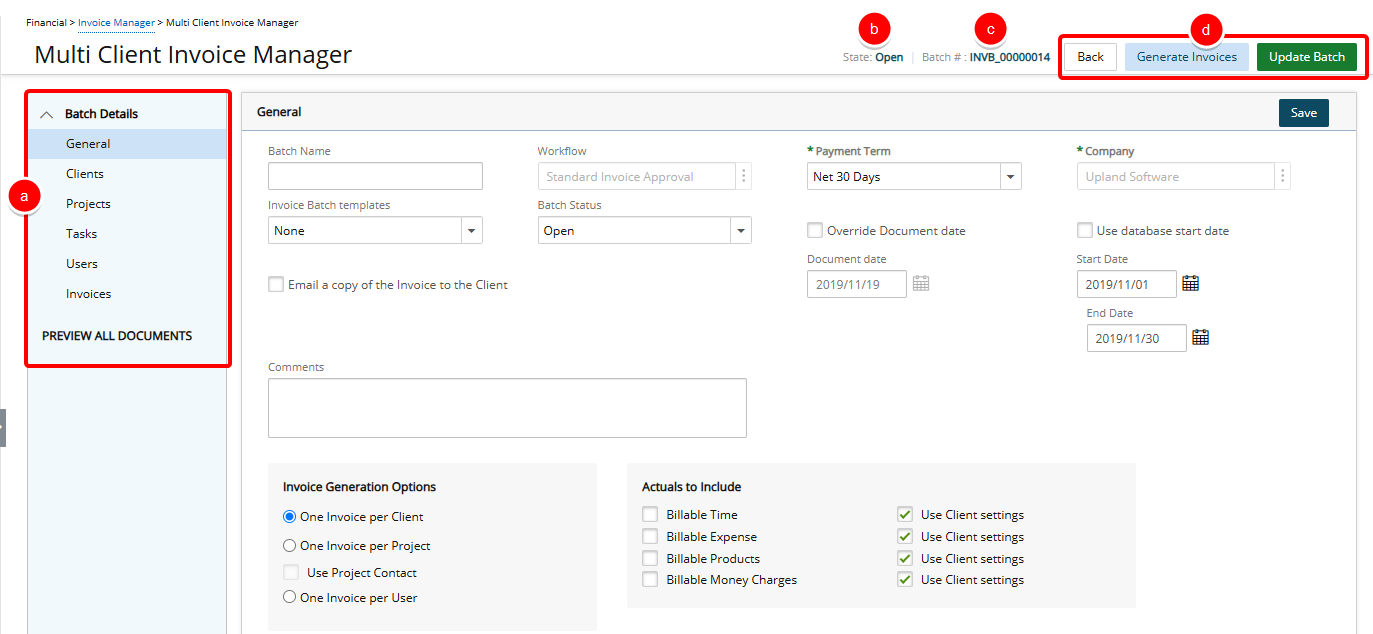
- Modify the Batch Details:
 Select Clients
- From the navigation, select Clients.
- Select the Client(s) that will be included in the Multi Client Invoice.
- Select the Add button.
- View your Client(s) listed within the Selected Clients column.
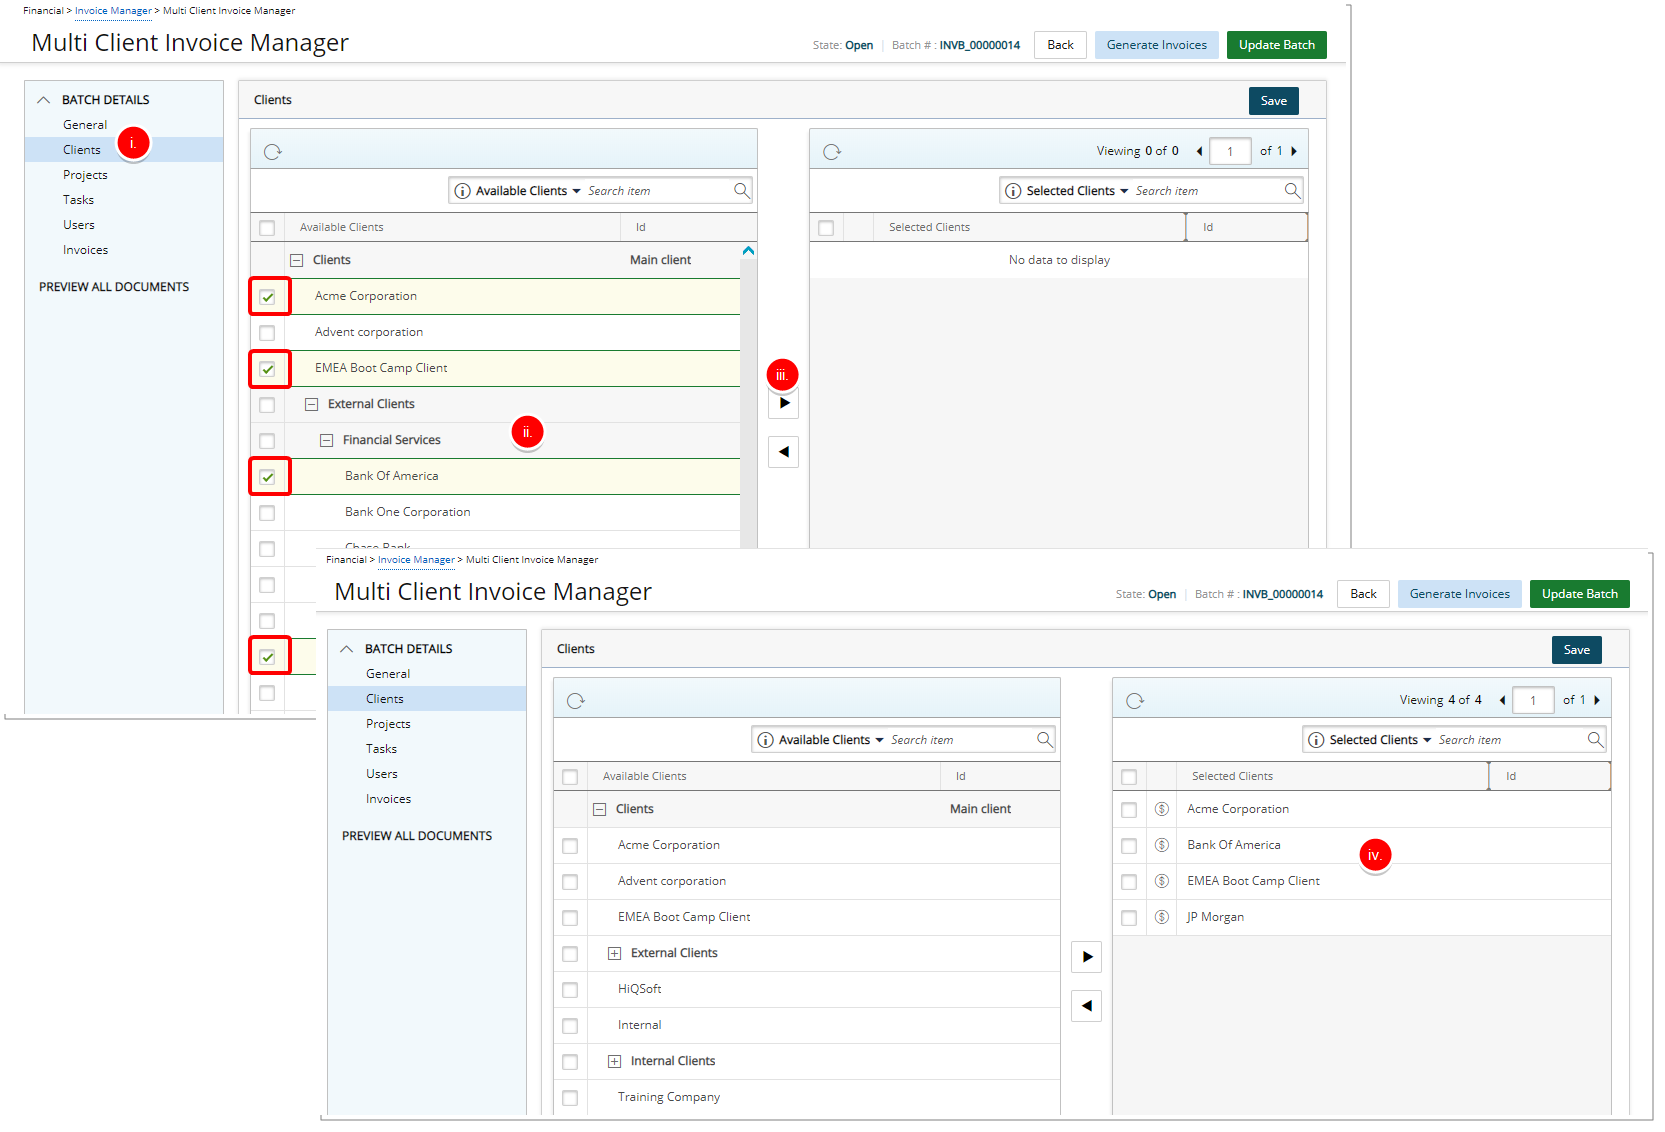
Tip: Select the clients that you wish to remove from the multi-client invoice, and then select Remove.
Note: Suspended Clients are displayed in red and cannot be selected when creating an invoice batch.
- Select Projects
- From the navigation, select Projects.
- Select the projects that will be included in the Multi Client Invoice.

Tip: Select a Search By criteria from the following available options: Client Name, Project Name, Project Id, Start Date or End Date and then enter a corresponding value in the Search For box. Click the search icon to narrow down the available items list.
- Select Tasks
- From the navigation, select Tasks.
- Select the tasks that will be included in the Multi Client Invoice.
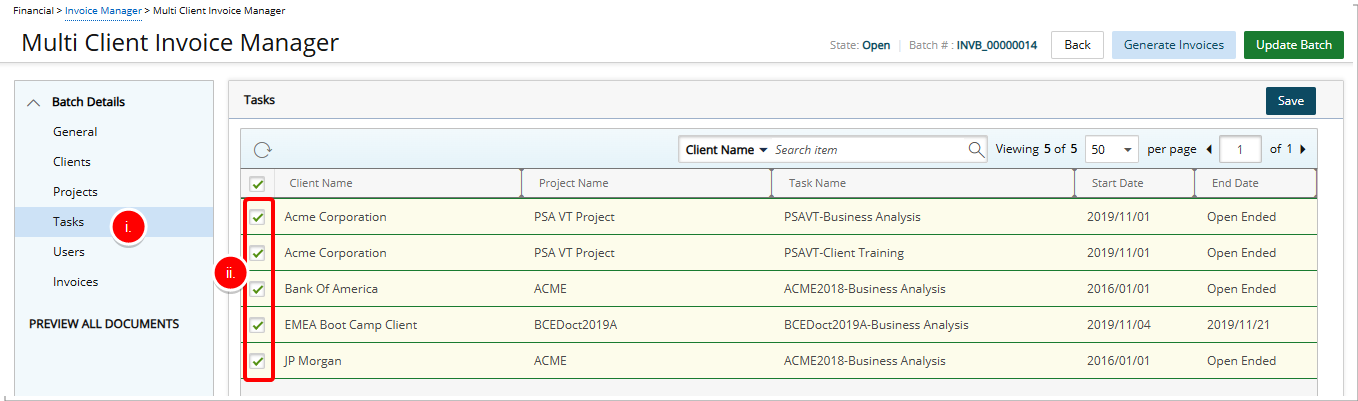
Tip: Select a Search By criteria from the following available options: Client Name, Project Name, Task Name, Start Dateor End Date, and then enter a corresponding value in the Search For box. Click the search icon to narrow down the available items list.
- Select Users
- From the navigation, select Users.
- Select the users that will be included in the Multi Client Invoice.

Tip: Select a Search By criteria from the following available options: User Name, Client Name, Project Name or Task Name and then enter a corresponding value in the Search For box. Click the search icon to narrow down the available items list.
- From the navigation, select Invoices.
- Click the Generate Invoices button to generates invoices.
- A list of all the invoices for the selected clients, projects, tasks and users are generated and displayed in the Invoices list.
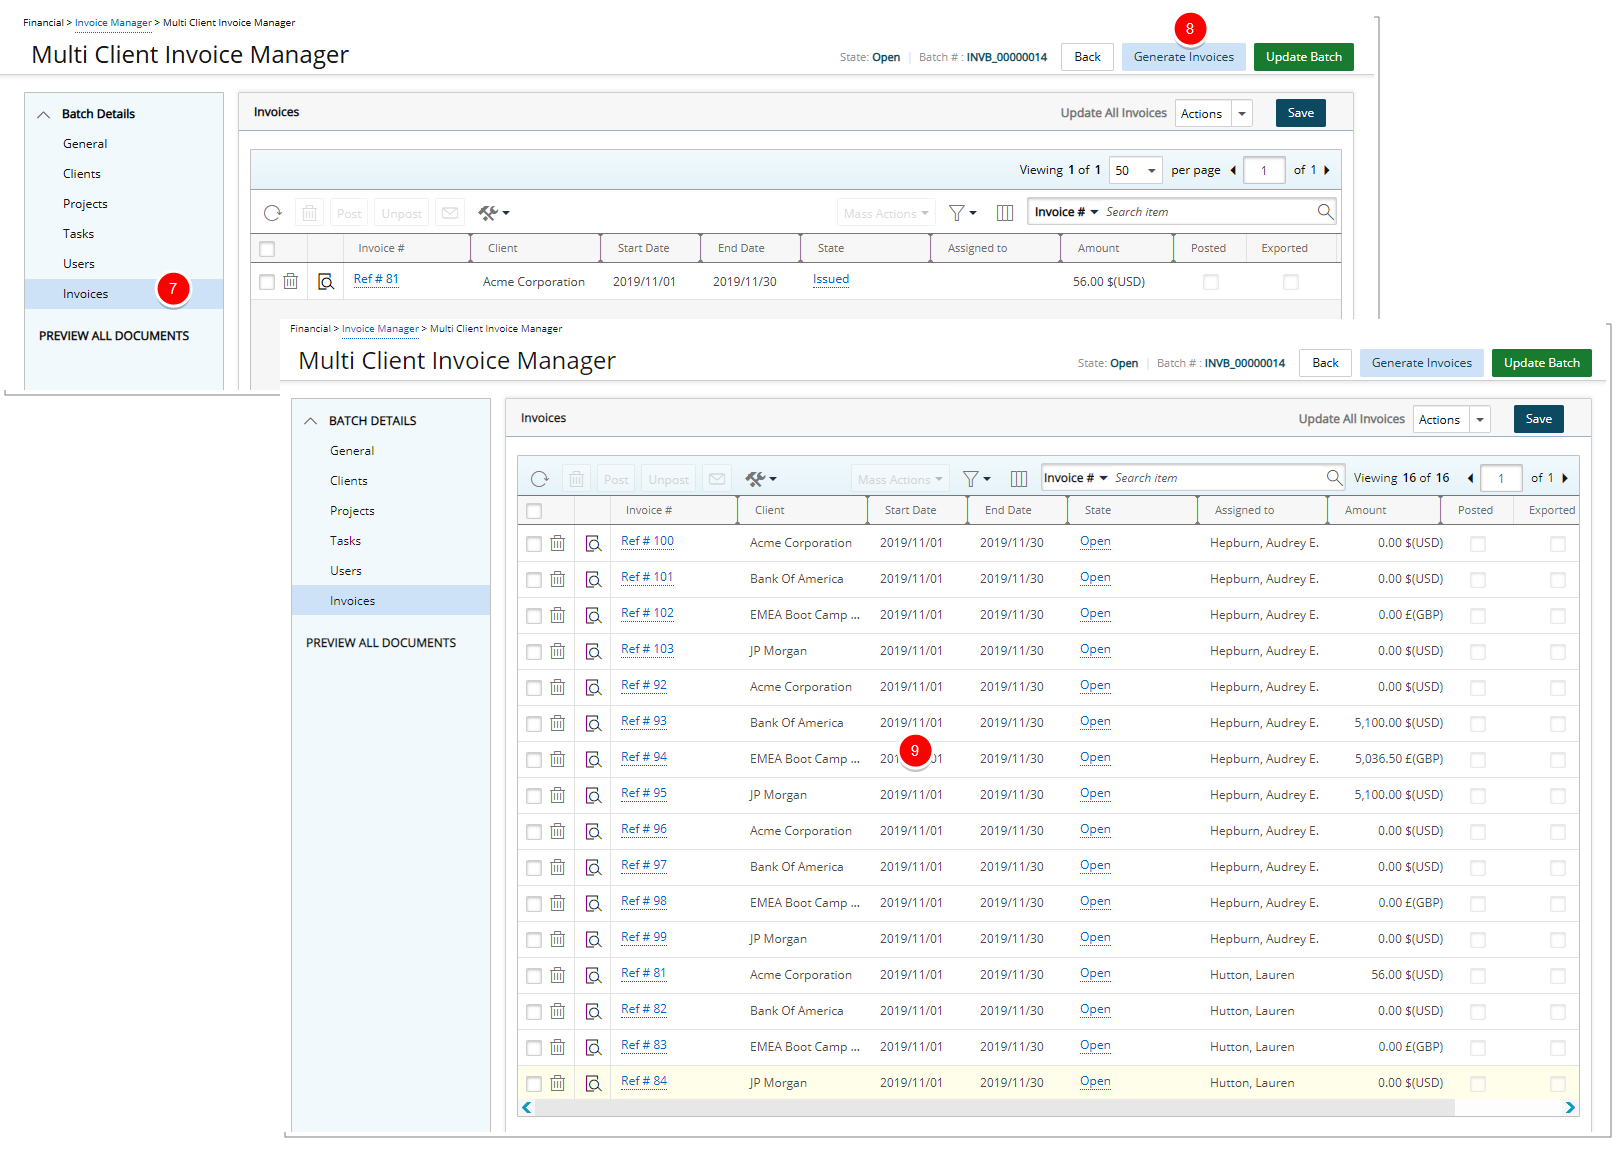
Note: The option to Update All Invoices is only available from the Invoices tab. Note that all selected Invoices must be in the same State in order to use this functionality.
- View the Details of an Invoice:
- Select an invoice from the Invoices list to view its details on the Invoice Edit page
- Click the Back link to return to the Multi Client Invoice Manager Edit page.
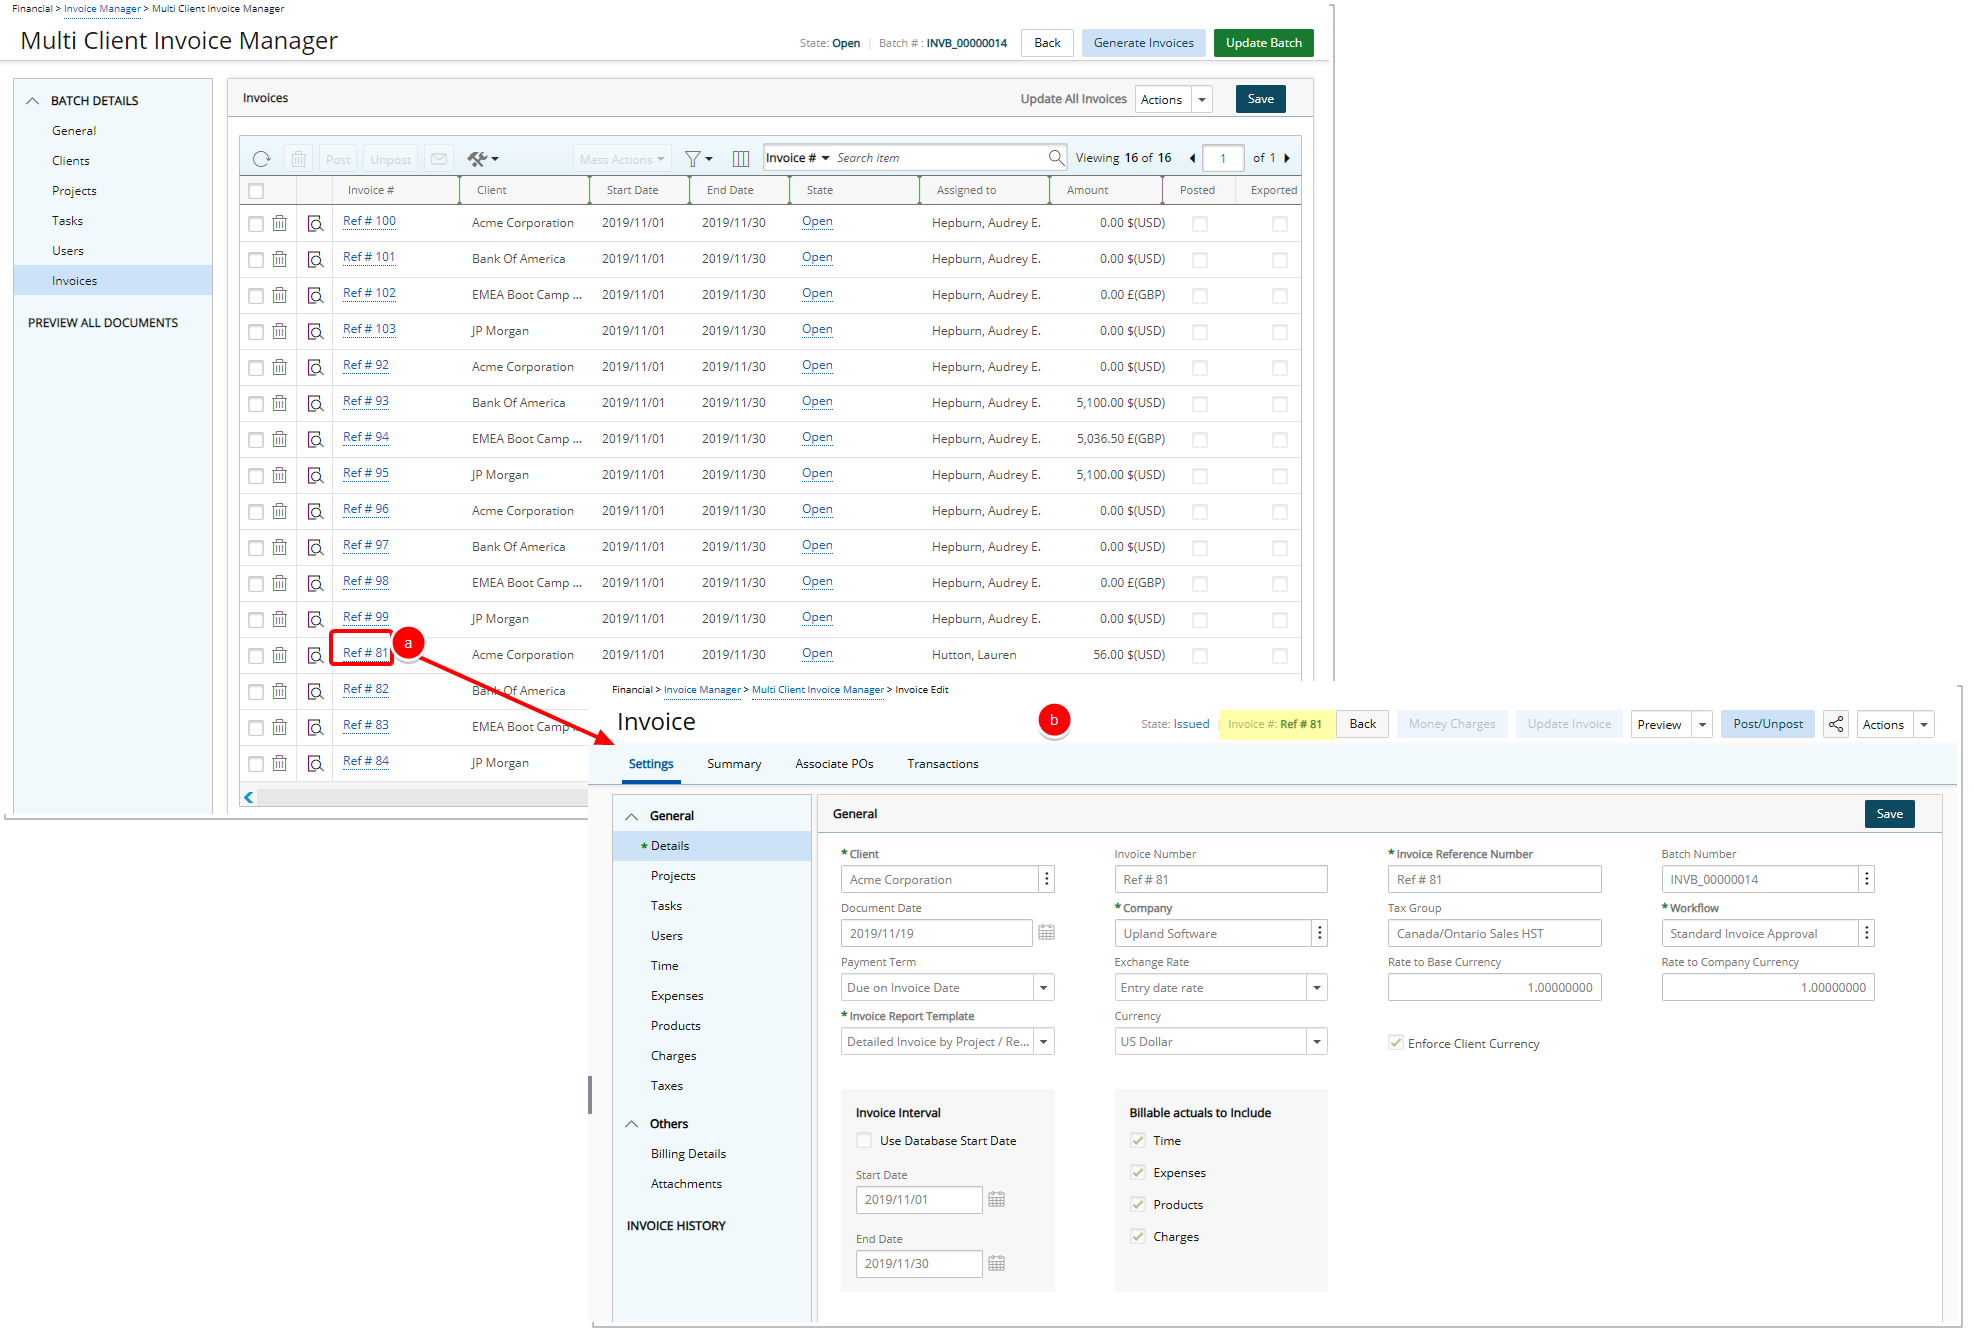
Note: From the Invoices list page you can also Attach or Detach Invoices. For more information see: Attaching Invoices to a Multi Client Invoice Batch or Detaching Invoices from a Multi Client Invoice Batch.