Adding a Note to a Booking allows you to capture important details, context, or instructions related to a specific resource assignment. Notes help communicate updates, clarify expectations, or document decisions directly within the Work Plan, keeping team members and stakeholders informed. If the Enable Mentioning in Comments & Notes setting is turned on in the System Configuration page, you can also mention other users in Work Plan Notes using the @ notation. When adding a new Note, a placeholder message—“Type @ to mention and notify someone”—appears next to the cursor, guiding you in tagging users for notification. Whether you're flagging special requirements, tracking changes, or providing background information, Notes offer a simple yet effective way to enhance collaboration and maintain visibility into booking-related information.
This article guides you through the steps to add a Note to a Booking. While this process is the same across all Work Plans, we will use the Project Work Plan as an example in this article.
Depending on your organizational role and assigned permissions, you can access the Work Plan through one of several available paths. These access points are illustrated in the Accessing the Work Plans article.
Note: The pages and formats shown in this article may differ from what you see in your environment. Your organization’s configuration or the rights assigned to you may result in a different experience.
- From the Icon Bar click Project List
 .
. - From the Project List page, select the Project you wish to edit by following one of these steps:
- Click the Project context menu button
 to expand it. From the available options click Edit.
OR - Click the name of the Project you wish to access.
Tip: Use the search capability for an efficient way of finding the specific project. For further details refer to Searching for a Project within the Project List page.
- Click the Project context menu button
- From the Project Edit page, hover your mouse over the Planners tab and select Work Plan from the available options.
- Start the split action using one of the following methods:
 Option 1: Use the Notes button
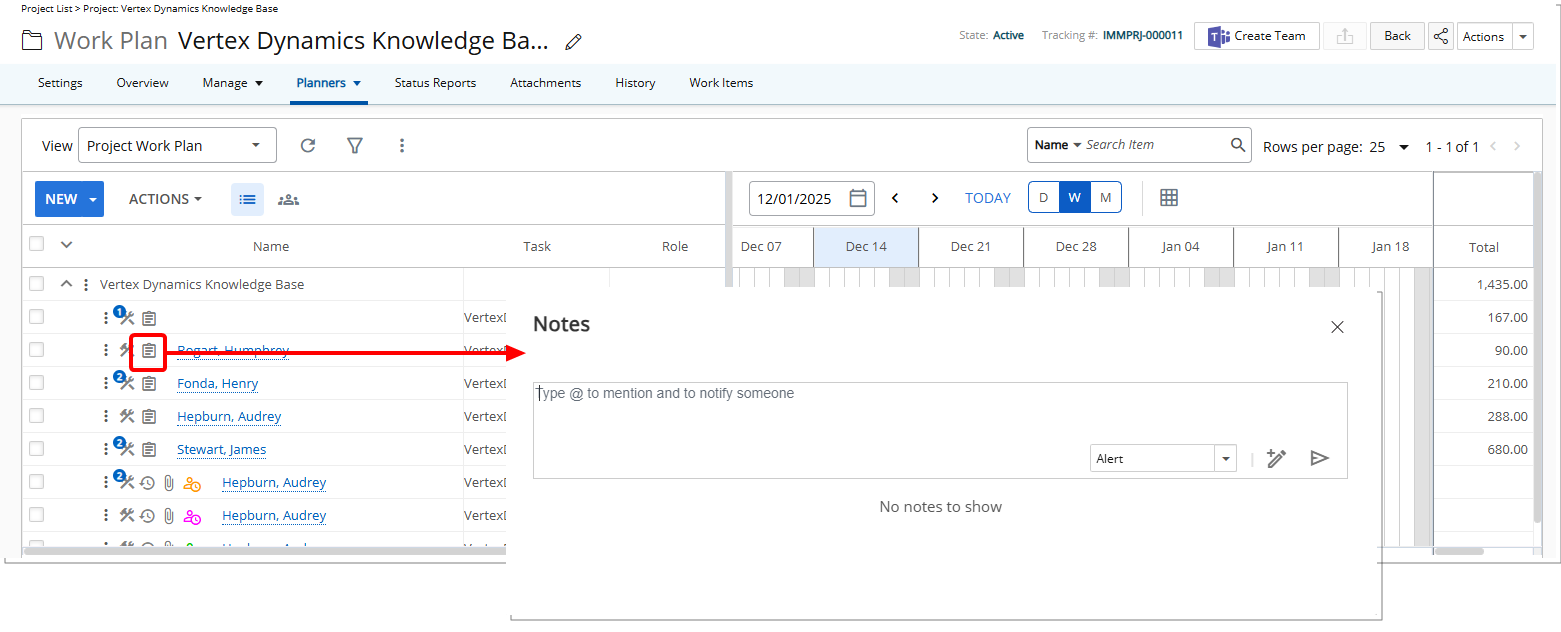
- Click the Note
 button located against a Booking row.
- Click the Note
- Option 2: Use the Booking Bar Context menu
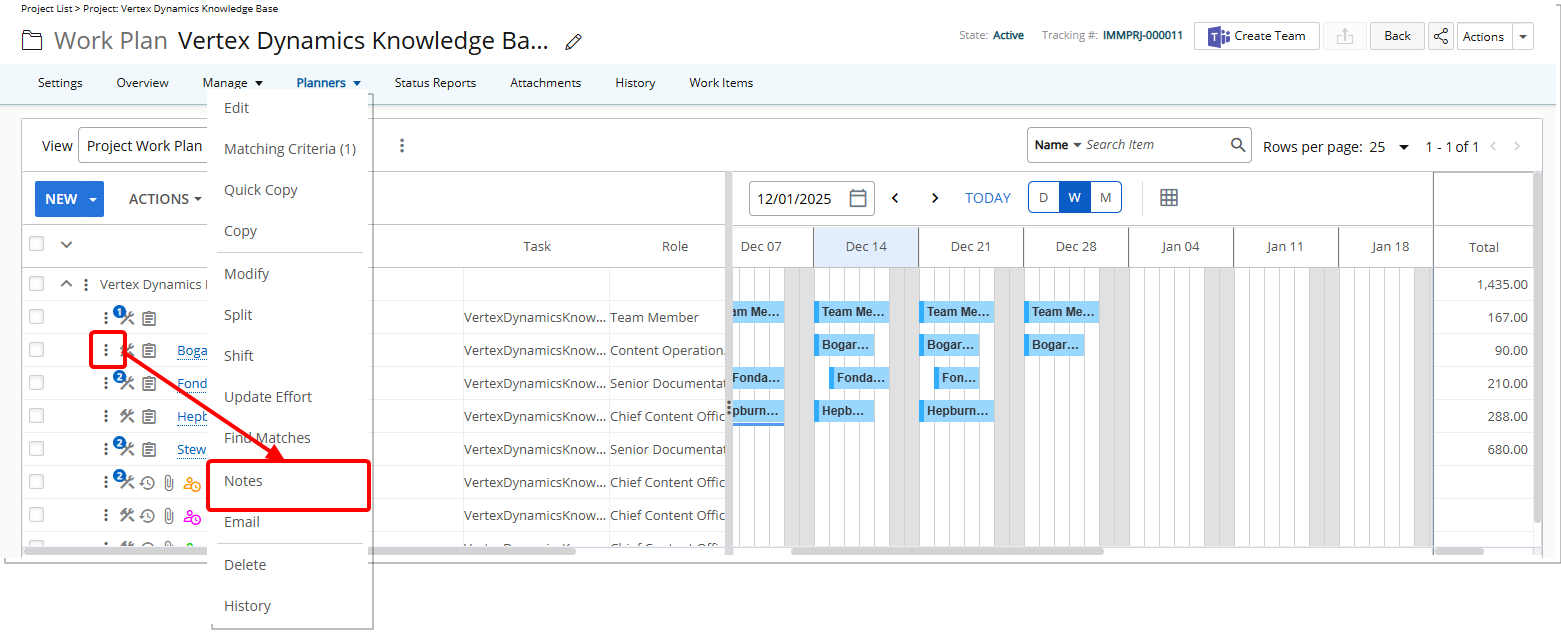
- Click the Context menu
 located against the Booking bar.
 - Select Notes from the available options.
- Click the Context menu
- Option 3: Use the Chart View Context menu
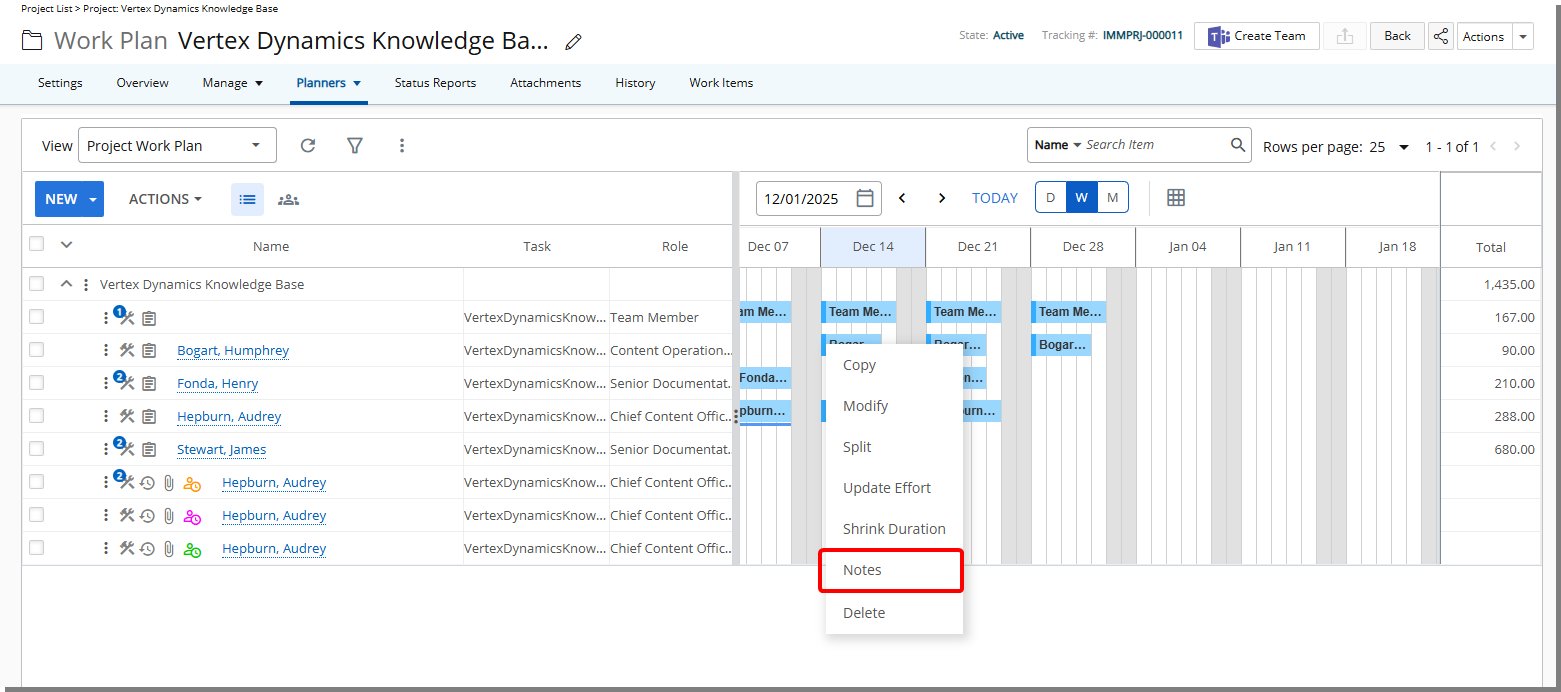
- Click the Chart
 button to access the Chart view.
 - Right-click the Booking bar. From the available options select Notes
- Select Notes from the available options.
- Click the Chart
- From the Notes dialog box, click the Show Formatting Options
 button to access the Rich Text editor to format your Notes.
Note: You can modify or delete your own Notes if you have the necessary permissions. This right can be granted under Setup > Organization > System > Security > Security Profile > Other > Notes.
- Enter the required note in the text field and format it as needed using the available options in the Rich Text Editor. It provides several formatting options, including:
- Bold, italic, underline, and strike-through
- Text color and highlight color
- Font type and size
- Numbered lists and bulleted lists
- Hyperlinks
- Tables
Tip: For further details refer to Rich Text Editor.
Note: While a Booking Note is being created or edited, the Notes icon for that booking appears bold in the Work Plan . This visual indicator helps you identify which booking is currently being updated.
- When the Enable Mentioning in Comments & Notes setting located within the System Configuration page is turned on, you can mention others in the Work Plan Notes using @ notation. When adding a new Note, a placeholder message—“Type @ to mention and to notify someone”— appears next to the cursor, guiding you on how to tag others.
Tip: When a user is mentioned using @ notation, the system triggers a Booking Notes Mention Notification, which includes relevant details about the mention. For further details refer to Using Mentions in Comments and Notes
- Click the Send
 button to save and send the Notification. Mentioned users will receive a notification, ensuring they are aware of relevant updates or required actions.

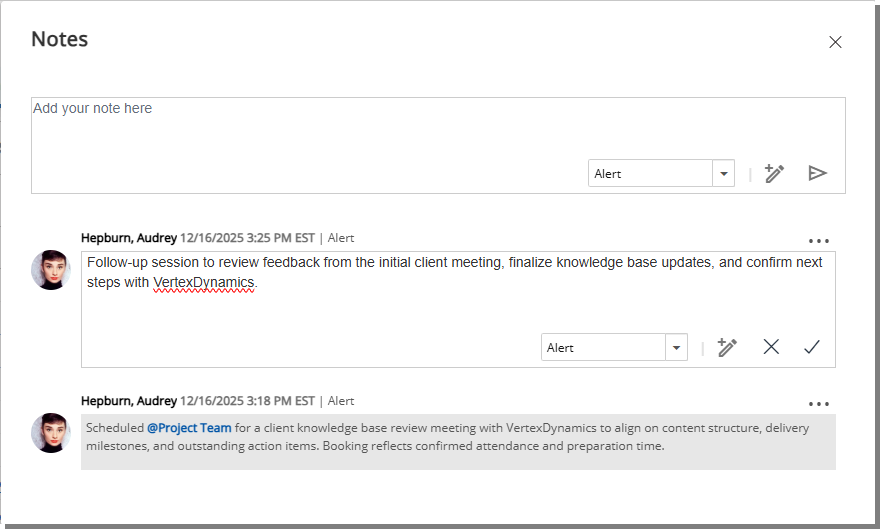
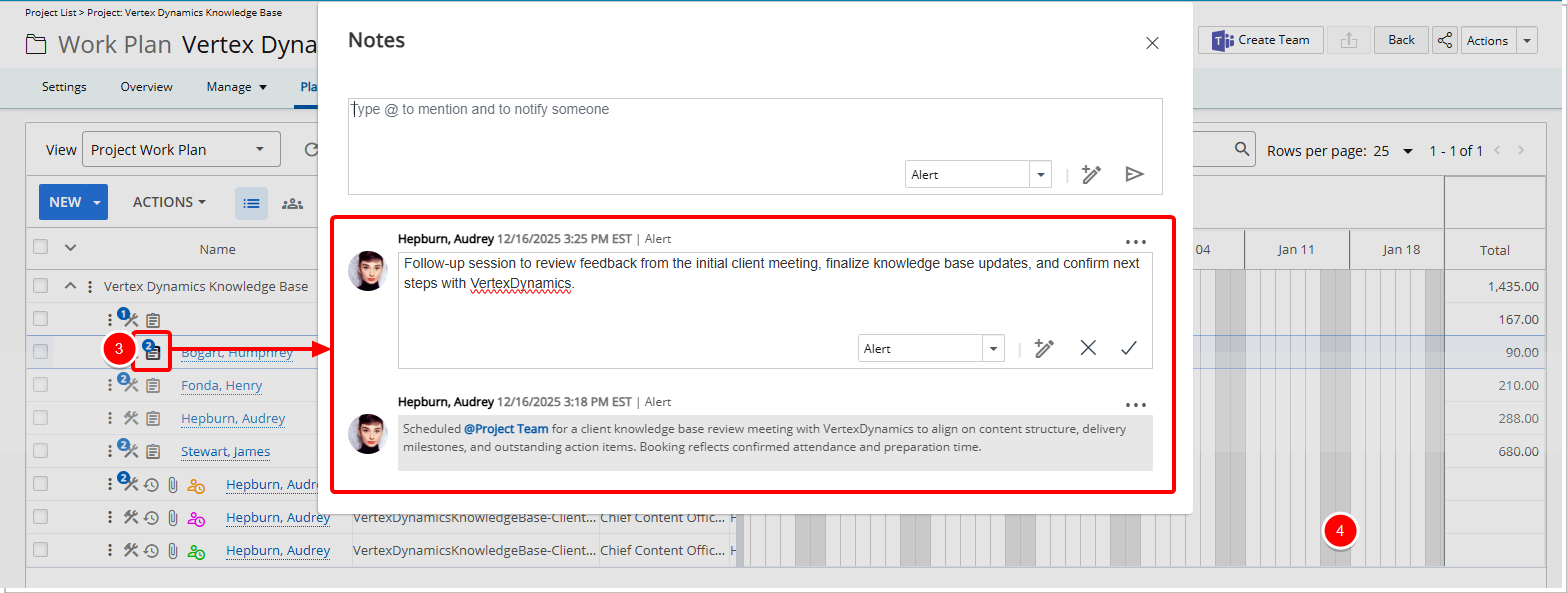
- Previously saved Notes are listed below the Note text field.
View Previously Saved Booking Notes
Previously saved notes appear below the note text field in the Notes dialog box. These notes provide historical context for the booking, including prior updates, decisions, or instructions entered by other users.
You can review existing notes to understand changes made over time or to reference earlier communications. If you have the required permissions, you can also edit or delete your own notes directly from this list.
Note: The ability to edit or delete notes depends on your assigned permissions. These permissions are managed in Setup > Organization > System > Security > Security Profile > Other > Notes.
- Locate the booking in the Work Plan.
- Check the Notes button associated with the booking. If previous notes exist, the button displays a counter indicating the number of saved notes.
- Click the Notes button.
- In the Notes dialog box, review the previously saved notes listed below the new note text field.
-
Select the ellipsis (More options) menu, and then click Edit or Delete.
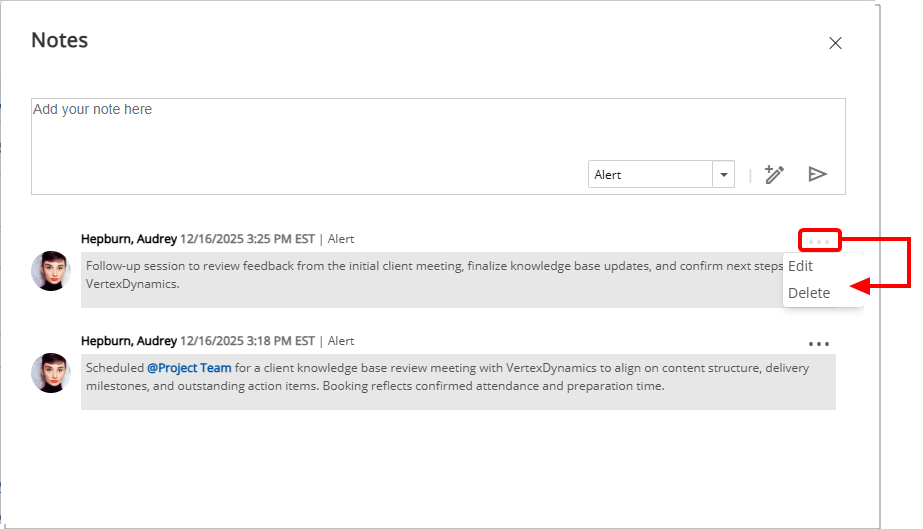
Note: When you select Edit, inline editing is enabled and the note display area expands into the note text field, allowing you to modify the note.