Create a document type
A document type defines the content and selections available to the end users to include in a specific document. Once you create a document type, you add sections and components, in a logical organization that will ultimately result in a document or presentation that can be built by users.
Note: Documentation types and presentation document types are often both referred to simply as "document types." They are constructed in similar ways, with the same components, although some are available only to one type.
Before you create your document type, we recommend you plan it in advance by following the suggestions in our document type best practices topic.
task 1: Open a new document type and set the properties
- Go to
- Click Create Doc Type and select one of the following options from the dropdown menu:
- New Document: Click to create a document type.
- New Presentation Click to create a presentation document type.
- Import: Click to import a document type.
- Open the Document Types Properties workspace, using the appropriate method below:
- If you created a document type: In the Navigation panel, click New Document.
- If you created a presentation document type: In the Navigation panel, click New Presentation.

- Enter a name for the document type.
- (Optional) Select the Enabled check box to enable this document type for use. The Enabled column on the grid indicates if the document type is enabled or disabled for use.
Note: You may want to wait to enable the document type until you have completed and tested it.
- Enter a description. The description displays in the Description column for the document type, and the Create a New Document dialog box.
- Select one of the following Navigation Modes options:
- Select By Sections: Display the section name and then the component name on the Assemble tab for created documents.
- Select By Tasks: Enable filter by tasks on the Assemble tab.
- Select one of the following Build Order options:
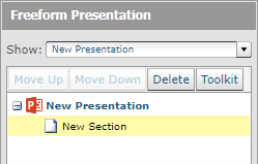
- Select Free-form: Display all slides for a custom document on the Review tab, where users can reorder the slides prior to building the presentation.
- Select Structured (Presentation document type only): Display the slide sections on the Review tab in a tree structure. Users can reorder slides within each section, but cannot reorder the section themselves unless the section is not in a fixed position.
- Click the Edit
 icon to select the default content folder. It is recommended as a best practice to first create the folder where you want to store the default content for document types.
 - (Optional) Select the following After Build options:
- Always Build to PDF: All documents or presentations built with this document type will build as a PDF. If the check box is clear, the user will have the option of building as a PDF on the Build page for documents or presentations.
- Lock After Build: Select one of the locking options below from the drop-down menu.
- None: The Microsoft Word package or document can be edited after the build.
- Entire Document: Locks the entire Word package or document. If you select this option, you must enter a password that will be required to unlock the file.
- Content Marked as Locked: Locks only the content with the Lock Content After Build property enabled. If you select this option, you must enter a password that will be required to unlock the file.
- Entire Document with Track Changes: Locks the entire Word document and editing is only permitted via Track Changes. If you select this option, you must enter a password that will be required to unlock the Word file. Once a document has gone through all the appropriate reviews, only a manager or individual with the password can approve any Track Changes that have been made before sending the document to customers.
- From the Available in drop-down menu, select one of the following:
- Created Documents: This document type can only be used to create a created document.
- Projects: This document type can only be used to create a project.
- Both: This document type can be used to create a project or created document.
- Under Title Page Information, in the Primary Source, select a Selection Driven Content component item or select No Title. Upland Qvidian will automatically insert the heading text of the first issue into the Title field if this data group is used in the document or presentation and the issue is selected by the user when building the document or presentation.
- Enter a title for the Primary Example.
- Enter a title for the Secondary Example.
- (Optional) From the Example DocumentActions menu, click Upload to upload an example document that users can view before creating a document from this document type. You can also click Download to download the attached example or Delete to remove it.
 Workflow for Creating and Using an Example Document:
- Create the document type and all subsection components.
- Create and build the document that represents the example you want users to view.
- On the Built Documents workspace of the Created Documents > Manage tab, download the document to a location where it is easy to find for an upload.
- Return to the document type's Properties dialog and then upload the built document by selecting Upload Document from the Actions menu.
The example document displays as a link to the right of the Actions menu. The Actions menu provides links to later download the document for review or editing, or to delete it.
When a user creates a new document and selects a document type that has an example document, the View an Example link displays on the right pane of the selected document type so the user can make sure this is the correct document type to use.
- Click Categories to open the Categories panel, and then select the check box next to the document type category, if available. Users can use these categories filter when creating a new document.
- Click Templates to open the Templates panel, and then select the check box next to the templates to be used to format either a document or a presentation document type. During the build process for a specific document, users who have been granted permission can select a different template to format the document or presentation.
- Click Roles to open the Roles panel, and then select the check box under each of the columns below next to the role name to grant the users with that role permission.
- Build: All users in this role can build documents using the selected document type.
- Edit: All users in this role can edit documents using the selected document type.
- Architect: All users in this role can design the subsection and components for the selected document type.
Note: You cannot add, edit, or delete a role on this panel. To perform these functions, go to Administration > User & Roles > Roles.
- Click Users to open the Users panel, and then select the check box under each of the columns next to the user name to grant that user permission. If the list of users is long, use the Search field to locate a specific user or to narrow the list, or use the navigation controls below the list to view the users
- Build: The user can build documents using the selected document type.
- Edit: The user can edit documents using the selected document type.
- Architect: The user can design the subsection and components for the selected document type.
- Click Save.
task 2: Add sections and subsection components
The set of tasks above create an empty document type, which is now saved and available to work with from the Architecture > Document Type page. In order for your users to use this document type to create a document, you must add and configure components. You can also add additional sections to better organize the document type.
task 3: Test build
You can run a test build, by clicking Test Build from the top of the workspace, at any time during the document type creation process to quickly preview the end result. In a test build, the Build button is always green, allowing you to bypass requirements.