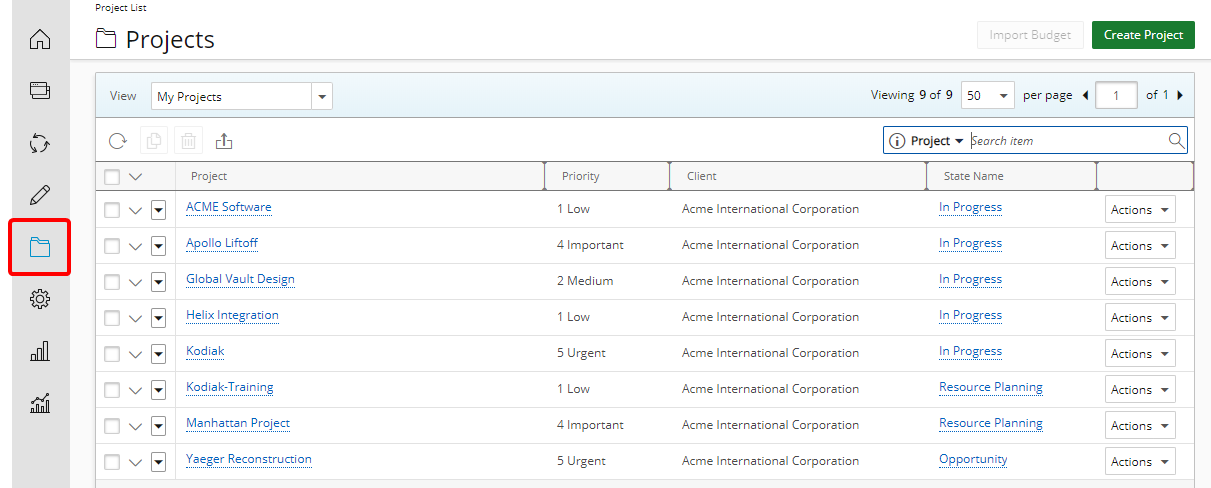
This article covers how to create a new View in the Project List page.
Note:
As of Tenrox 2019 R1, the interface for creating, editing and viewing Project details has been revamped with an upgraded look and navigation, replacing the Setup Project Edit page as it has been known to be. Moreover, Project Central has been deprecated with the Project List page having completely replaced it in features and functionality. For more information click here.
Version Note: The Project List page is available as of Tenrox 2018 R1.
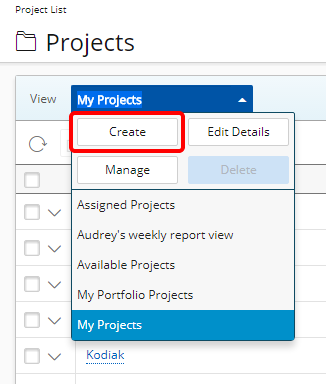
2. Click View
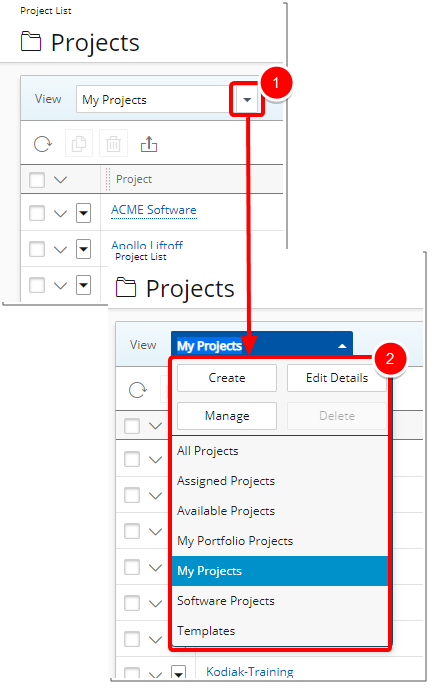
- Click the expand arrow on the right of the current View name.
- The list of all available options are then displayed in the list.
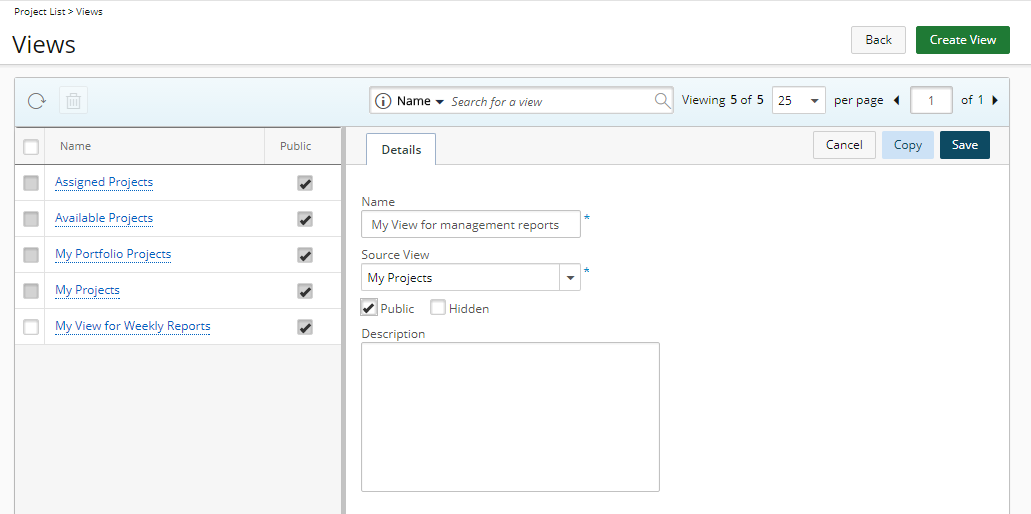
4. Enter the View Details
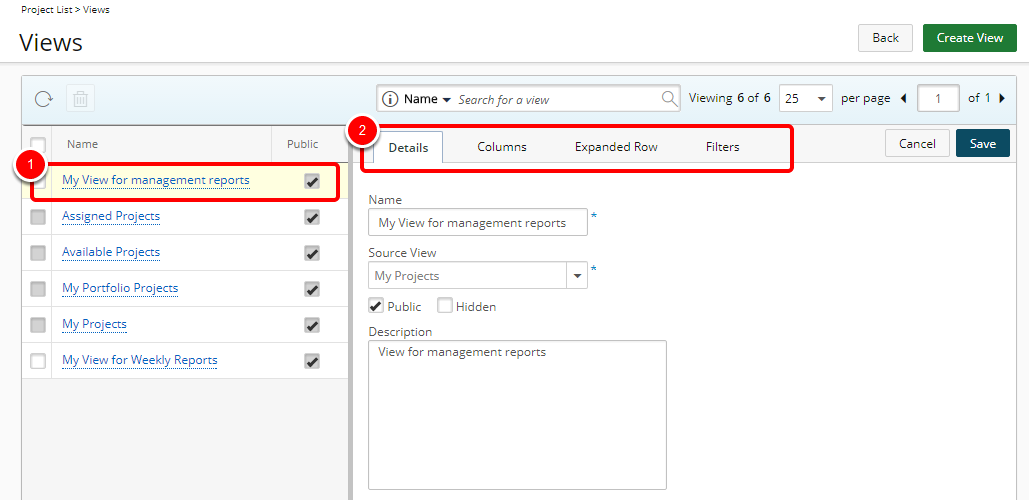
Enter the details for the View:
- Name: Enter the name of the custom View.
Note: When entering a View Name note that:
- Two different users can have the same Private View name.
- A User’s own View names must be unique.
- Public View names must be unique.
- All Projects View is unique.
- Source View: Select a View from the Source View list.
- Public: When selected the View is available to all who have the proper rights to the Project List.
- Hidden: When selected the View is not visible/available in the View list.
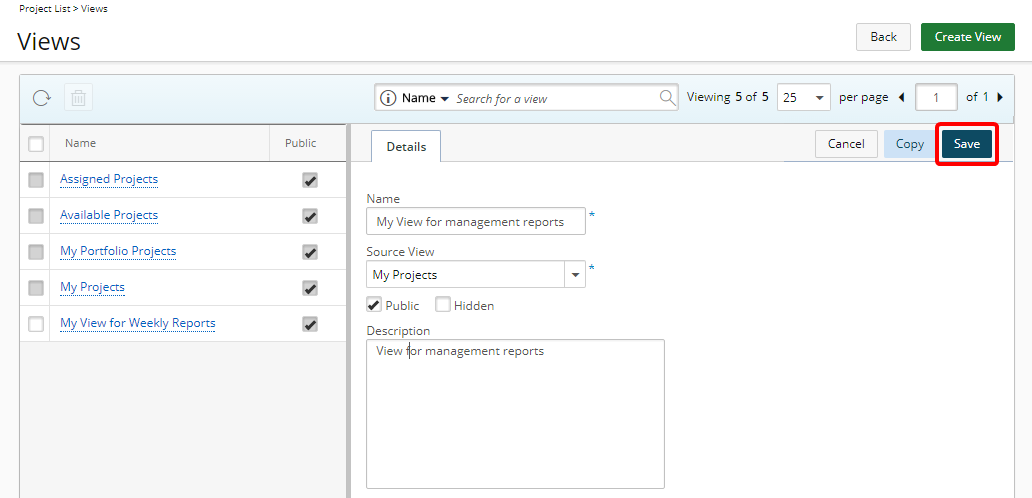
- Description: Enter a description for the newlsy created View in the Description box.
Note: When a Public View is modified, the changes cascade to all users. This applies to renaming, changing the Filter, changing the Column Selection or changing the Expanded Row Selection.
6. View or modify your newly created View
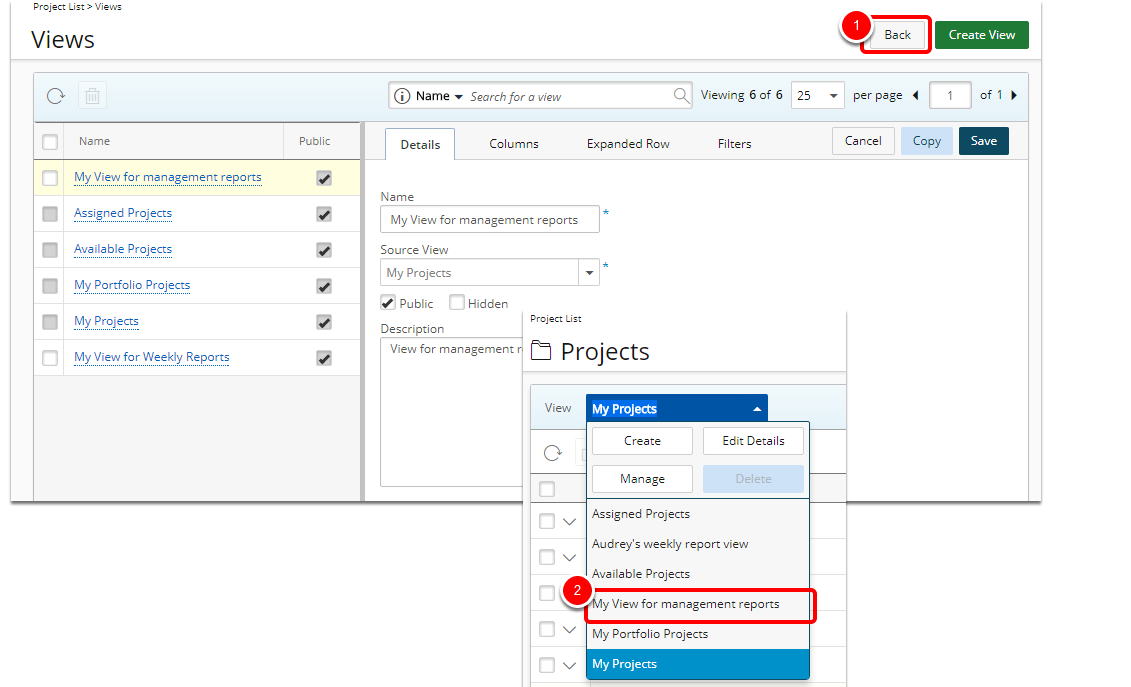
- Upon saving the view the Views page will refresh and the newly created view will appear on the left pane.
- New Tabs will appear where further modifications can be made to the view such as:
