You can set the following options for a message or distribution. There are several option types you have to work with.
Option Types
-
Distribution
-
Prompts
-
Custom Options
-
Scan Settings
To configure message options
-
Select Create Distribution and click the Options button. The Options dialog box appears.
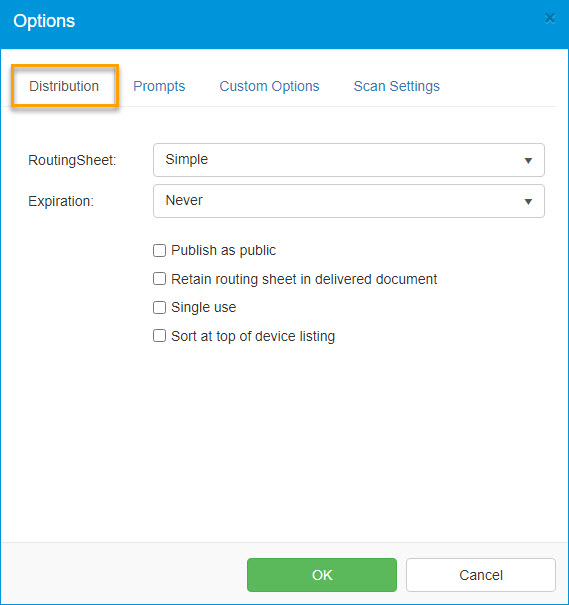
See the Create Distribution > Options > Distribution dialog box example below.
-
Use the Distribution tab to specify the following options, as needed.
-
Routing Sheet – Select either a Simple or Standard style. For example, a standard style may include company information and/or a disclaimer.
-
Expiration – Select whether or not the distribution expires, and if so, when:
-
Never – The distribution has no expiration date.
-
On Specific Date – Select the expiration date from the calendar.
-
Expires – Specify the amount of days, weeks, months, or years after the date created, date modified, or date last used for the distribution to expire.
-
-
Publish as public – Publish the distribution for users who subscribe to public distributions.
-
Retain Routing Sheet in delivered document – Deliver the routing sheet with the document. Normally, the routing sheet is not delivered.
-
Single use – Indicate that the message or distribution is only intended for one-time use.
-
Sort at top of devicelisting – Places the distribution at the top of the distributions listed at the device for quick and easy access.
-
-
Use the Prompts tab, to specify information requested by prompts set up by an Administrator; for example, a client number or for certain law firms, a matter number.
-
Use the Custom Options tab to select custom options that an Administrator created and configured for your organization's use.
-
Use the Scan Settings tab to select any scan settings you want applied to the message or distribution.