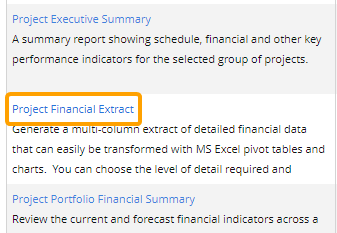
Project Financial Extract Report
The Project Financial Extract report extracts detailed financial data on a custom selection of Projects. Report builders can choose the level of detail required and also specify which fiscal periods and Financial Plans (drafts, approved plans, etc.) to include.
Each row in the report represents a Financial Item entered into a Financial Plan. Each Financial Item will only populate relevant columns with data.
Example: Imagine a Committed Expenditure of $10,000 for a "Backup Server". 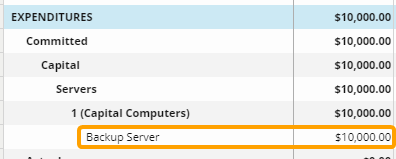
This row will only have values for relevant columns; basic details like "Project Name", "Financial Plan", and "Amount" will be populated as well as Expenditure-specific columns such as "Expenditure Document Number", "Expenditure Type", and (of course) "Expenditure Name". However, non-relevant columns such as "Funding Category" will not contain a value for the row because the item is an Expenditure, not a Fund.
The left-hand side of this report contains columns that display Project- and Financial Plan-related information for each Financial Item ("Project Name", "Project Portfolio", "Financial Plan", "Financial Plan Type", etc.).


To the right, the report contains columns that display data specific to the Financial Item itself.


The right-hand side of the report consists of Task-related data for Financial Plan labor costs.

Note: Every column to the right of the "Task Code" column is a Task Property.
Note: In order to display labor costs on the Financial Plan, select all three checkboxes under "Fulltime Resources:" while configuring the Project's "Financial Worksheet Settings":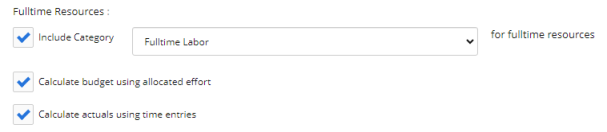
When these are all selected, the cost of the allocated effort on the Project's Work Plan will be added to the Financial Plan's Budget. When Resources submit time toward Tasks on their Timesheets, it results in actual time. The cost of this actual time will be added to the Financial Plan's Expenditures.
To display Resource names on the Financial Plan, select Category and Item from the "Budget Details" drop-down menu: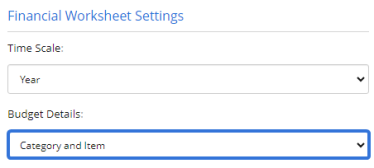
Example: The Project Financial Extract lists Resources as Budget Items and Expenditures, but all of the labor costs are broken down into Tasks.
Notice how there are two Budget Items (column Q) for Jack Skelly. This is because he has been assigned to two Tasks in the time period: "Press Release" and "Communications Plan" (column AK). The amounts (column AH) for those Budget Item rows are calculated based on the allocated time toward each Task. Jack's hourly rate is multiplied by the number of hours that have been assigned to him on the Task.
This applies to Expenditures as well. Notice that there are two Expenditures (column W) for Jack. This is because he has entered time toward both Tasks on his Timesheet, resulting in actual time that is used to calculated Expenditure labor costs. In those rows, however, we can see that the amounts (column AH) are not as high as their Budget counterparts. This is because Jack has not yet entered all of his time toward the Tasks on his Timesheet.
Tip: For a report that displays Financial Indicators instead of Financial Plan data, see the Project Portfolio Financial Summary.
Eclipse PPM users can run the Project Financial Extract report from the Reports page.
To run the Project Financial Extract report:
Before You Start: Projects and their data will only be included in the report if the user running the report has the "Project Details - View" permission on at least one of the Project's Policies. Consider this before tasking an Eclipse PPM user with running this report.
-
Select the Reports icon
 from the Navigation Menu.
-
Select Project Financial Extract from the list of Eclipse Reports.
-
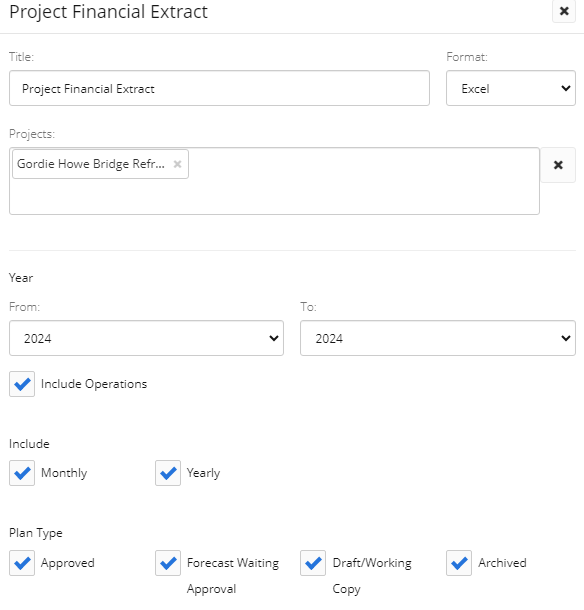
Use the "Project Financial Extract" window to customize your Project Financial Extract report.
-
Title: Enter a custom name for your Project Financial Extract report. This name will be displayed at the top of the report.
-
Format: Ignore this field for this report; the only available export option is a Microsoft Excel file.
-
Projects: Select which Projects will be included in the report by typing in the name of a Project or Project filter and selecting it from the drop-down menu. Repeat this until all of your desired Projects and filters have been added.
Note: These are the same Project filters that can be found on the Project Search page. From here, users can create their own custom Project filters that can be used in the report.
Note: A message will appear if the selected filter(s) will result in no Projects being included in the report.
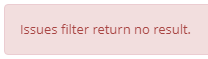
This could be the result of selecting a filter (or multiple) that does not include any Projects. It could also occur if the user running the report does not have permission to view any of them. -
Year: Use the "From" and "To" drop-down menu to determine a date range. The report will only contain Financial data from within this range.
-
Include Operations: Select this checkbox to include Financial data from Projects marked as "Operations".
-
Include: Select the checkboxes to include either/both monthly or annual Financial data.
-
Plan Types: Select the checkboxes to determine which Financial Plan types will be included in the report.
-
-
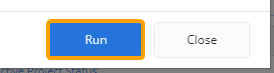
Select the Run button.
After selecting Run, the report will automatically download onto your device in a Microsoft Excel spreadsheet.